
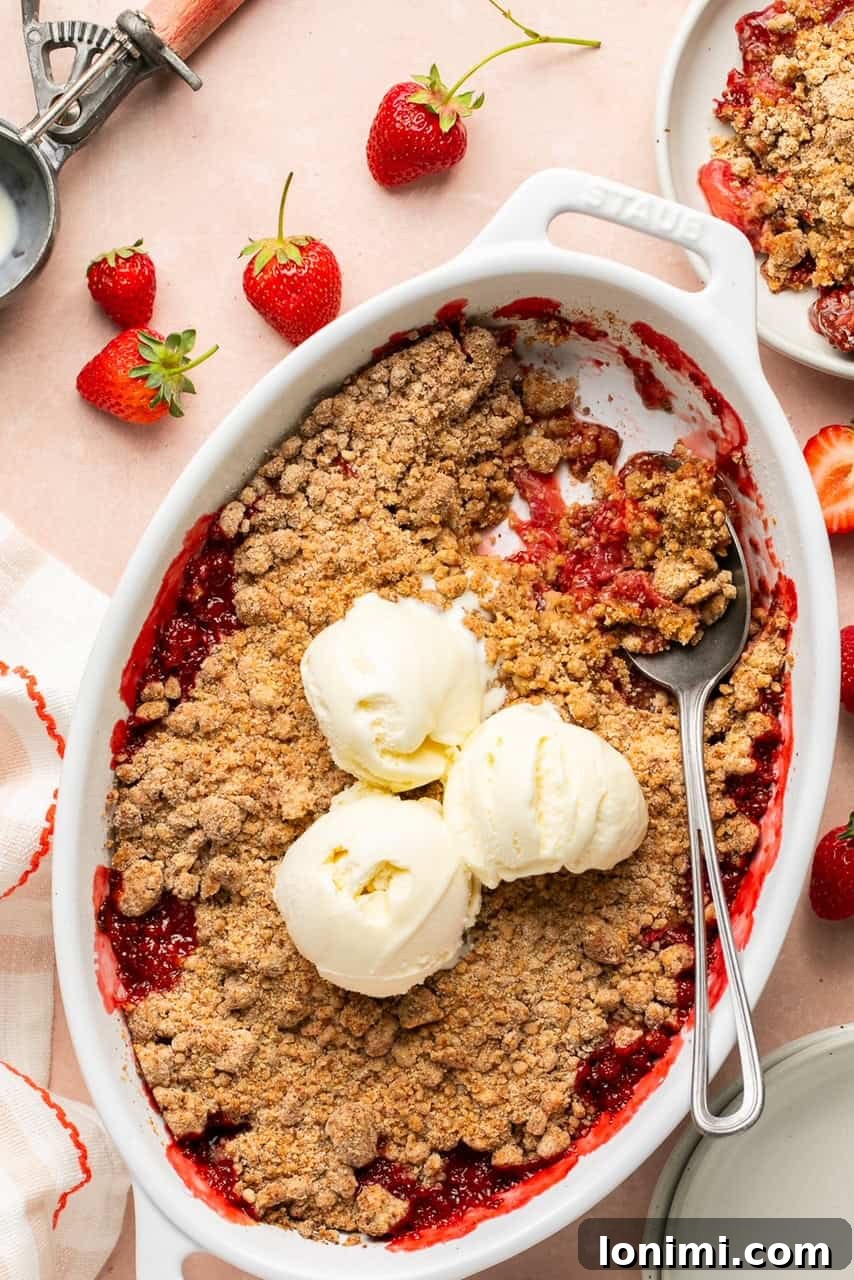
Get ready to embrace the sweet flavors of summer with this absolutely irresistible Strawberry Crumble! This dessert is a true celebration of fresh, juicy strawberries, topped with a golden, buttery, and perfectly crunchy crumble. It’s the ideal treat for sunny days, backyard barbecues, or simply when you crave a comforting, fruit-filled delight. Crafted with naturally sweetened strawberries and a delightful oat-free topping, this recipe is designed for everyone to enjoy. It’s also completely egg-free, nut-free, and includes a fantastic dairy-free option, making it a versatile choice for various dietary needs and allergies without compromising on taste or texture.
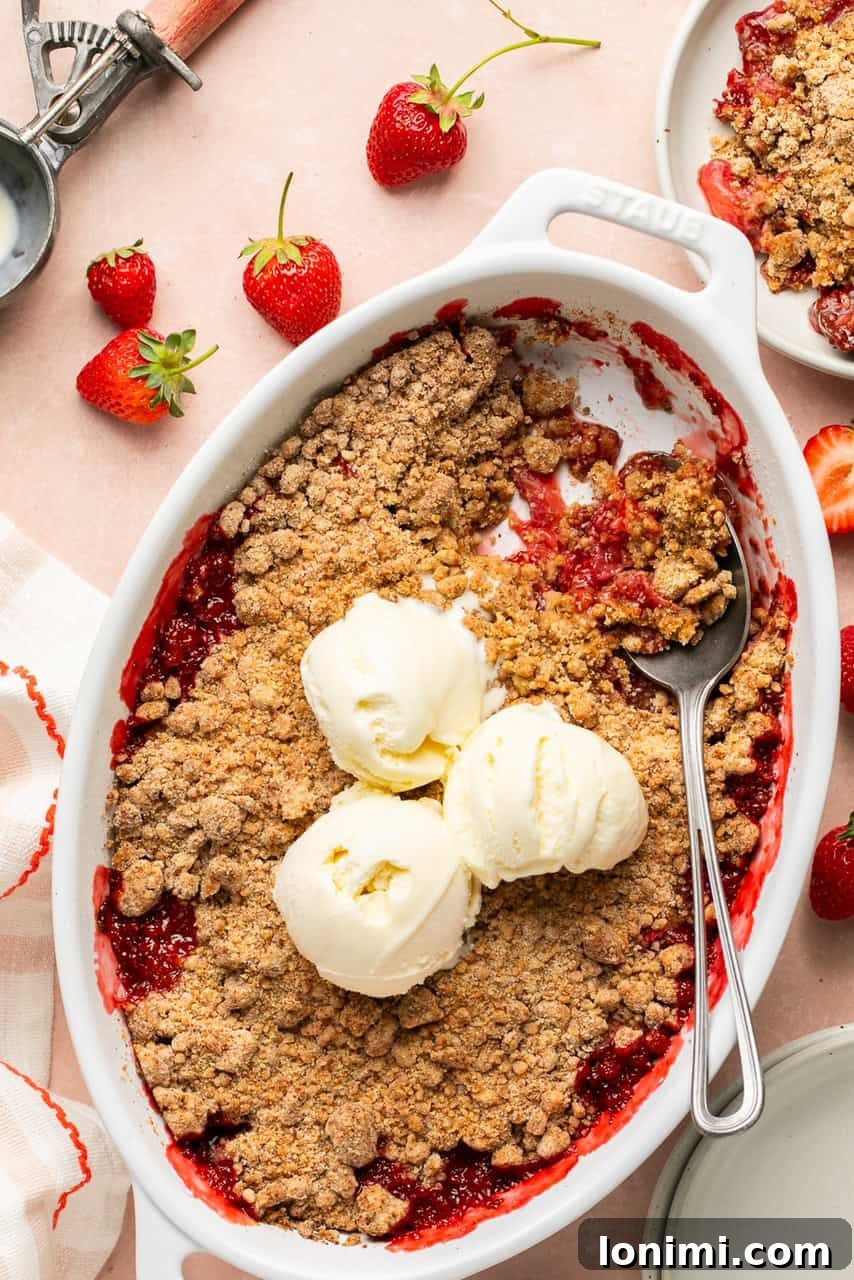
Understanding Fruit Desserts: Crumble vs. Crisp vs. Cobbler
Fruit-filled baked desserts hold a special place in the hearts of many, particularly during the warmer months when fresh produce is abundant. While terms like “crumble,” “crisp,” and “cobbler” are often used interchangeably, each boasts its own distinct characteristics, primarily defined by its topping. Understanding these nuances can help you appreciate the unique qualities of each and even inspire you to experiment with different variations.
A **crumble**, like the delightful strawberry recipe we’re exploring today, features a streusel-like topping. This classic topping is traditionally made from a simple mixture of flour, butter, and sugar, which, when baked, creates a wonderfully rich, buttery, and crumbly texture. The magic of a crumble lies in its rustic charm and the satisfying contrast between the tender fruit and the delicate, golden-brown crumbs. It’s a less structured topping, meant to break apart easily, offering a comforting mouthfeel.
In contrast, a **crisp** usually incorporates rolled oats into its topping, and sometimes nuts, too. The addition of oats gives the crisp a heartier, chewier, and notably crunchier finish than a crumble. The oats toast beautifully in the oven, adding a nutty depth and a more robust texture that stands up well to juicy fruits. If you’re looking for an extra layer of crunch and a slightly more wholesome feel, a crisp might be your go-to.
Meanwhile, a **cobbler** distinguishes itself with a topping that resembles biscuits or cake. Instead of a scattered crumbly mixture, a cobbler often has dollops of dough or a single layer of batter placed over the fruit. As it bakes, this topping puffs up, developing a soft, cake-like consistency or a golden, scone-like crust. The name “cobbler” is said to come from its appearance, which looks like a cobbled street. This creates a more substantial, bread-like element that soaks up some of the fruit juices, offering a different kind of comforting indulgence.
Today, our focus is squarely on the magnificent Strawberry Crumble. It embodies the essence of a classic fruit dessert: sweet, juicy strawberries baked under a golden, buttery, and perfectly crumbly topping. It’s designed to be delightfully crunchy, yet with a softer, melt-in-your-mouth quality that sets it apart from the often more robust crunch of a fruit crisp. This makes it a perfect balance of textures and flavors, a truly comforting dessert that sings of summer.
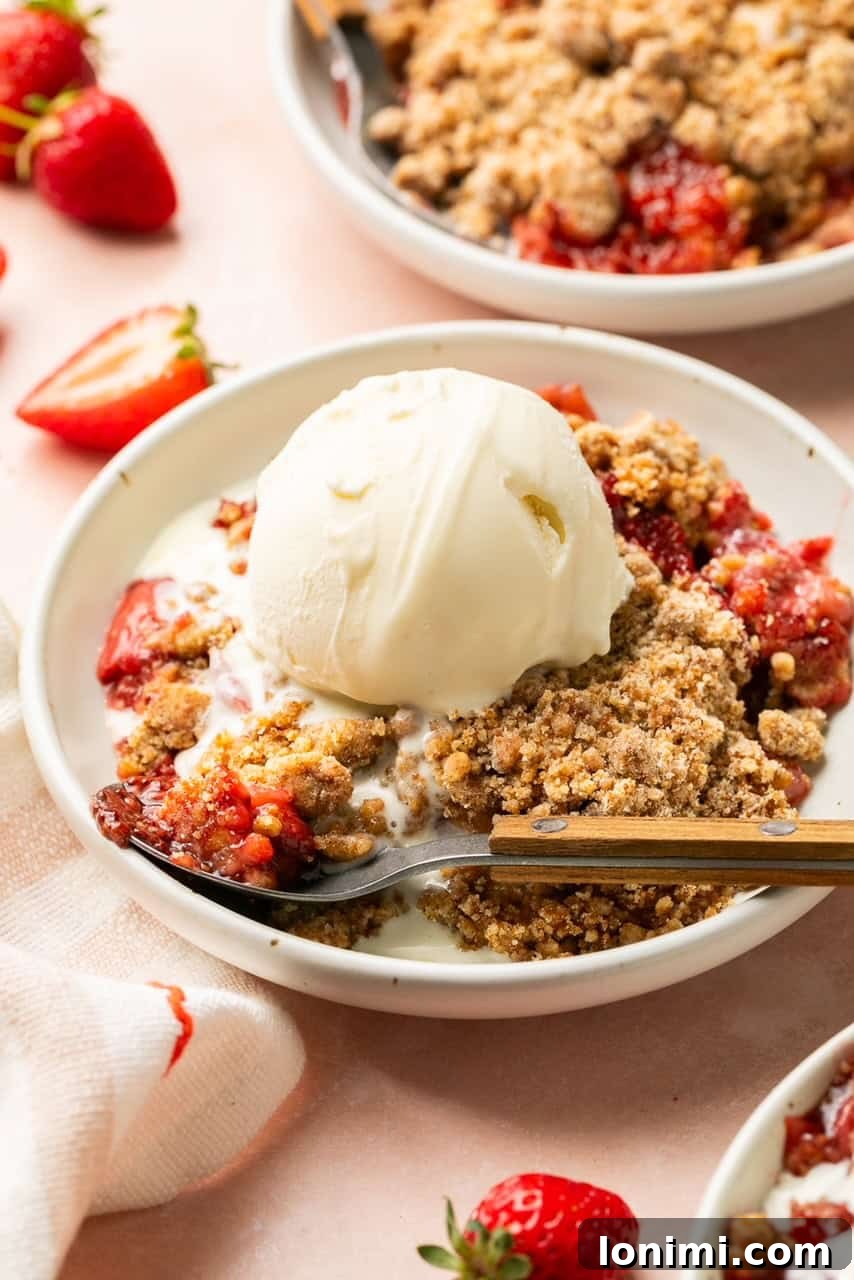
Why This Strawberry Crumble Recipe Stands Out
This Gluten-Free Strawberry Crumble isn’t just another dessert; it’s a testament to how simple ingredients can create extraordinary flavors. It’s meticulously crafted to be the ultimate summer dessert, perfectly balancing sweet and tangy notes that beautifully highlight the seasonal bounty of fresh, ripe strawberries. Each spoonful delivers a burst of vibrant fruit flavor complemented by the rich, buttery crumble, creating a delightful symphony of taste and texture that is genuinely hard to resist.
One of the many reasons this recipe shines is its incredible ease of preparation. You don’t need to be an experienced baker to achieve impressive results. The steps are straightforward, and the ingredients are readily available, making it an excellent choice for both spontaneous baking sessions and planned gatherings. Its versatility is another major plus: while strawberries are the star here, this recipe serves as a fantastic base for exploring other seasonal fruits. Imagine the possibilities with a vibrant blueberry, a tart raspberry, a succulent peach, or a classic apple crumble – all achievable with minor adjustments to this adaptable recipe.
Beyond its deliciousness and simplicity, this strawberry crumble is also highly accommodating for various dietary needs. It is naturally **oat-free, nut-free, and egg-free**, making it a safe and delightful option for individuals with common allergies. Furthermore, with the simple substitution of vegan butter, this recipe easily transforms into a completely **dairy-free and vegan-friendly** dessert. This inclusivity ensures that everyone at your summer party or family gathering can enjoy a slice of this heavenly treat.
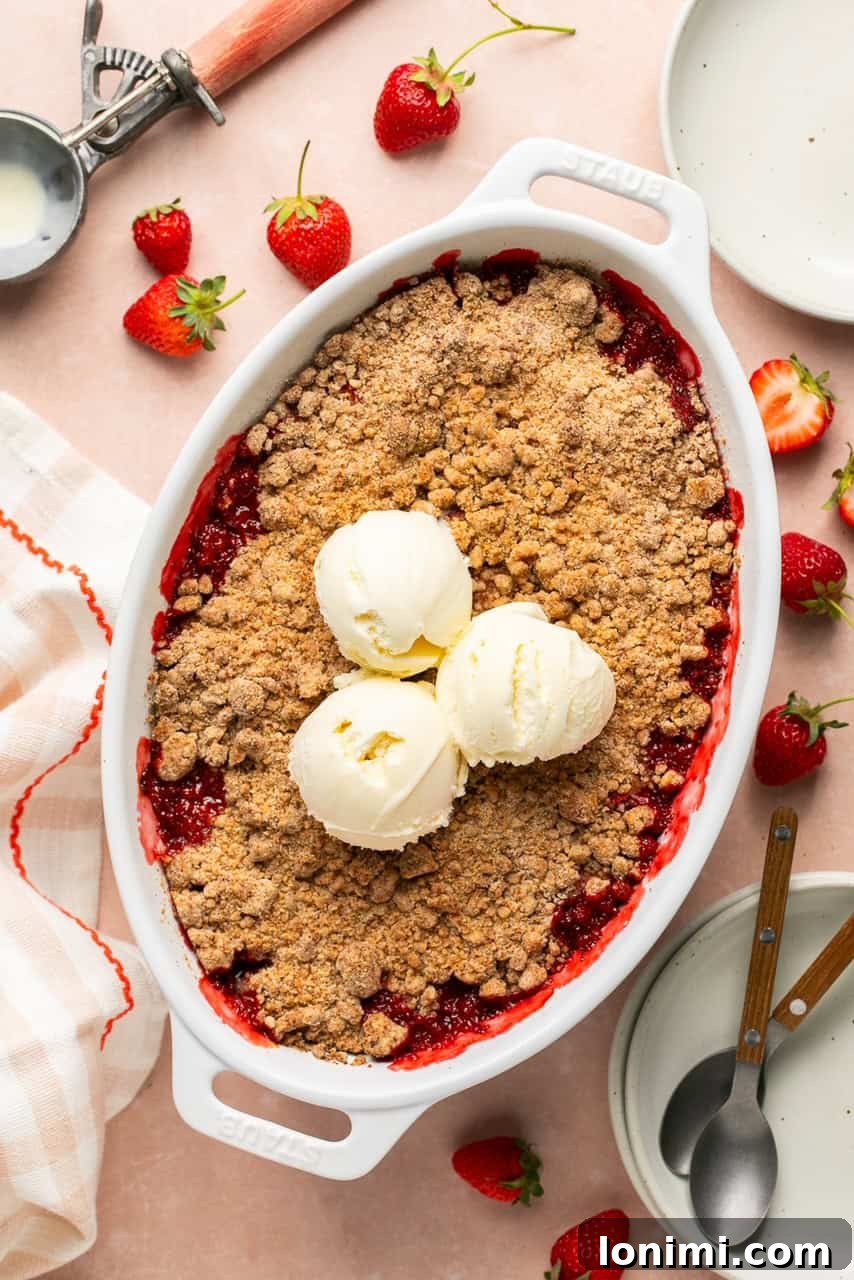
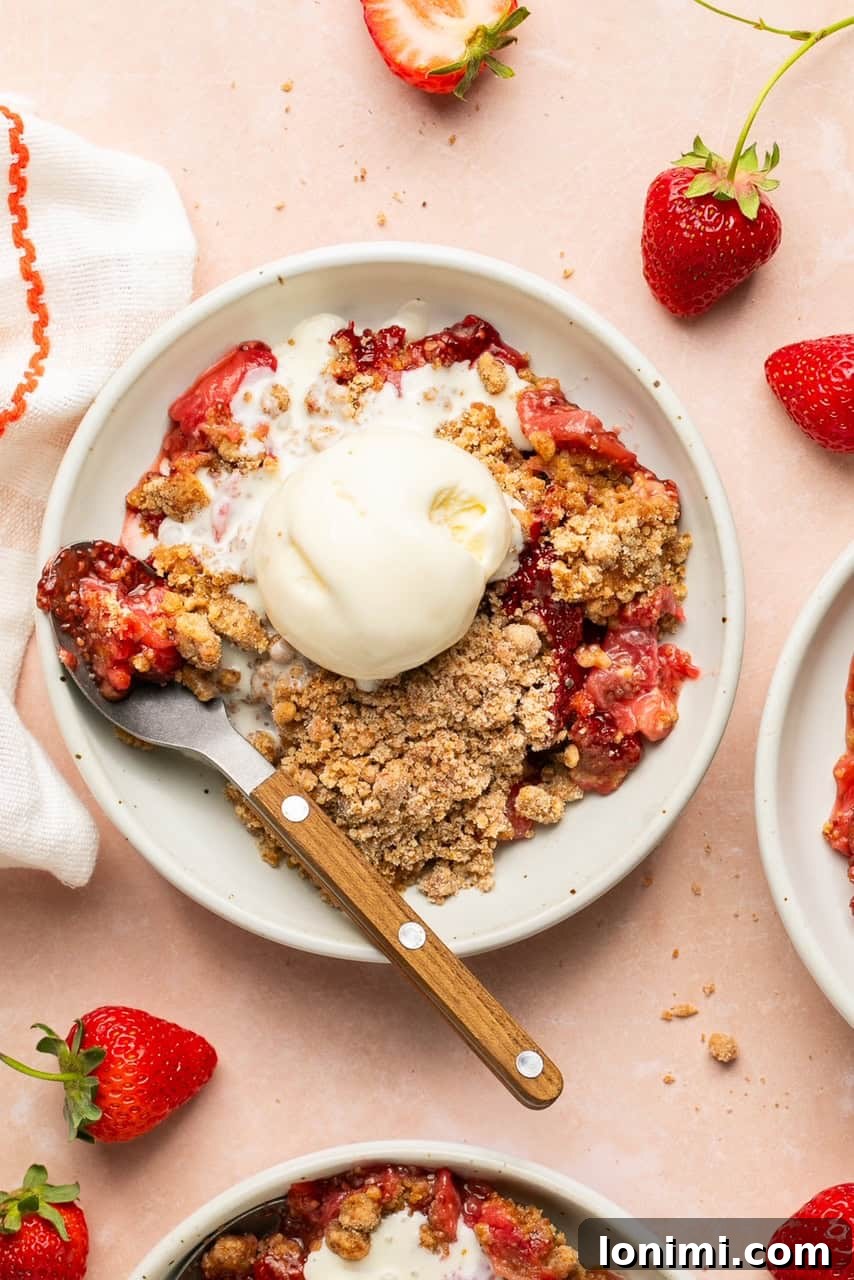
Served warm, perhaps with a generous scoop of creamy vanilla ice cream melting into the bubbling fruit or a dollop of freshly whipped cream, this flavor-packed dessert truly captures the essence of summer. The warm, sweet berries and the crispy topping create a comforting indulgence that is both nostalgic and refreshing. It’s a crowd-pleasing delight that promises to be the star of any summer occasion, leaving everyone craving for more. Prepare to impress your guests with minimal effort and maximum flavor!
Key Ingredient Notes for Your Perfect Strawberry Crumble
Crafting the perfect strawberry crumble starts with understanding the role of each ingredient. Here’s a detailed look at what you’ll need and why these choices matter, along with some helpful substitution tips:
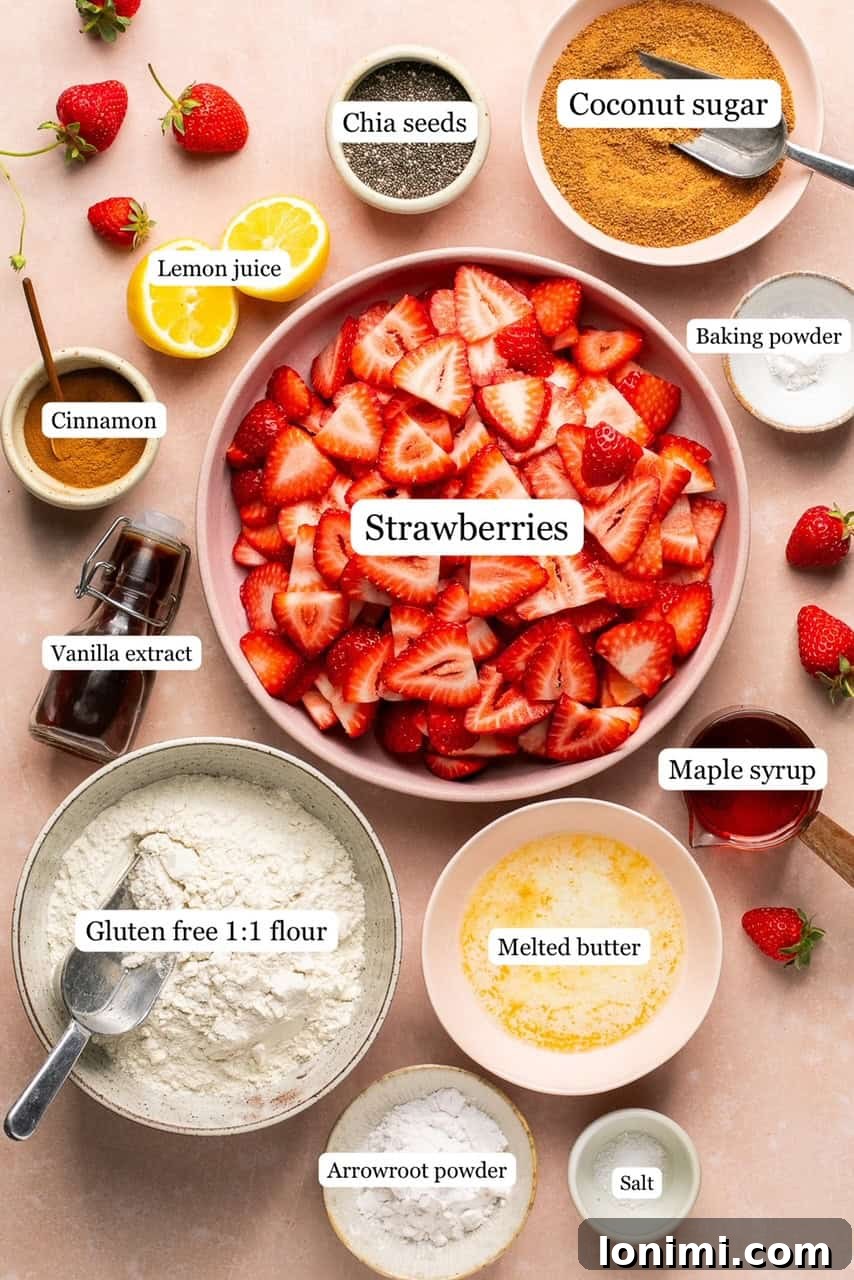
Crumble Topping Ingredients
- Gluten-Free Flour: I highly recommend using a high-quality 1:1 gluten-free baking flour blend, such as King Arthur Baking’s product, for the best results. These blends are specifically formulated to mimic the texture and performance of traditional all-purpose flour. If you do not have gluten sensitivities, regular all-purpose flour works perfectly well and can be used as a direct substitute. The flour provides the foundational structure for our signature crumbly texture.
- Coconut Sugar: This unrefined sugar offers a lovely caramel-like flavor and natural sweetness, making it an excellent choice for this crumble. Its subtle flavor enhances the overall profile without being overpowering. Brown sugar is a fantastic substitute if coconut sugar is not available, as it also provides a rich, molasses-like sweetness that complements the berries beautifully.
- Maple Syrup: Adding a touch of pure maple syrup not only contributes natural sweetness but also helps bind the crumble mixture slightly and adds a wonderful depth of flavor. Ensure you use pure maple syrup, not pancake syrup, for the best taste.
- Baking Powder: A small amount of baking powder helps to create a slightly lighter and more tender crumble topping, preventing it from becoming too dense. It contributes to that desirable light crispness.
- Cinnamon: The warm, aromatic spice of cinnamon perfectly complements the sweetness of the strawberries and the richness of the butter. It adds a comforting layer of flavor that makes this crumble truly special. Feel free to adjust the amount to your preference.
- Sea Salt: A pinch of sea salt is crucial for balancing the sweetness and enhancing all the other flavors in the crumble topping. Don’t skip it, as it brightens the overall taste profile.
- Melted Butter: Butter is the hero of the crumble topping, providing that essential rich flavor and contributing to the perfect crumbly texture. For a **dairy-free and vegan-friendly** version, simply substitute with your favorite brand of high-quality vegan butter. Ensure it’s fully melted for easy incorporation.
Strawberry Filling Ingredients
- Fresh Strawberries: For the most vibrant flavor and ideal texture, fresh, ripe strawberries are highly recommended. Their natural sweetness and slight tartness are unbeatable. If fresh strawberries are out of season, frozen strawberries can be used; however, be aware that the filling might be a bit more watery. If using frozen, there’s no need to thaw them first; they can go straight into the dish.
- Chia Seeds: These tiny powerhouses serve multiple purposes. They help to thicken the strawberry filling naturally, preventing it from becoming overly runny, and also add a subtle nutritional boost and a pleasant texture.
- Arrowroot Starch/Powder: This natural thickening agent is key to achieving a beautifully set and glossy strawberry filling. It ensures the filling isn’t too liquidy, providing a luscious texture. Cornstarch is an excellent and readily available alternative if you don’t have arrowroot powder on hand. Both work effectively to create a perfectly gooey fruit base.
- Maple Syrup: A generous amount of maple syrup sweetens the strawberries naturally, allowing their inherent flavor to shine without being overwhelmed by refined sugars. It also adds moisture and a subtle richness.
- Fresh Lemon Juice: A squeeze of fresh lemon juice is indispensable. It brightens the flavor of the strawberries, enhances their natural tartness, and prevents the filling from tasting overly sweet. It truly elevates the fruit’s profile.
- Pure Vanilla Extract: Vanilla extract adds a warm, sweet, and aromatic note that beautifully complements the strawberries and ties all the flavors of the filling together. Use pure vanilla extract for the best quality and taste.
Crafting Your Delicious Strawberry Crumble: A Step-by-Step Guide
Making this strawberry crumble is a straightforward and enjoyable process that yields spectacular results. Follow these detailed steps to create a dessert that will impress everyone:
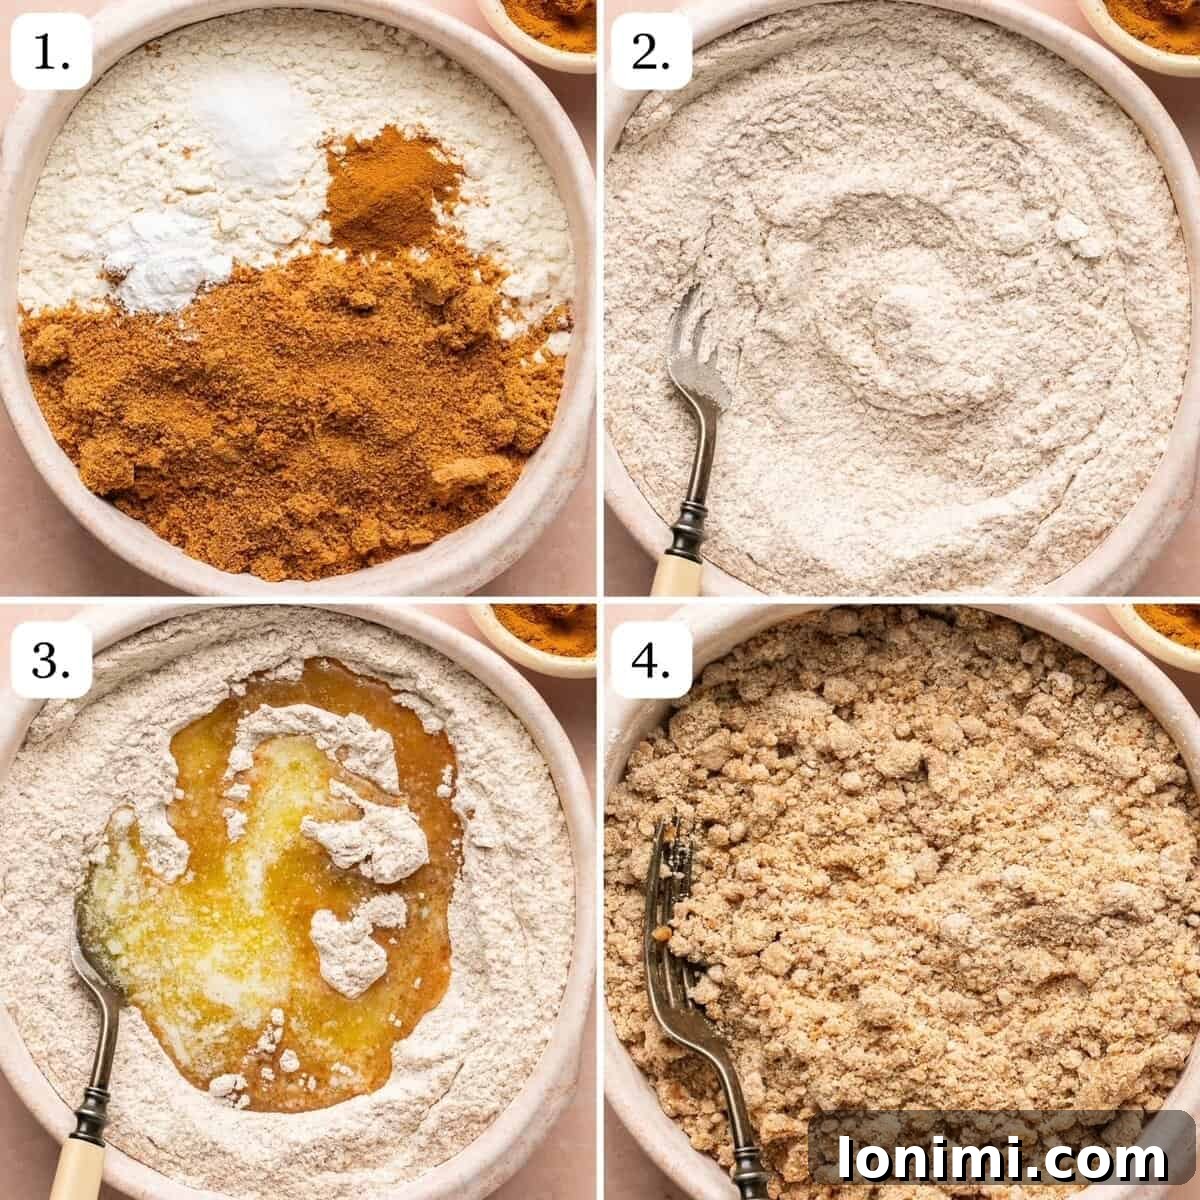
Step 1: Preheat and Prepare the Crumble Base
Begin by preheating your oven to 350 degrees F (175 degrees C). This ensures the oven is at the correct temperature for even baking. In a large mixing bowl, combine all the dry ingredients for the crumble topping: the gluten-free flour (or all-purpose flour), coconut sugar, maple syrup, baking powder, cinnamon, and sea salt. Make sure to set aside the melted butter for a later step.
Step 2: Thoroughly Mix Dry Ingredients
Using a whisk or a fork, mix the dry ingredients together until they are well combined. This step ensures that the baking powder, cinnamon, and salt are evenly distributed throughout the flour and sugar mixture, which is crucial for a consistent flavor and texture in your crumble topping.
Step 3: Incorporate the Melted Butter
Now, pour the previously measured melted butter (or vegan butter) directly into the bowl with your dry crumble mixture. The melted butter will evenly coat the dry ingredients, initiating the formation of those desirable crumbly pieces.
Step 4: Achieve the Perfect Crumble Texture
Stir the mixture vigorously with a fork or a spatula until the flour mixture is fully combined with the butter and forms a crumbly texture. You want a mix of small and larger clumps, resembling coarse sand with some pea-sized crumbs. Avoid overmixing; the goal is just to combine the ingredients until crumbly, which is key to a light, crispy topping.
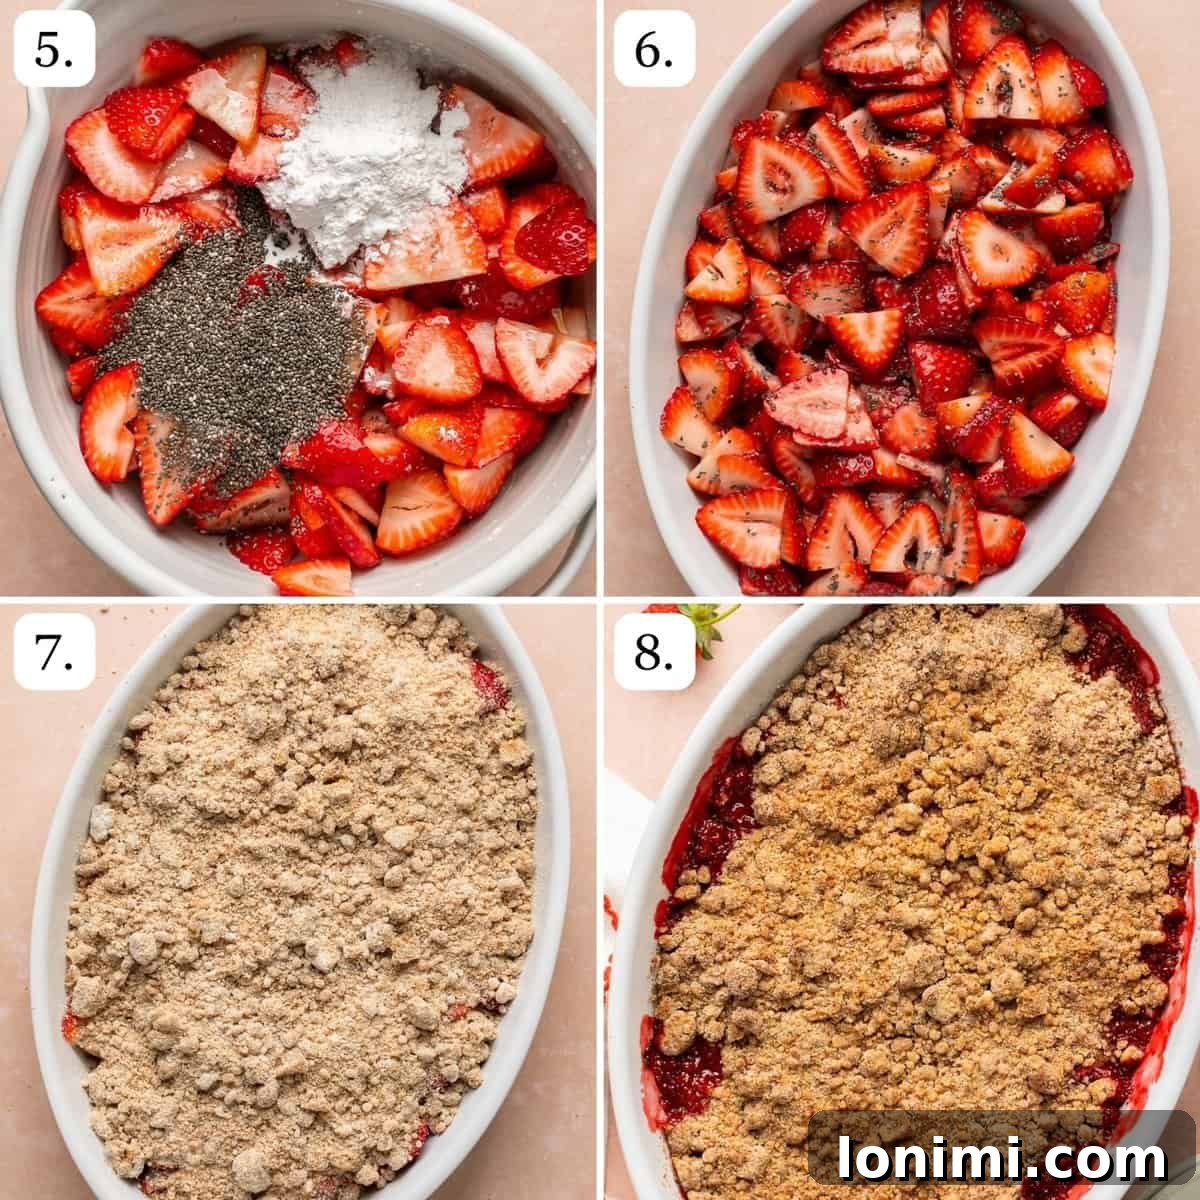
Step 5: Prepare the Luscious Strawberry Filling
In a separate, medium-sized bowl, add your sliced fresh strawberries. Then, sprinkle in the chia seeds, arrowroot powder (or cornstarch), maple syrup, fresh lemon juice, and pure vanilla extract. These ingredients will transform the strawberries into a perfectly sweet and slightly thickened filling.
Step 6: Combine and Transfer to Baking Dish
Gently stir the strawberry mixture until all the ingredients are well combined and the strawberries are evenly coated. Transfer this beautiful, vibrant strawberry mixture to the bottom of your chosen baking dish. A 7×10-inch baking dish or a 9-inch (large) pie dish works wonderfully for this recipe. Spread the strawberries evenly across the bottom of the dish.
Step 7: Top with Crumble and Prepare for Crispness
Evenly sprinkle the prepared crumble mixture over the top of the strawberry layer. Ensure there’s a good distribution of both small, fine crumbs and larger, chunkier pieces to create varied textures. For an extra golden-brown and crispy topping, lightly spray the surface of the crumble with a bit of avocado oil, coconut oil, or any other preferred cooking oil. This small step makes a big difference in achieving that irresistible crunch.
Step 8: Bake to Golden Perfection and Serve
Place your crumble in the preheated oven and bake for approximately 35-40 minutes. You’ll know it’s perfectly baked when the strawberry mixture is visibly bubbling around the edges, indicating that the fruit is tender and the filling has thickened, and the crumble topping has turned a beautiful golden brown. Once out of the oven, let it cool for a few minutes before serving. Serve warm, ideally topped with a generous scoop of vanilla ice cream or a dollop of whipped cream. Enjoy every single comforting bite!
Expert Tips for the Best Strawberry Crumble
- Fresh vs. Frozen Strawberries: While this recipe truly shines with fresh, peak-season strawberries for their vibrant flavor and firmer texture, frozen strawberries are a viable alternative during the off-season. If using frozen berries, there’s no need to thaw them beforehand; simply toss them directly into the filling mixture. However, be prepared for a slightly more liquidy filling, as frozen berries release more water upon baking. To mitigate this, you might add an extra tablespoon of arrowroot powder or cornstarch to the filling.
- Achieving Dairy-Free and Vegan Perfection: This recipe is incredibly adaptable for those following a dairy-free or vegan diet. The only animal-based ingredient is butter. By simply substituting the traditional butter with a high-quality vegan butter (like Miyoko’s Kitchen or Earth Balance), your strawberry crumble becomes entirely dairy-free and vegan. All other ingredients are plant-based, making this an easy and delicious vegan dessert option.
- Make-Ahead Convenience: For effortless entertaining or a quick weeknight treat, you can prepare this delicious dessert in advance. Follow Steps 1-4 to prepare the crumble topping and the strawberry filling. Assemble the crumble in your baking dish, then cover it tightly with plastic wrap and refrigerate for up to 24 hours. When you’re ready to bake, remove it from the refrigerator and let it sit at room temperature for 10-15 minutes while your oven preheats. Then, bake according to Step 8. This method allows the flavors to meld beautifully and saves you time on the day of serving.
- Preventing a Soggy Bottom: To ensure your crumble remains beautifully crisp, especially if using very juicy strawberries, you can toss the sliced strawberries with a tablespoon of dry ingredients from the crumble topping *before* adding the wet filling ingredients. This creates a small barrier that helps absorb excess moisture.
- Perfectly Golden Topping: Don’t underestimate the power of a light spray of cooking oil (avocado, coconut, or olive oil) over the crumble topping before baking. This helps achieve that desired deep golden-brown color and contributes significantly to the satisfying crunch.
Serving Suggestions for Your Strawberry Crumble
This warm, bubbling strawberry crumble is a dessert that truly shines on its own, but it’s even more spectacular when paired with the right accompaniments. Here are some delightful ways to serve it:
- Classic with Vanilla Ice Cream: The ultimate pairing! A generous scoop of cold, creamy vanilla ice cream melting over the warm, fruity crumble creates an irresistible contrast in temperature and texture. The simplicity of vanilla allows the strawberry and buttery crumble flavors to truly pop.
- Luxurious with Whipped Cream: A dollop of freshly whipped cream (or dairy-free whipped cream for a vegan option) adds a light, airy richness. Its delicate sweetness provides a beautiful balance to the crumble’s robust flavors.
- A Touch of Crème Fraîche: For a more sophisticated and slightly tangy complement, serve your crumble with a spoonful of crème fraîche. Its subtle sourness cuts through the sweetness beautifully, adding a layer of complexity.
- Plain and Perfect: Sometimes, the purest way to enjoy a delicious dessert is just as it is. A warm bowl of strawberry crumble, showcasing its vibrant fruit and crunchy topping, is satisfying enough on its own.
- Breakfast or Brunch Treat: Don’t limit crumble to just dessert! Serve it for breakfast or brunch with a side of plain Greek yogurt (or dairy-free yogurt) for a wholesome and delightful start to your day.
Storage Tips to Keep Your Crumble Fresh
While this strawberry crumble is best enjoyed warm and fresh from the oven, leftovers are equally delicious. Proper storage ensures you can savor it for days to come:
- Refrigerator Storage: Allow any leftover strawberry crumble to cool completely to room temperature. Transfer it to an airtight container to prevent it from drying out or absorbing other food odors. Store it in the refrigerator for up to 4-5 days.
- Reheating Instructions: To enjoy your leftover crumble, you can reheat individual portions in the microwave until just warm through, or place the entire dish (if it’s oven-safe) in a preheated oven at 300°F (150°C) for about 15-20 minutes, or until warmed through and the topping crisps up slightly. Serving it warm again with a fresh scoop of ice cream or whipped cream is highly recommended!
- Freezing for Later: For longer storage, freeze the baked and cooled crumble. Wrap the entire baking dish tightly with several layers of plastic wrap and then aluminum foil, or transfer individual portions to freezer-safe containers. It can be frozen for up to 3 months. Thaw overnight in the refrigerator before reheating as directed above.
Strawberry Crumble Recipe FAQs
Several factors can lead to a less-than-crunchy crumble. Firstly, avoid over-mixing the crumble topping. You want to incorporate the butter just enough to create various crumb sizes, not a uniform paste. Overmixing develops gluten (even in GF flour, it can affect texture) and can make it tough. Secondly, don’t skip the step of lightly spraying the top of the crumble with a bit of cooking oil (like avocado or coconut oil) before baking. This fat helps the topping brown and crisp up beautifully in the oven. Also, ensure your oven is at the correct temperature and baked for the full recommended time to allow for proper browning and crisping.
Absolutely! This crumble recipe is incredibly versatile and can be adapted for a wide variety of fruits. Think fresh blueberries, raspberries, peaches (peeled and sliced), apples (peeled and thinly sliced), or even a combination of berries. Adjust the sweetness slightly based on the tartness of your chosen fruit. If using very watery fruits, you might want to increase the arrowroot powder/cornstarch slightly to maintain a good filling consistency.
You’ll know your strawberry crumble is perfectly baked when the fruit filling is visibly bubbling around the edges of the dish, indicating it’s hot and thickened. The crumble topping should be a beautiful golden brown and feel firm to the touch. If the topping is browning too quickly, you can loosely cover the dish with aluminum foil for the last 10-15 minutes of baking.
While it is a dessert, this strawberry crumble incorporates several healthier elements. It uses naturally sweet strawberries, which are rich in vitamins, antioxidants, and fiber. The recipe also utilizes coconut sugar and maple syrup, which are less refined alternatives to white sugar. Being gluten-free, oat-free, egg-free, and having a dairy-free option also caters to various dietary needs. Portion control is always key with any dessert, but it’s a wonderful treat that allows you to enjoy fruit in a delicious way.
Yes, you can prepare the strawberry filling a few hours in advance. Combine all the fruit filling ingredients in a bowl, cover it, and refrigerate. Just before assembling, give it a quick stir. This is a great time-saver, especially if you’re entertaining. However, for best results, prepare the crumble topping just before baking to ensure maximum crispness.
More Delicious Strawberry Desserts & Recipes
If you’ve fallen in love with the sweet charm of strawberries, you’ll be thrilled to discover more delightful ways to incorporate this beloved fruit into your baking repertoire. Here are some fantastic recipes that celebrate strawberries in all their glory:
- Strawberry Angel Food Cake Trifle: Layers of light angel food cake, fresh strawberries, and creamy goodness create an elegant and refreshing dessert perfect for any occasion.
- Strawberry Shortcake: A timeless classic, this recipe features tender biscuits, sweet macerated strawberries, and a cloud of whipped cream for a truly nostalgic treat.
- No Bake Strawberry Cheesecake Jars: For a quick and easy dessert, these no-bake cheesecake jars offer creamy richness and vibrant strawberry flavor without turning on the oven.
- Paleo Vegan Berry Crisp: If you enjoyed this crumble, you’ll love this berry crisp, which is also paleo and vegan-friendly, offering a different texture profile with mixed berries.
Each of these recipes offers a unique way to enjoy the incredible taste of fresh strawberries, ensuring you have a delightful option for every craving and occasion!
Love this recipe? Please consider leaving a 5-star 🌟🌟🌟🌟🌟 rating and a review in the comment section below. Your feedback is greatly appreciated! You can also follow me on Facebook, Pinterest or Instagram for more delicious recipes and healthy living tips!
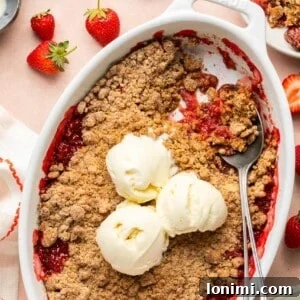
Easy Strawberry Crumble Recipe (Gluten Free)
5 from 6 votes
This Strawberry Crumble is a sweet and scrumptious dessert just in time for summer! A juicy, naturally sweetened strawberry filling is topped with a crunchy crumble topping, then baked to perfection. This recipe is oat-free, egg-free, nut-free, and has a dairy-free option!
Equipment
- 7×10 inch baking dish or 9-inch pie dish
Ingredients
Crumble Topping
- 1.5 cups gluten-free 1:1 flour (King Arthur Baking brand recommended)
- ½ cup coconut sugar
- 2 tbsp maple syrup
- ½ tsp baking powder
- 1 tsp cinnamon
- ¼ tsp sea salt
- 6 tbsp butter, melted (use vegan butter for dairy-free option)
Strawberry Filling
- 2 lbs strawberries, sliced
- 2 tbsp chia seeds
- 2 tbsp arrowroot powder (cornstarch also works)
- ⅓ cup maple syrup
- 2 tbsp fresh lemon juice
- 1 tsp pure vanilla extract
Instructions
- 1. Preheat Oven: Preheat your oven to 350 degrees F (175°C).
- 2. Prepare Crumble Topping: In a large bowl, combine the gluten-free flour, coconut sugar, maple syrup, baking powder, cinnamon, and sea salt. Mix well. Add the melted butter and stir until the mixture becomes crumbly, with a mix of small and large chunks.
- 3. Prepare Strawberry Filling: In a separate bowl, combine the sliced strawberries, chia seeds, arrowroot powder, maple syrup, lemon juice, and vanilla extract. Stir gently until all ingredients are evenly coated.
- 4. Assemble Crumble: Pour the strawberry mixture into the bottom of a 7×10 inch baking dish or a 9-inch pie dish, spreading it evenly. Sprinkle the crumble mixture over the strawberries, ensuring good coverage. Lightly spray the topping with a bit of avocado oil or other cooking oil to help it brown and crisp.
- 5. Bake and Serve: Bake for 35-40 minutes, or until the strawberry filling is bubbling around the edges and the crumble topping is golden brown and crispy. Let cool slightly before serving warm, ideally with a scoop of vanilla ice cream. Enjoy!
Notes
For more detailed tips on making this recipe dairy-free, preparing it ahead of time, and achieving the perfect crunchy topping, please refer to the “Expert Tips” and “Recipe FAQs” sections above.
Nutrition Information (Estimate)
Serving Size: 0.5 cup |
Calories: 391kcal |
Carbohydrates: 66g |
Protein: 5g |
Fat: 14g |
Saturated Fat: 7g |
Polyunsaturated Fat: 2g |
Monounsaturated Fat: 3g |
Trans Fat: 0.5g |
Cholesterol: 30mg |
Sodium: 253mg |
Potassium: 314mg |
Fiber: 8g |
Sugar: 32g |
Vitamin A: 371IU |
Vitamin C: 91mg |
Calcium: 124mg |
Iron: 2mg
All nutrition facts are an estimate and automatically calculated. While I fact-check them using My Fitness Pal, please note that they may not always be 100% accurate and depend on the specific ingredients used. For the most accurate grams per serving size, it is recommended to weigh your total yield and divide by the number of servings.
Rate & comment below, and tag me on Instagram @maryswholelife