
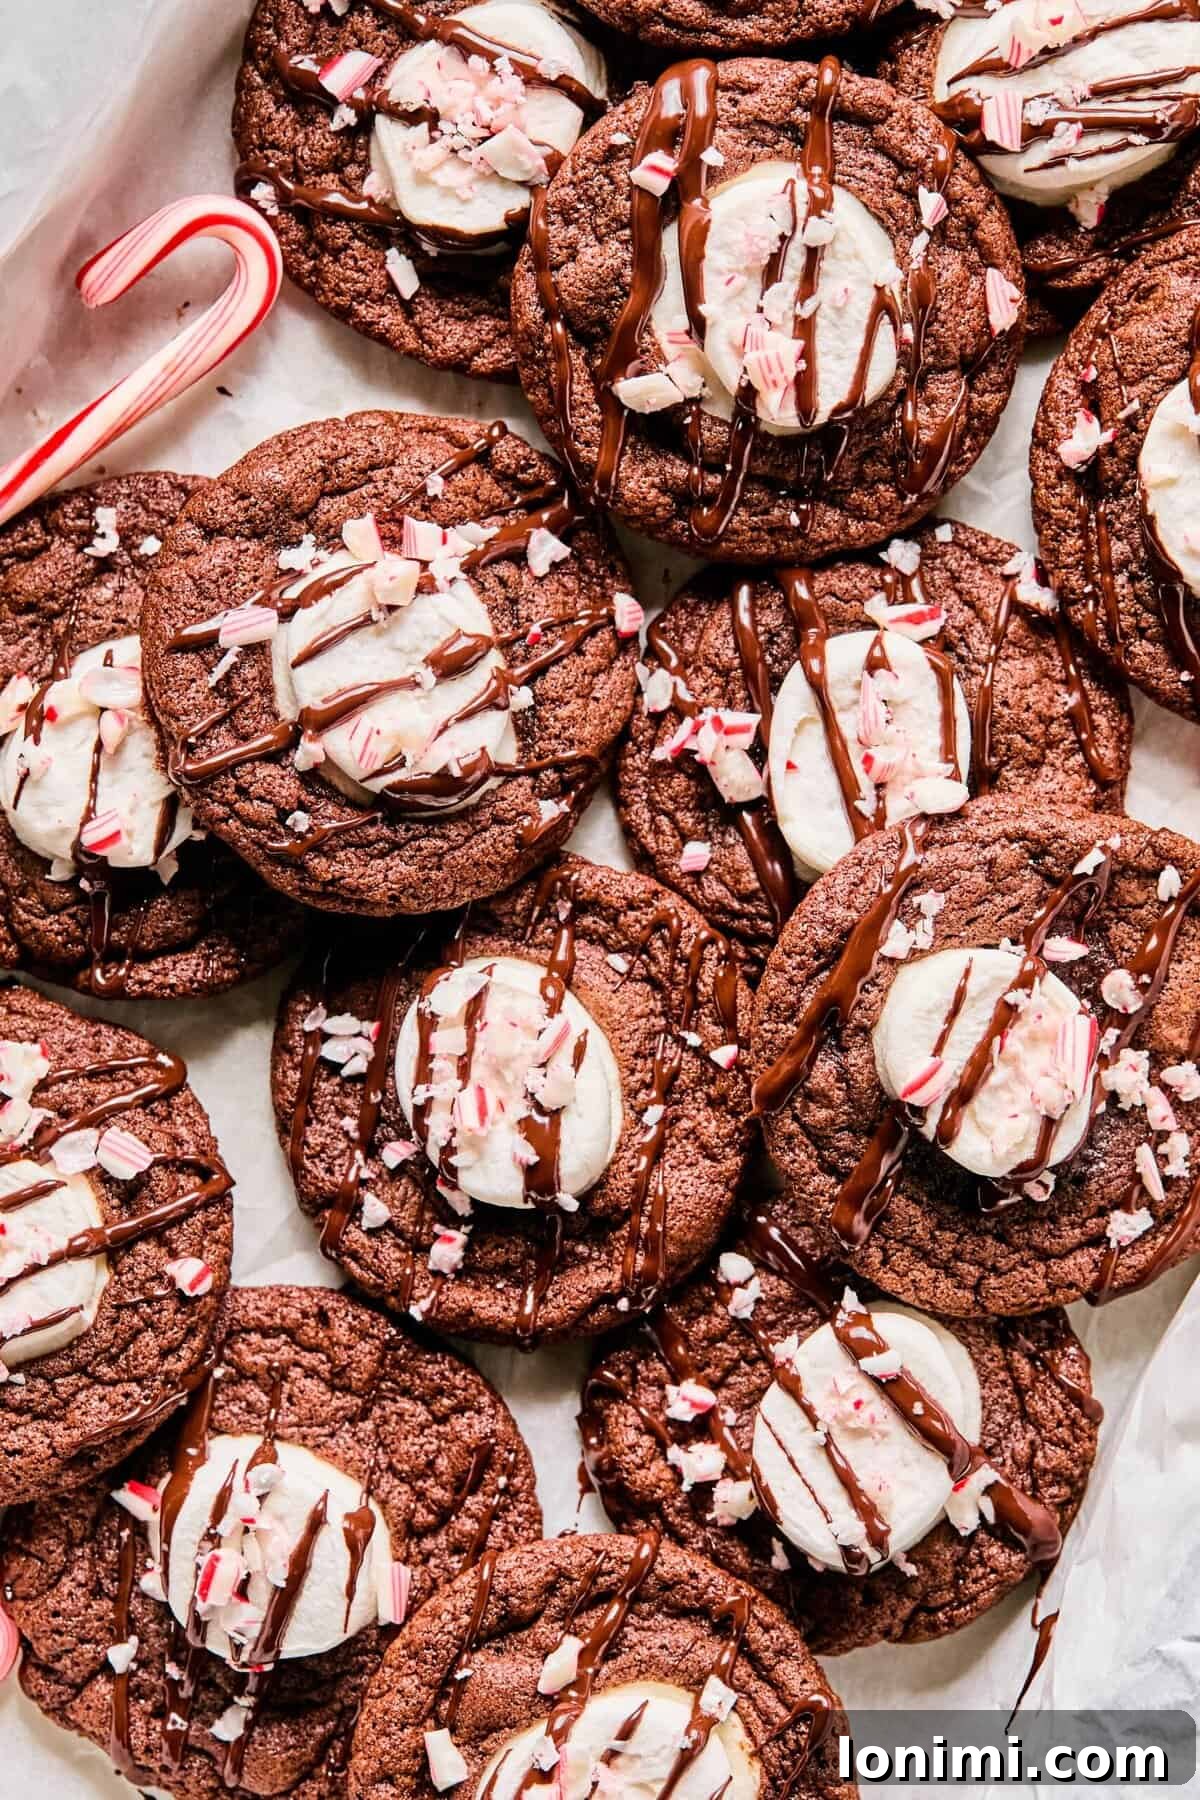
Irresistible Gluten-Free Hot Cocoa Cookies: Your Ultimate Winter Treat
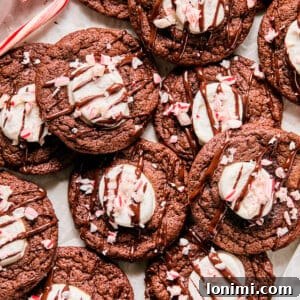
Imagine the comforting embrace of a warm mug of hot chocolate, perfectly translated into a delightful cookie. These **gluten-free hot cocoa cookies** capture everything you adore about that cozy winter beverage: the deep, rich cocoa flavor, wonderfully soft and chewy centers, pockets of melty marshmallows, and a festive burst of peppermint crunch on top. They are more than just a cookie; they are an experience, evoking the joy of crisp winter evenings, twinkling holiday lights, and the undeniable craving for something warm, comforting, and freshly baked from your oven.
Crafted to be both simple and spectacularly delicious, this recipe ensures that everyone, especially those avoiding gluten, can indulge in a truly magical holiday treat. Whether you’re planning a festive cookie exchange, looking for a cozy baking project on a chilly day, or simply want to spread some seasonal cheer, these hot cocoa cookies are guaranteed to become a cherished part of your winter traditions.
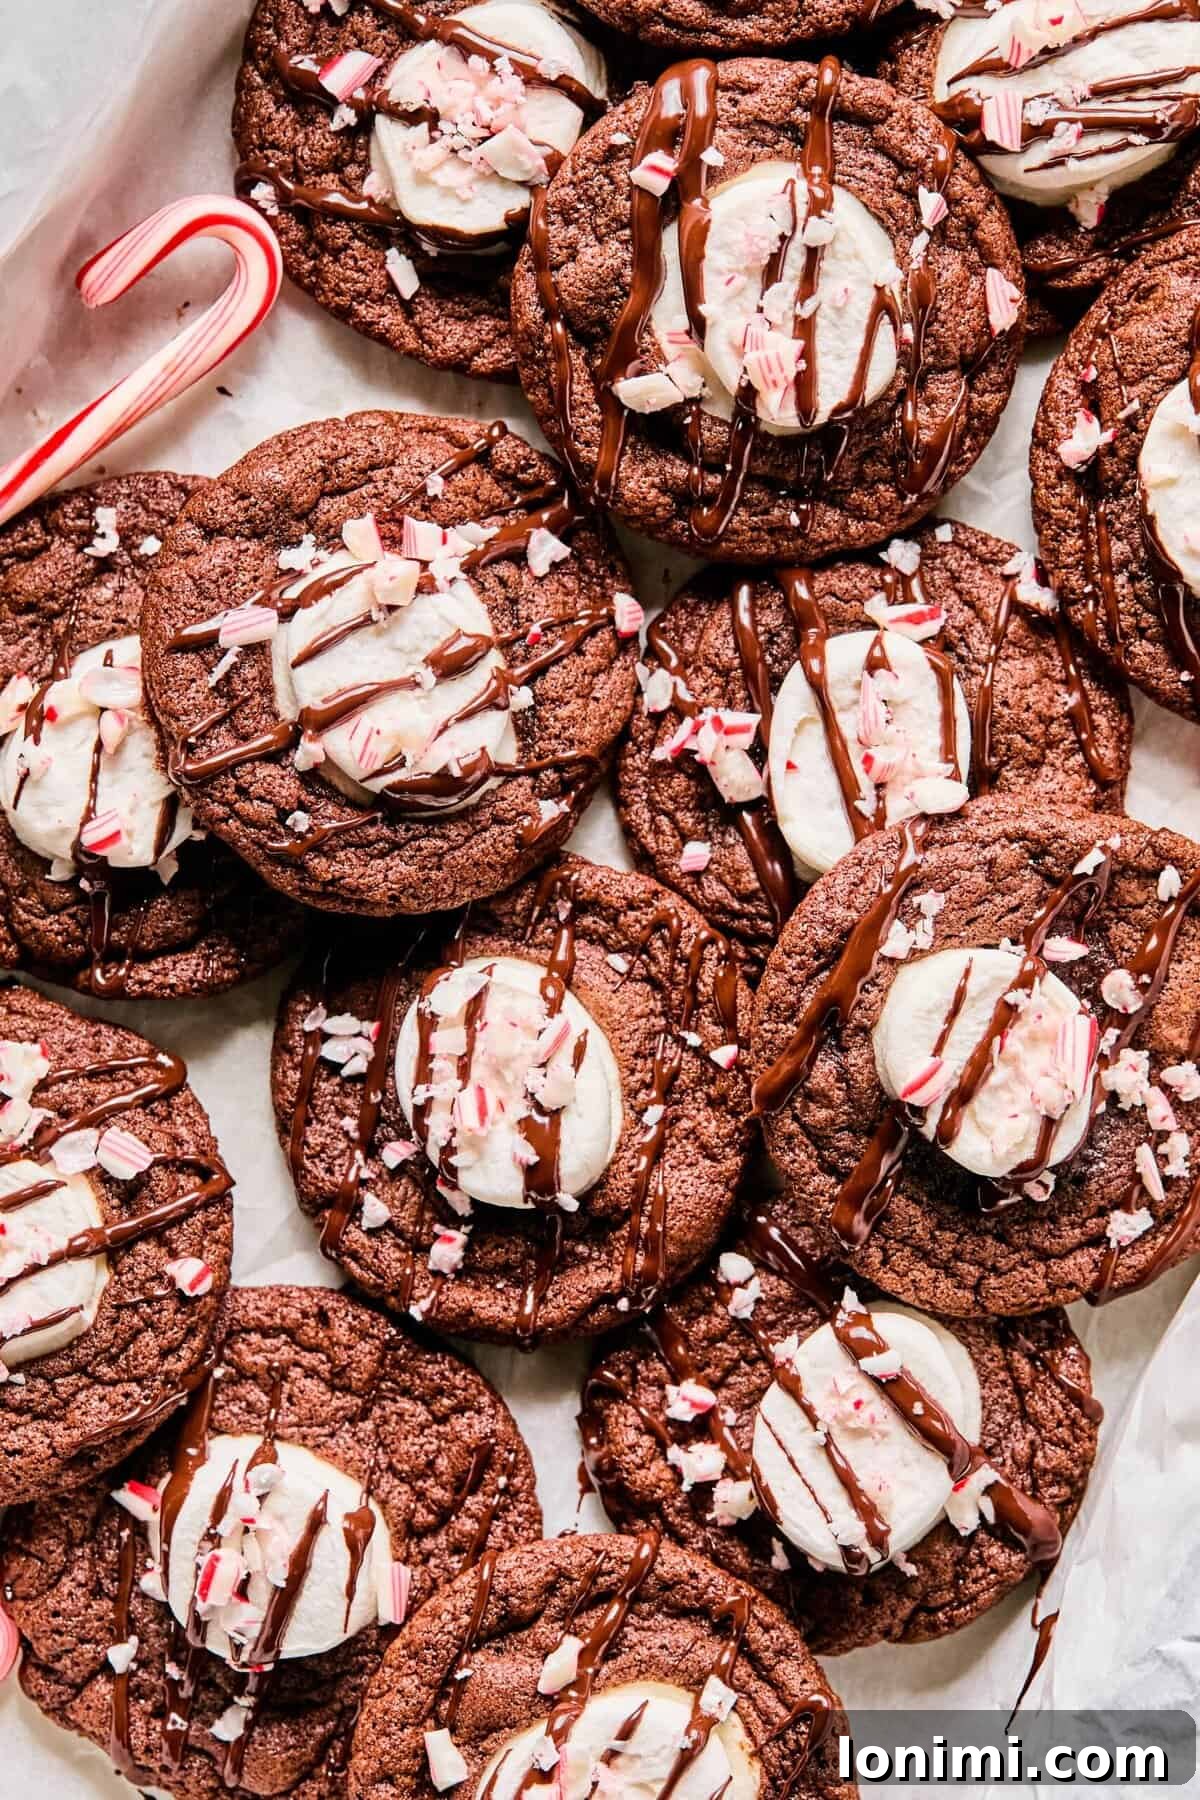
Quick Glance: Gluten-Free Hot Cocoa Cookie Essentials
- ⏱️ Prep Time: 15 minutes (plus 30-60 minutes chilling)
- 🍳 Cook Time: 12-13 minutes
- 🕒 Total Time: Approximately 1 hour (including chilling)
- 👥 Servings: 24 festive cookies
- 📊 Calories: ~241 kcal per serving (based on estimated nutrition panel)
- 🔥 Cook Method: Oven baked on a sheet at 350 °F
- 👩🍳 Flavor Profile: Deeply rich cocoa, wonderfully soft and chewy, with gooey melted marshmallows and a refreshing peppermint crunch.
- ⭐ Difficulty: Easy, making them an ideal choice for both novice bakers and seasoned holiday cookie enthusiasts.
Why You’ll Adore These Gluten-Free Hot Cocoa Cookies
If you’re a fan of gluten-free baking and always on the hunt for new, exciting cookie recipes, then these Hot Cocoa Cookies are about to become your new obsession. Before we dive deeper, you might also want to explore some other reader favorites like my Chocolate Chipless Cookies, Raspberry and White Chocolate Cookies, or the ever-popular Gluten-Free Almond Butter Chocolate Chip Oatmeal Cookies. Each recipe promises ease and deliciousness for any baking occasion!
But let’s talk about the unique magic of these hot cocoa cookies. They perfectly hit that sweet spot between nostalgic comfort and pure indulgence. Imagine a cookie that boasts a soft, fudgy interior, reminiscent of a rich brownie, with just the right amount of gentle crispness around the edges. What truly sets them apart is the marshmallow: it melts just enough to create that iconic gooey hot cocoa finish, yet retains its delightful chewiness without disappearing entirely into the dough. For an extra layer of decadence, dark chocolate chips are folded into every bite, ensuring a glorious double chocolate experience, while a generous sprinkle of crushed candy canes adds a vibrant, festive crunch and a touch of holiday spirit.
Many gluten-free chocolate cookies can suffer from a dry, crumbly texture. This recipe expertly tackles that common issue. The clever combination of softened unsalted butter, moist light brown sugar, and robust raw cacao powder works synergistically to keep the dough incredibly tender and rich. Furthermore, a crucial step involves chilling the dough, which is vital for gluten-free flours. This prevents the cookies from spreading too thin in the oven, ensuring they maintain their delightful shape and desired chewy texture. The result is a consistently reliable and utterly delicious winter cookie that you’ll be eager to bake year after year, perfecting your holiday cookie platter!
Beyond these delightful cookies, if you’re seeking more festive treats, be sure to try my Christmas Puppy Chow or these incredibly easy No-Bake Peanut Butter Balls. They complement the hot cocoa cookies perfectly for a truly memorable holiday spread.
The Science Behind Perfect Gluten-Free Cookies
Achieving the perfect texture in gluten-free baking often comes down to understanding the properties of the ingredients. Unlike traditional wheat flour, gluten-free flour blends lack the elastic gluten network that provides structure and chewiness. This is why many gluten-free cookies can be prone to dryness or excessive spreading. Our recipe combats these challenges by:
- Balanced Sweeteners: The ratio of brown sugar to granulated sugar is key. Brown sugar, with its molasses content, adds essential moisture and a lovely caramel note, while granulated sugar contributes to the crisp edges and overall structure.
- Strategic Fat Content: A generous amount of butter ensures a rich, tender crumb, preventing dryness. For dairy-free versions, high-quality vegan butter performs similarly, contributing to the desirable soft texture.
- Dough Chilling: This step is non-negotiable for gluten-free cookies. Chilling allows the gluten-free flours to fully hydrate, preventing the dough from spreading excessively in the oven and resulting in thicker, chewier cookies. It also deepens the flavors, making for a more complex and satisfying bite.
By following these principles, we ensure that every bite of these hot cocoa cookies is as satisfying and delicious as their gluten-containing counterparts.
Essential Ingredients for Your Hot Cocoa Cookies
Crafting these amazing hot cocoa cookies begins with a selection of quality ingredients. Here’s a detailed look at what you’ll need and the specific role each component plays in achieving cookie perfection, along with some helpful tips for substitutions.
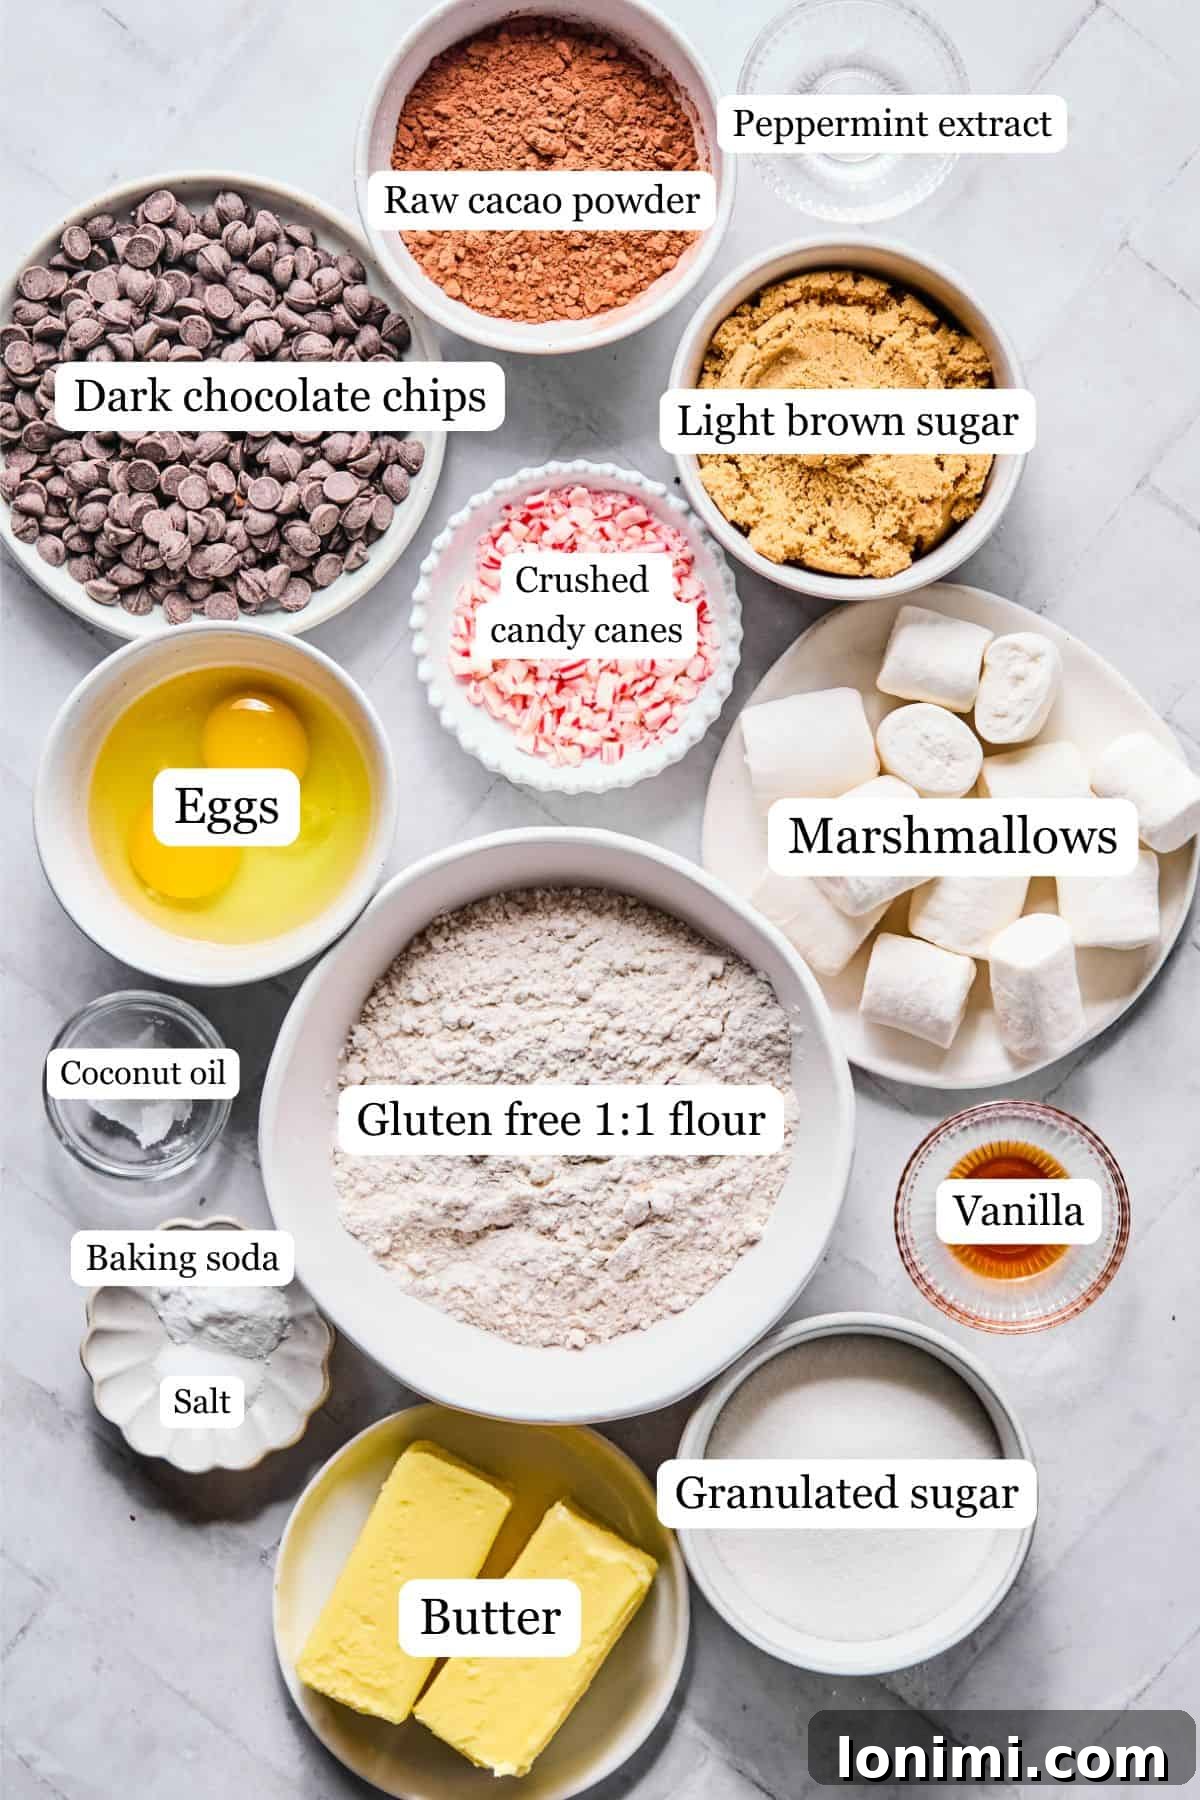
- Unsalted Butter: The foundation for a soft, rich cookie base. Using unsalted butter allows you to control the total salt content in the recipe. Ensure it’s slightly softened at room temperature for optimal creaming with the sugars. For **dairy-free hot cocoa cookies**, a high-quality vegan butter substitute works perfectly.
- Light Brown Sugar & Granulated Sugar: This dynamic duo provides both moisture and structure. Light brown sugar contributes wonderful caramel notes and helps keep the cookies tender and chewy thanks to its molasses content. Granulated sugar aids in spreading slightly and creating those desirable gently crisp edges.
- Eggs: Essential binders that give the dough structure and contribute to the fudgy, almost brownie-like texture of these chocolate cookies. They also add richness and moisture.
- Vanilla Extract & Peppermint Extract: Vanilla deepens the classic hot chocolate cookie flavor, adding warmth and complexity. A touch of peppermint extract elevates these into truly festive holiday chocolate cookies, providing a refreshing, seasonal twist. You can omit peppermint for a purely chocolate experience if preferred.
- Gluten-Free 1:1 Flour Blend: The cornerstone of our gluten-free success. We highly recommend a reliable blend like King Arthur Baking’s gluten-free 1:1 flour, which is designed to perform similarly to all-purpose wheat flour. This ensures your cookies are sturdy yet delightfully soft, avoiding the common crumbly texture found in some gluten-free chocolate cookies. Ensure your blend contains xanthan gum, or add ¼ tsp if it doesn’t.
- Raw Cacao Powder: This is key to achieving an incredibly deep, complex cocoa flavor that truly makes these cookies taste like rich cocoa powder desserts. Raw cacao is less processed than Dutch-processed cocoa, offering a slightly more bitter and intense chocolate profile. You can substitute with natural unsweetened cocoa powder if cacao is unavailable.
- Baking Soda & Salt: The baking soda provides the necessary lift and a tender crumb, while salt is crucial for balancing the sweetness and enhancing all the delicious chocolate flavors. Don’t skip the salt!
- Dark Chocolate Chips: These add another layer of rich chocolate flavor and create delightful pockets of melted chocolate within the cookies. We love the Enjoy Life brand for its high quality and allergy-friendly profile. Semi-sweet chocolate chips can also be used.
- Marshmallows: The undisputed star that brings the “hot cocoa” element to life! Cut regular-sized marshmallows in half horizontally for flatter, more stable pieces. The Dandies brand offers a fantastic vegan option if you’re making dairy-free or vegan cookies.
- Chocolate Drizzle and Crushed Candy Canes: These are the perfect finishing touches, adding a beautiful presentation and an irresistible crunch. The chocolate drizzle enhances the visual appeal and provides another layer of chocolate goodness, while the candy canes infuse a refreshing peppermint blast and a lovely festive aesthetic, truly completing the Christmas cocoa cookies feel.
Step-by-Step Guide: Crafting Your Hot Cocoa Cookies
Making these hot cocoa cookies is a fun and rewarding process, perfect for bakers of all skill levels. Follow these detailed steps to ensure perfectly chewy, marshmallow-topped delights every time.
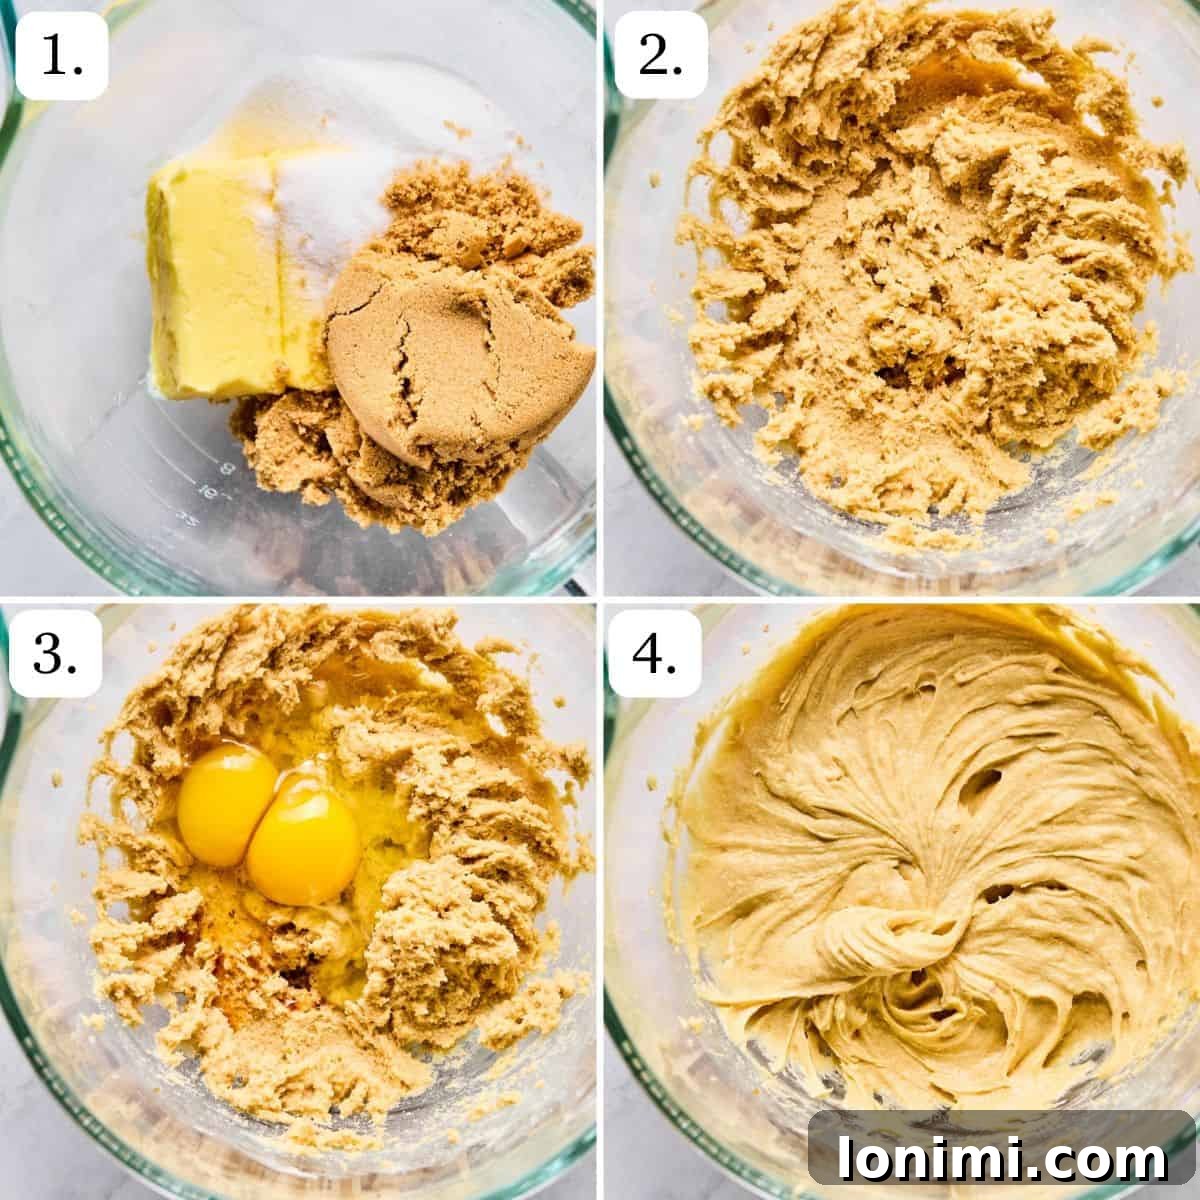
Step 1: Prepare Your Baking Surface. Begin by lining a large baking sheet with parchment paper. This prevents sticking and makes cleanup a breeze. Having your sheet ready ensures a smooth transition when it’s time to scoop your dough.
Step 2: Cream Butter and Sugars. In a large mixing bowl, combine the slightly softened unsalted butter with both the light brown sugar and granulated sugar. Beat them together using a stand mixer fitted with a paddle attachment, or a hand mixer, until the mixture is light, fluffy, and pale in color. This process incorporates air, contributing to the cookies’ soft texture. Scrape down the sides of the bowl as needed.
Step 3: Add Wet Ingredients. Introduce the eggs one at a time, mixing well after each addition until fully incorporated. Then, stir in the vanilla extract and peppermint extract. Beat until everything is well combined and the mixture is smooth and fragrant.
Step 4: Combine Wet Ingredients. Ensure all wet ingredients are thoroughly mixed into the butter-sugar base. The mixture should be homogenous and smooth before moving on to the dry ingredients, ensuring even distribution of flavors throughout the dough.
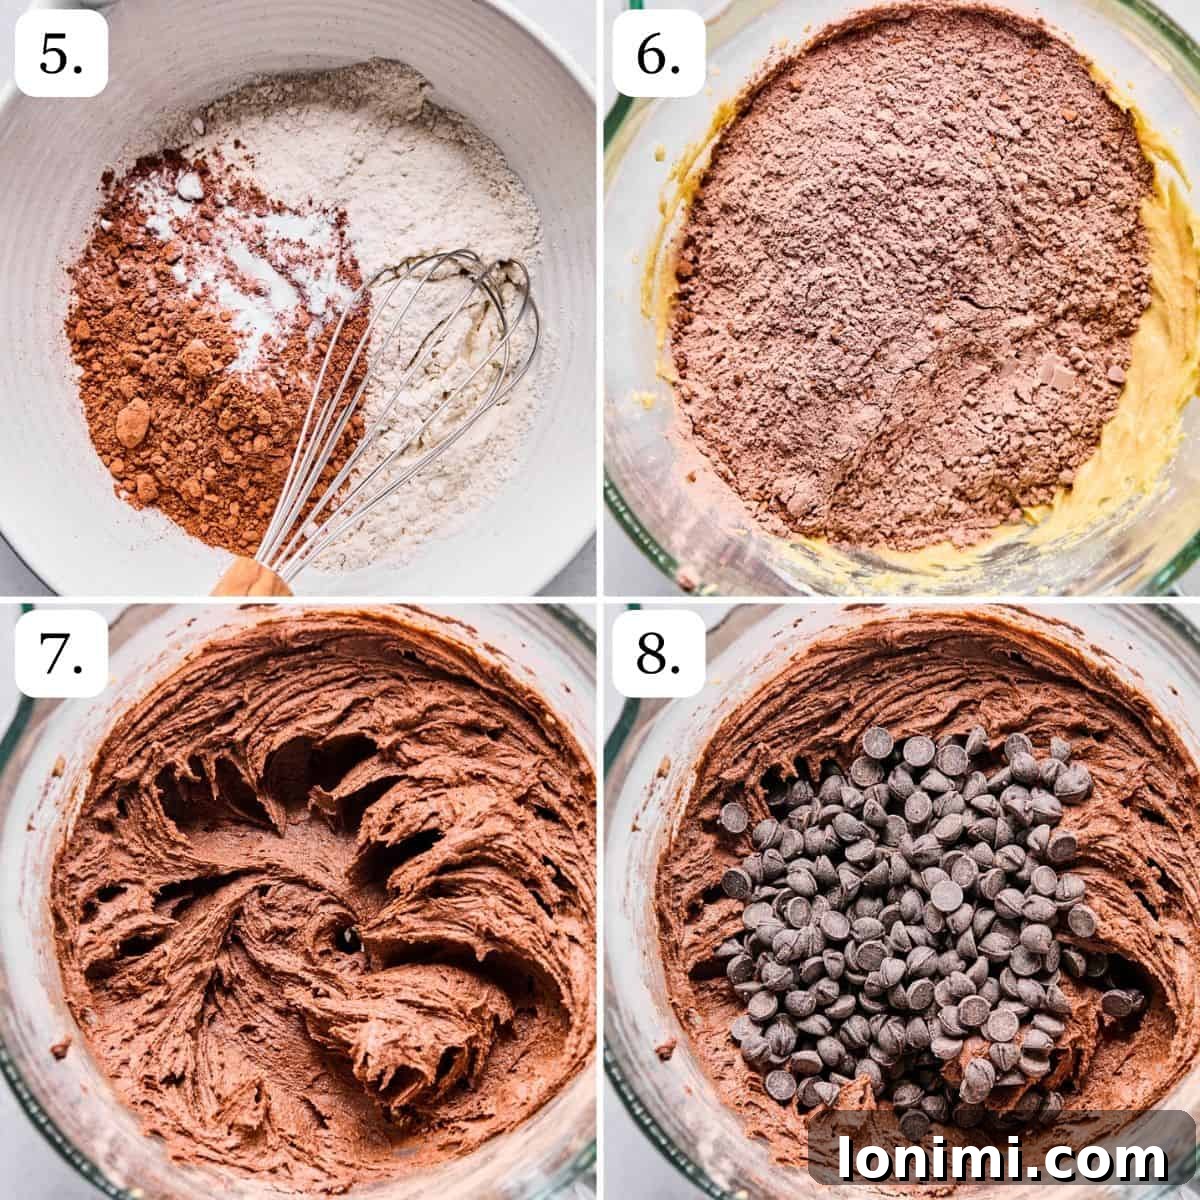
Step 5: Whisk Dry Ingredients. In a separate, medium-sized bowl, whisk together the gluten-free 1:1 flour blend, raw cacao powder, baking soda, and salt. Whisking ensures these dry ingredients are evenly distributed, which is crucial for consistent cookie texture and rise.
Step 6: Integrate Dry and Wet. Gradually add the dry ingredient mixture to the wet ingredients in the large bowl. Mix on low speed, or by hand, until just combined. Be careful not to overmix, as this can lead to tougher cookies, even with gluten-free flour.
Step 7: Form Dough. Continue mixing until a thick, somewhat sticky dough forms. It should pull away from the sides of the bowl but still be soft enough to scoop. If it feels too dry, add a teaspoon of milk (dairy or non-dairy) at a time until the right consistency is reached.
Step 8: Fold in Chocolate Chips. Gently stir in the dark chocolate chips until they are evenly distributed throughout the dough. You want a good amount of chocolate in every bite!
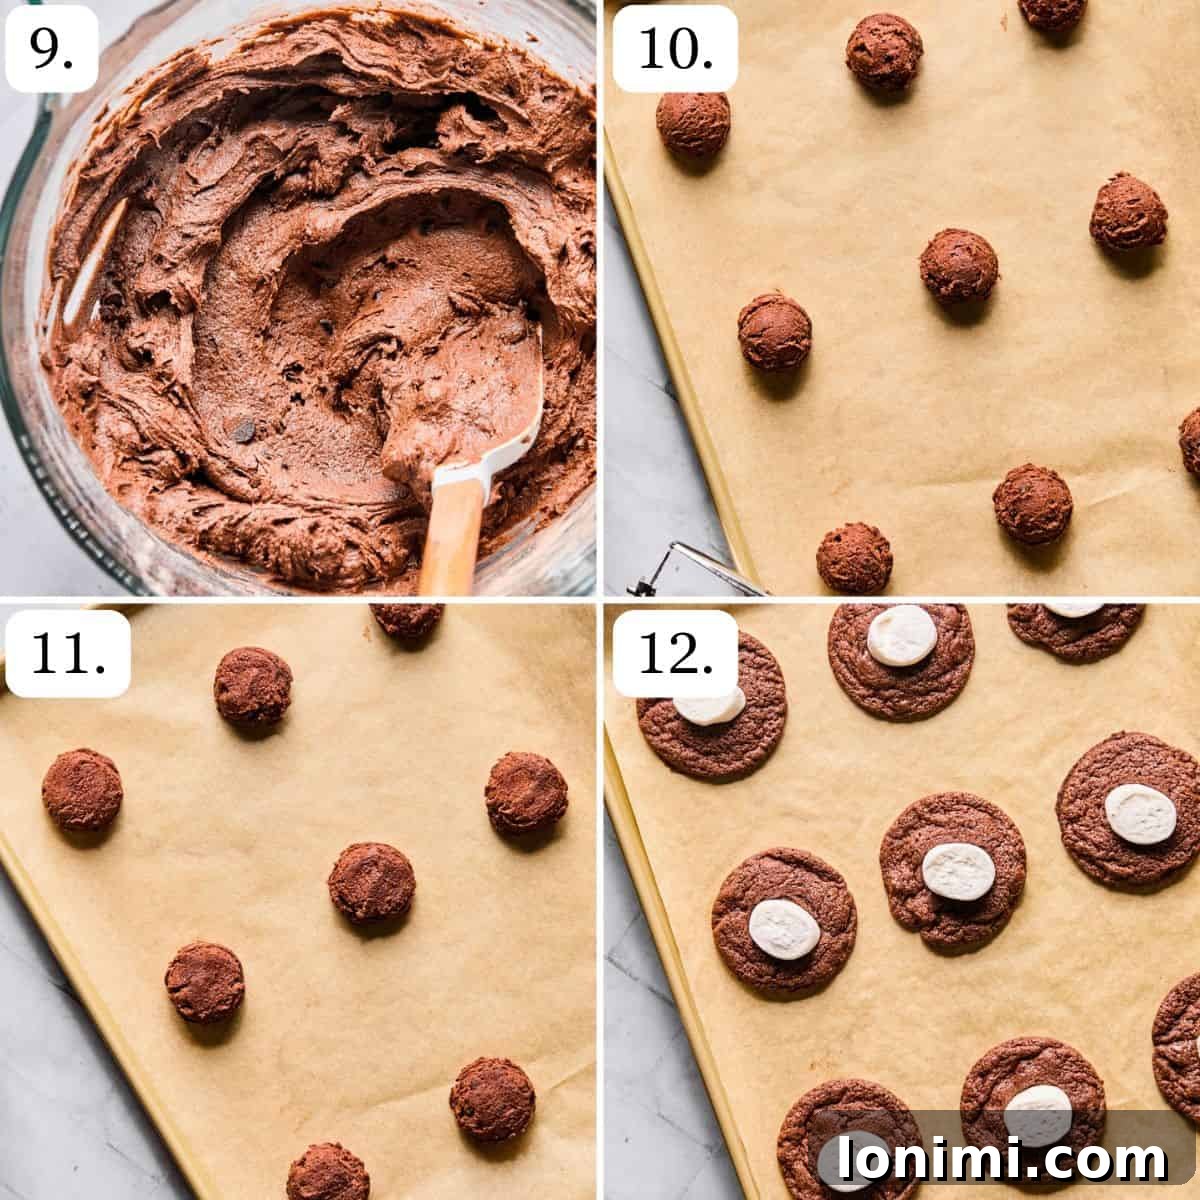
Step 9: Chill the Dough. Cover the bowl with plastic wrap and refrigerate the dough for at least 30-60 minutes. For even better results and enhanced flavor, you can chill it overnight. This crucial step helps prevent spreading, allowing the gluten-free flour to hydrate fully, and results in chewier, more flavorful cookies.
Step 10: Preheat Oven & Scoop Dough. While the dough chills, preheat your oven to 350°F (175°C). Once chilled, use a 1.5 – 2-inch cookie scoop to portion out dough balls onto your prepared baking sheet, spacing them about 2 inches apart to allow for proper spreading.
Step 11: Gently Flatten. Lightly press down on the top of each dough ball with the palm of your hand or the back of a spoon. This subtle flattening helps promote even baking and provides a better surface for the marshmallow later.
Step 12: First Bake & Marshmallow Addition. Bake the cookies for 9 minutes. At this point, they will be set around the edges but still soft in the center. Remove the baking sheet from the oven and, working quickly, gently press half a marshmallow (cut side down) into the center of each cookie. Be careful not to flatten the cookie too much while adding the marshmallow.
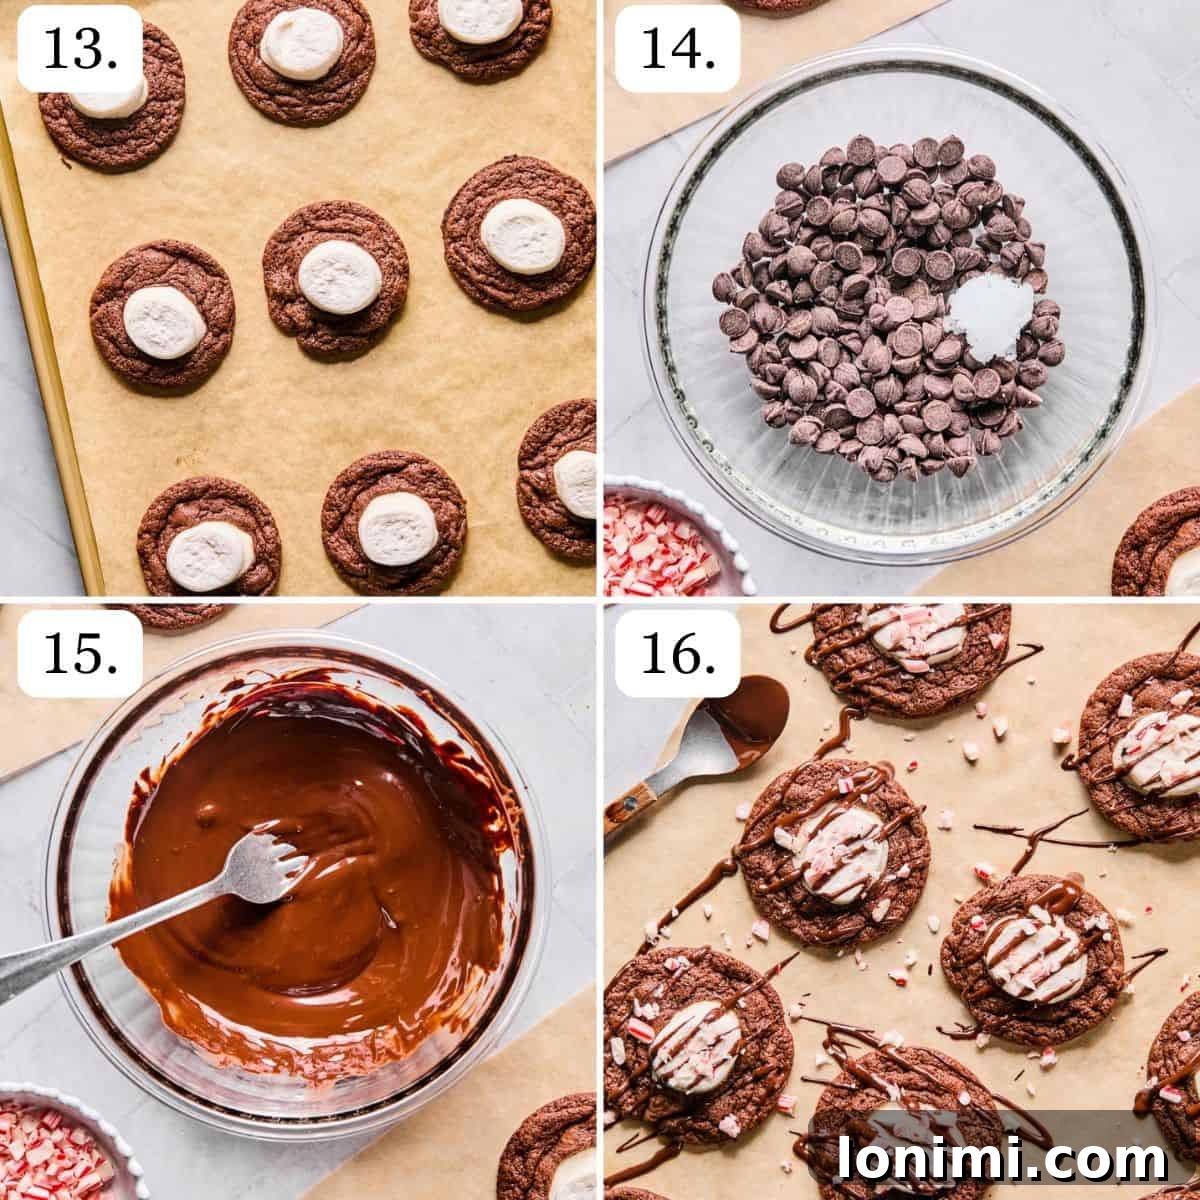
Step 13: Second Bake. Return the cookies to the oven for an additional 3-4 minutes. Keep a close eye on them; you want the marshmallows to melt slightly and become gooey and lightly golden, and the cookies to finish setting. Avoid over-baking to keep them soft and chewy.
Step 14: Prepare Chocolate Drizzle. While the cookies are cooling, prepare your chocolate drizzle. In a microwave-safe bowl, combine the additional dark chocolate chips and coconut oil. Microwave in 30-second increments, stirring well after each, until smooth and fully melted. Alternatively, use a double boiler on the stovetop for a more controlled melt.
Step 15: Cool, Drizzle & Garnish. Allow the cookies to cool fully on the baking sheet or a wire rack. Once cool, transfer them back to a parchment-lined sheet. Drizzle generously with the melted chocolate, then immediately sprinkle with crushed candy canes before the chocolate sets. Refrigerate briefly (10-15 minutes) to help the chocolate firm up faster.
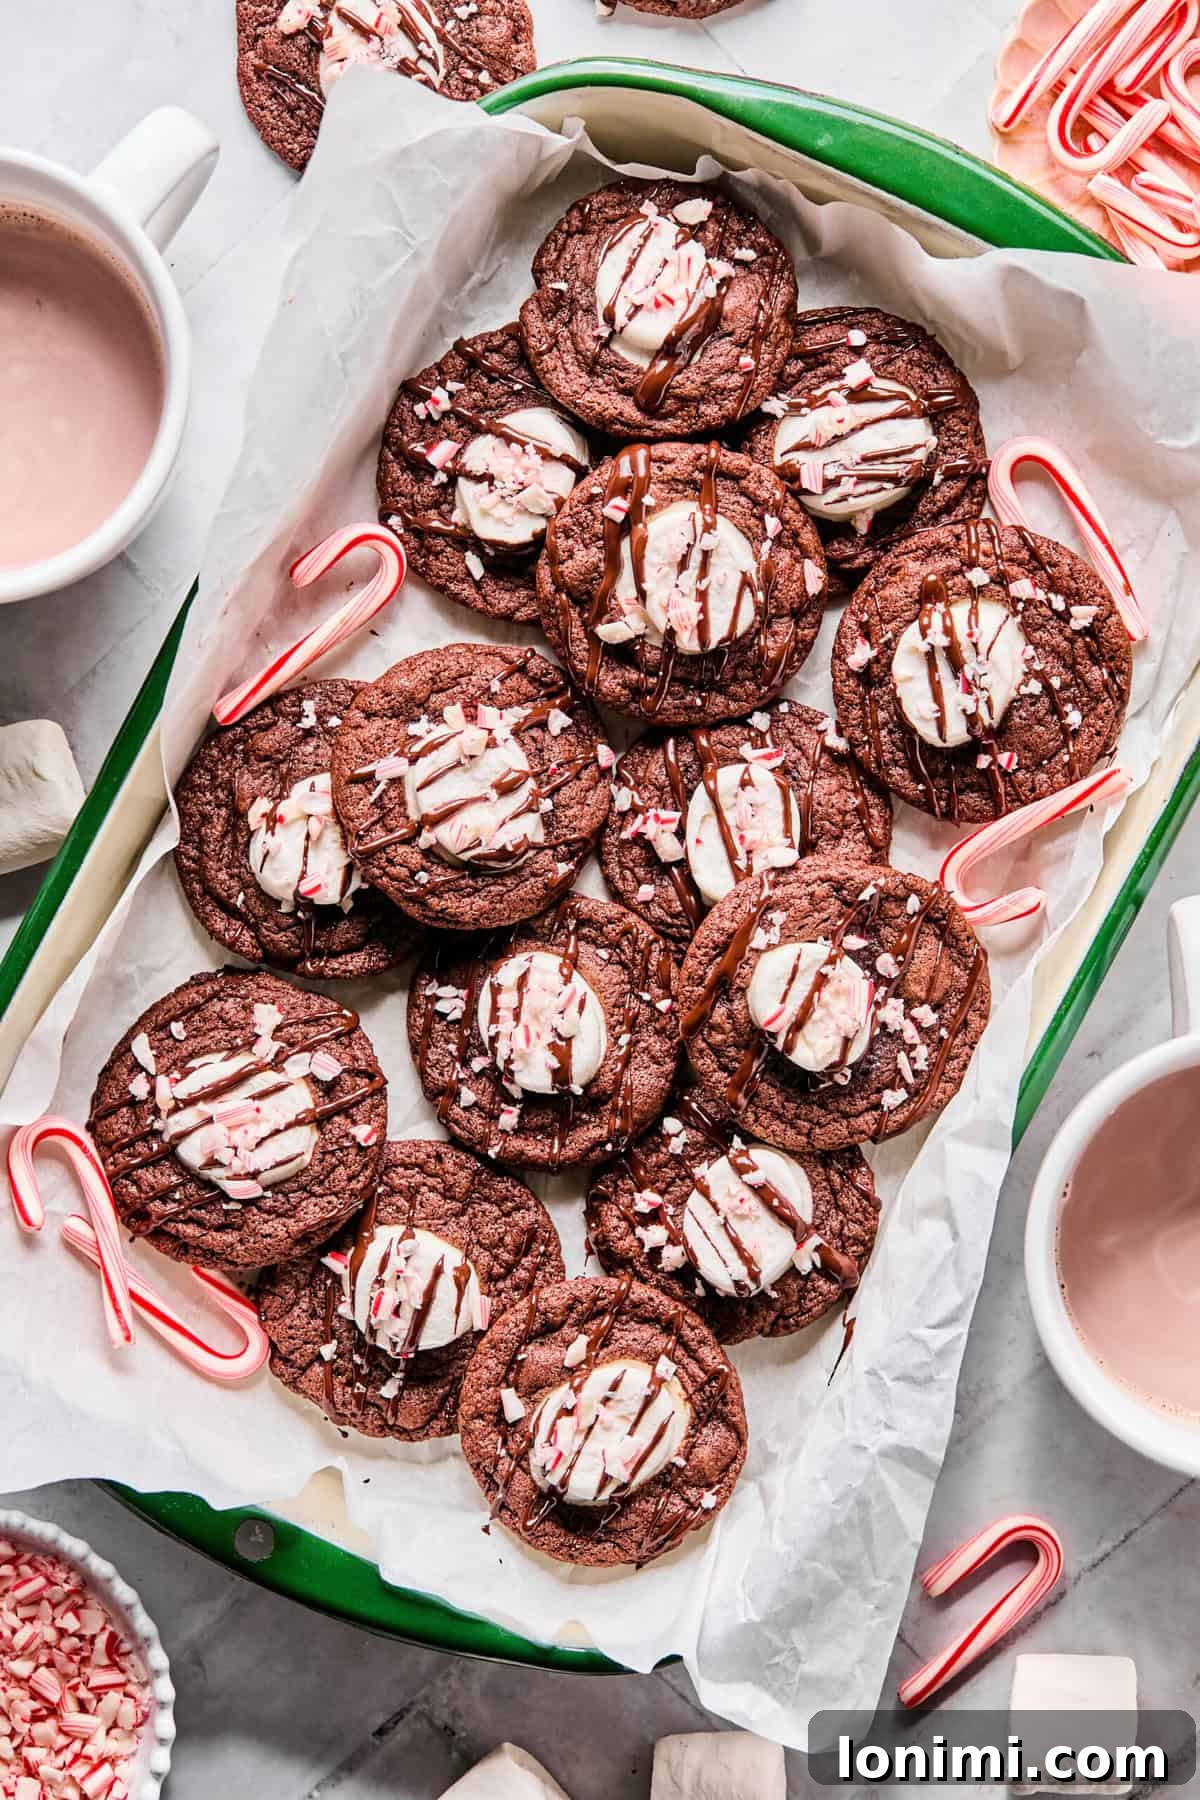
Step 16: Indulge! Your beautiful, festive, and utterly delicious gluten-free hot cocoa cookies are now ready to be enjoyed! Serve them with a mug of hot chocolate for the ultimate treat, or share them as a delightful holiday gift.
Storage & Freezer Tips for Your Hot Cocoa Cookies
These delightful hot cocoa cookies are perfect for making ahead, and knowing how to properly store them ensures they stay fresh and delicious. Here’s how to keep them at their best, whether for a few days or for future enjoyment:
Room Temperature Storage
Store your baked and fully cooled cookies in an airtight container at room temperature for 3-4 days. To prevent the marshmallow tops from sticking together or getting messy, it’s a good idea to place a layer of parchment paper between stacked cookies. This small step helps preserve their beautiful appearance and soft texture.
Freezing for Later
These cookies are fantastic for freezing, making them a superb option for holiday meal prep or spontaneous cravings. You have two convenient methods for freezing:
- Freeze the Dough: This is a wonderful way to have fresh-baked cookies on demand. Scoop the dough into 1.5-2 inch balls, flatten them slightly as you would before baking, and then arrange them on a sheet pan lined with parchment paper. Freeze until solid, then transfer the frozen dough balls to a freezer-safe bag or airtight container. When you’re ready to bake, simply place the frozen dough balls on a baking sheet (no need to thaw) and add 1-2 minutes to the initial bake time (before adding marshmallows).
- Freeze the Baked Cookies: If you prefer to have fully baked cookies ready, you can freeze them after baking. For best results, skip the chocolate drizzle and candy cane topping before freezing. Allow the cookies to cool completely, then arrange them in a single layer on a tray and freeze until solid. Once frozen, transfer them to a freezer-safe bag or container, again using parchment paper between layers to protect the marshmallows. When ready to enjoy, thaw the cookies at room temperature and then add the fresh chocolate drizzle and crushed candy canes for the ultimate presentation and crunch. This method ensures the toppings remain vibrant and appealing.
Proper freezing techniques mean you can enjoy these festive hot cocoa cookies long after the holiday season, or have a batch ready for unexpected guests.
Hot Cocoa Cookie Recipe FAQs
Absolutely! While the peppermint adds a wonderful festive touch, you can easily omit the peppermint extract for a purely classic hot cocoa flavor. Simply increase the vanilla extract to 1.5 teaspoons to enhance the chocolate notes.
Yes, you can use mini marshmallows! However, be aware that they melt much faster than halves of regular marshmallows. If using mini marshmallows, tuck a few into the center of each cookie right after the first bake (the 9-minute mark) and return them to the oven for only 2-3 minutes, just until they are softened and lightly puffed. Keep a close eye on them to prevent them from burning or disappearing completely.
Yes, chilling the dough is highly recommended, especially for gluten-free cookies. Gluten-free flours benefit greatly from resting time, as it allows them to properly hydrate. This prevents the cookies from spreading too thin in the oven, ensuring they maintain a soft, chewy texture and their intended shape. A minimum of 30-60 minutes is ideal, but chilling overnight can yield even better results.
Absolutely! These hot cocoa cookies are perfect for advance preparation. Both the raw cookie dough and the baked cookies freeze beautifully. You can freeze the dough balls for future baking or freeze the baked cookies (without the drizzle) to decorate and enjoy later. See the “Storage & Freezer Tips” section above for detailed instructions on both methods.
Making these cookies dairy-free is simple! Substitute the unsalted butter with an equal amount of high-quality vegan butter (such as Miyoko’s Kitchen or Earth Balance sticks). Ensure your dark chocolate chips and marshmallows are also dairy-free (Enjoy Life and Dandies brands are excellent choices, respectively). The rest of the ingredients are naturally dairy-free.
Excessive spreading is a common issue with gluten-free cookies. The most likely culprits are insufficient chilling time for the dough, butter that was too warm, or an oven temperature that wasn’t accurate. Ensure your butter is softened but not melted, thoroughly chill the dough for at least 30-60 minutes (or longer), and verify your oven temperature with an oven thermometer.
These gluten-free hot cocoa cookies bring the cozy charm of a favorite winter drink straight to your dessert table, offering soft, fudgy centers, perfectly melted marshmallows, and a festive chocolate peppermint drizzle. They are truly a treat for the senses! For another seasonal favorite that’s equally delightful, make sure to try my Soft Baked Pumpkin Cheesecake Cookies next, for a different but equally comforting flavor profile.
More Delicious Gluten-Free Treats to Explore
Fudgy Protein Brownies (7g Protein + No Weird Aftertaste!)
Gluten Free Chocolate Chip Almond Butter Oatmeal Cookies
Easy Gluten Free Peanut Butter Blossoms Recipe
S’Mores Chocolate and Marshmallow Cookie Skillet
Love these gluten-free hot cocoa cookies? Please leave a 5-star 🌟🌟🌟🌟🌟 rating in the recipe card below & a review in the comment section. Or, follow me on Facebook, Pinterest or Instagram today!
Simple Gluten-Free Hot Cocoa Cookies
Equipment
-
Large Baking Sheet
-
Cookie Scoop (1.5-2 inch)
-
Parchment Paper
-
Mixing Bowls
-
Electric Mixer (stand or hand-held)
Ingredients
For the Cookies
- 1 cup unsalted butter, slightly softened (use vegan butter for dairy-free)
- ¾ cup light brown sugar
- ¾ cup granulated sugar
- 2 large eggs
- 1 tsp vanilla extract
- ¾ tsp peppermint extract (optional, for a festive touch)
- 1 ¾ cups gluten-free 1:1 flour blend, I like King Arthur Baking brand (ensure it contains xanthan gum)
- ½ cup raw cacao powder (or natural unsweetened cocoa powder)
- 1 tsp baking soda
- ½ tsp salt
- 1 cup dark chocolate chips, I like Enjoy Life brand (use dairy-free for DF option)
- 12 regular marshmallows, cut in half horizontally to make 24 flatter pieces. I like Dandie’s brand for vegan.
For the Chocolate Drizzle & Topping
- ¾ cup dark chocolate chips
- 1 tsp coconut oil
- ½ cup candy canes, crushed into fine pieces
Instructions
-
Line a large baking sheet with parchment paper, ensuring it covers the entire surface to prevent sticking and simplify cleanup later.
-
In a large bowl, using a stand mixer or a hand mixer, beat the slightly softened unsalted butter and both sugars (light brown and granulated) until the mixture is light, creamy, and visibly fluffy, approximately 2-3 minutes. Make sure to scrape down the sides of the bowl to ensure everything is well combined.
-
Add the eggs one at a time, mixing well after each addition. Then, stir in the vanilla extract and peppermint extract until fully incorporated and fragrant.
-
In a separate medium bowl, whisk together the gluten-free 1:1 flour blend, raw cacao powder, baking soda, and salt. Whisk for about 30 seconds to ensure all dry ingredients are thoroughly mixed.
-
Gradually add the dry ingredient mixture to the wet ingredients in the large bowl. Mix on low speed until a thick, somewhat sticky dough forms. Be careful not to overmix. Once the dough comes together, gently stir in the dark chocolate chips until evenly distributed. Cover the bowl and refrigerate the dough for 30-60 minutes, or even overnight for best results.
-
Approximately 15 minutes before you are ready to bake, preheat your oven to 350°F (175°C).
-
Using a 1.5-2 inch cookie scoop, form uniform dough balls. Place them on the prepared baking sheet, ensuring they are spaced about 2 inches apart to allow for proper spreading. Gently press down on each dough ball slightly with your palm or the back of a spoon. This recipe typically yields 22-24 cookies.
-
Bake for 9 minutes. The cookies will look set around the edges but may still appear soft in the center. Carefully remove the pan from the oven. Gently and quickly press one half of a marshmallow (cut side down) into the center of each cookie, being careful not to completely flatten the cookie. Return the cookies to the oven for an additional 3-4 minutes, or until the marshmallows begin to melt, puff up, and turn lightly golden, and the cookies are set.
-
Allow the cookies to cool completely either on the baking sheet or transfer them to a wire cooling rack. Cooling completely is crucial before adding the drizzle. Once cool, transfer them to a clean parchment-lined baking sheet for the next step.
-
To prepare the chocolate drizzle, combine the additional ¾ cup dark chocolate chips and 1 teaspoon of coconut oil in a microwave-safe bowl. Microwave in 30-second increments, stirring well after each interval, until the chocolate is smooth and fully melted. Alternatively, melt the mixture using a double boiler on the stovetop for precise control.
-
Drizzle the melted chocolate generously over each cooled cookie. Immediately sprinkle with the crushed candy canes before the chocolate has a chance to set. For a quicker set, you can refrigerate the cookies for about 10-15 minutes. Serve and enjoy your festive, delicious hot cocoa cookies!
Notes
These cookies also freeze exceptionally well without the chocolate drizzle and candy cane topping. For the best result, add these festive garnishes after the cookies have thawed.
You can freeze these cookies in two convenient ways:
- Freeze the dough: Scoop the dough into balls, flatten slightly, and freeze them on a sheet pan until solid. Once firm, transfer them to a freezer-safe bag or container. When ready to bake, place frozen dough balls on a baking sheet and add 1-2 minutes to the first bake time (before adding marshmallows).
- Freeze the baked cookies: Bake the cookies as directed, but skip the chocolate drizzle and candy cane topping. Freeze the cooled cookies on a tray until solid, then transfer them to a freezer-safe bag. Thaw at room temperature and then decorate with the chocolate drizzle and candy canes just before serving.
Nutrition
All nutrition facts are an estimate and automatically calculated. While I fact-check them using My Fitness Pal, please note that they may not always be 100% accurate and depend on the specific brands and ingredients used. For the most accurate grams per serving size, it is recommended to weigh your total batch and divide by the number of servings.