
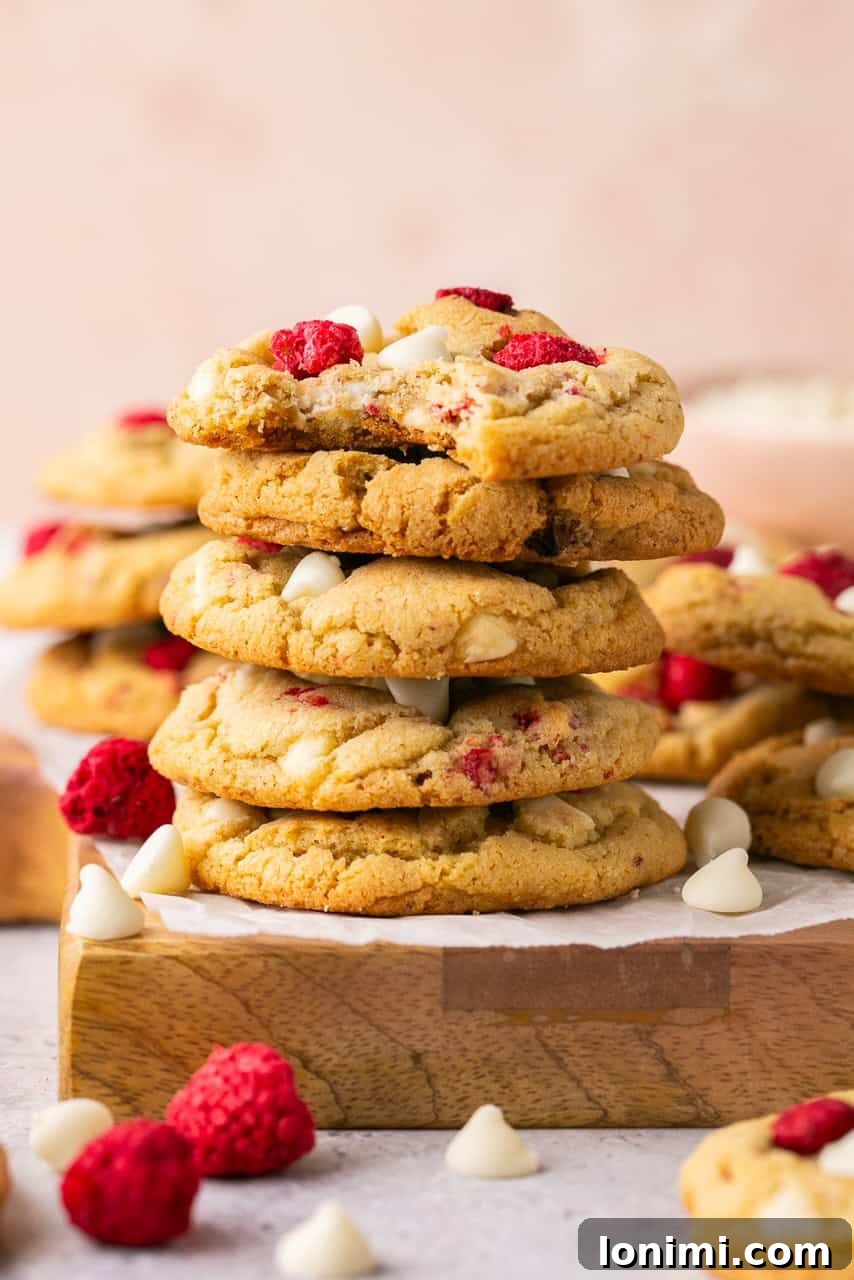
Indulge in the perfect harmony of sweet white chocolate and tangy raspberries with these incredibly soft, chewy, and utterly irresistible gluten-free cookies. Whether you’re a seasoned baker or new to gluten-free recipes, this guide will help you create a batch of delightful cookies that everyone will love!
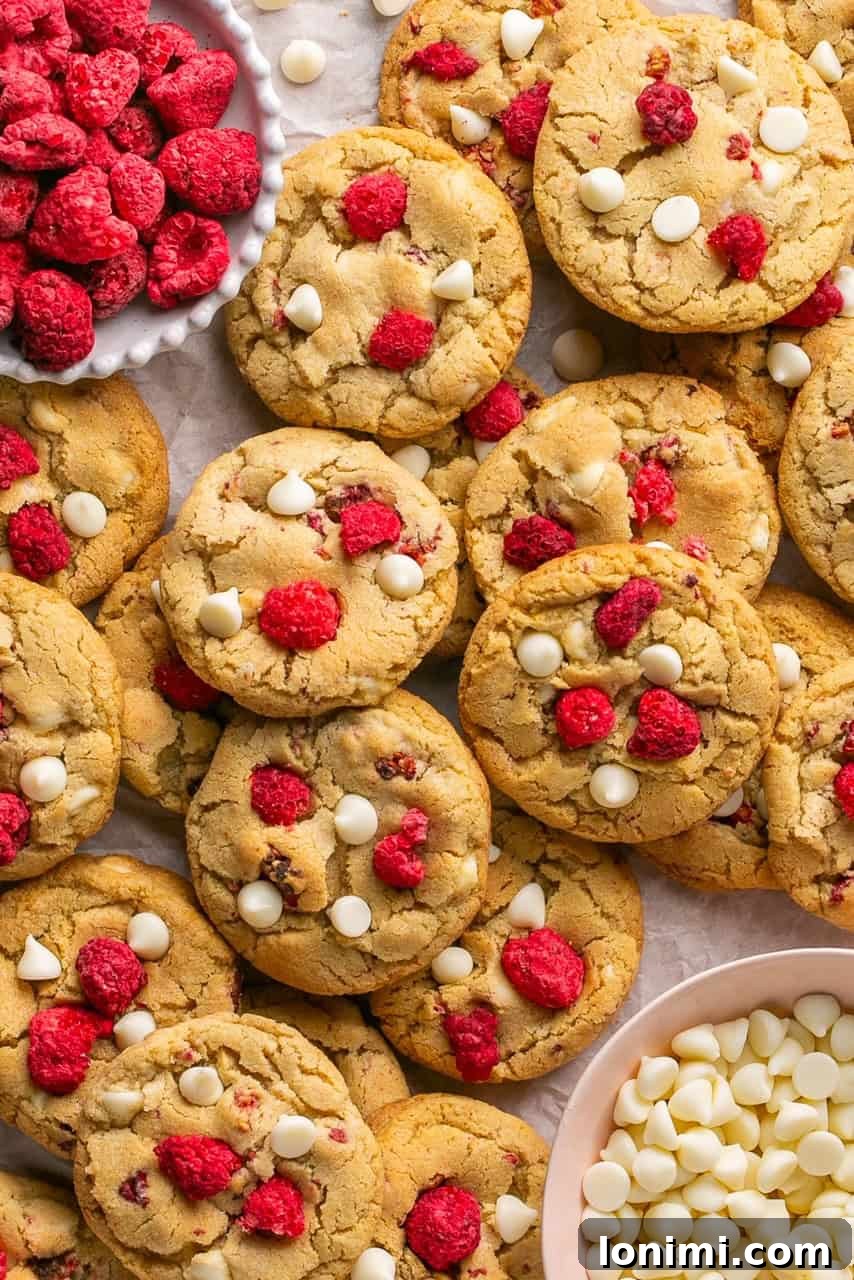
Irresistible Gluten-Free Raspberry White Chocolate Cookies: The Perfect Sweet-Tart Treat
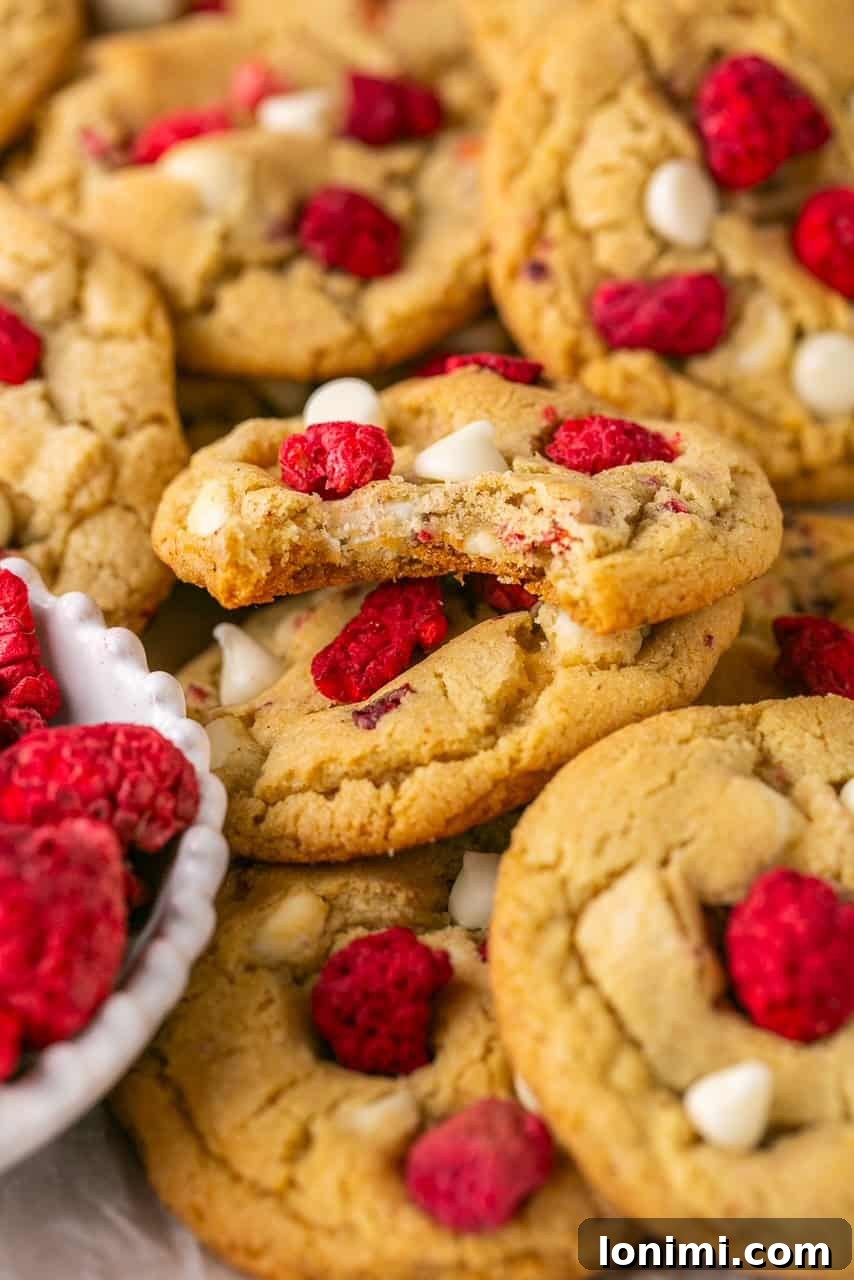
There’s something truly magical about the combination of creamy white chocolate and bright, tangy raspberries. These Gluten-Free Raspberry White Chocolate Cookies bring that magic to life in every bite! Designed to be delightfully soft, wonderfully chewy, and bursting with flavor, this recipe proves that gluten-free baking can be utterly delicious and accessible to everyone. Whether you’re looking for a special treat for Valentine’s Day, a festive addition to your holiday spread, or simply a comforting homemade cookie, these raspberry white chocolate cookies are a guaranteed crowd-pleaser.
What sets these gluten-free cookies apart is their incredible texture and balanced flavor profile. We’ve fine-tuned the ingredients to ensure they don’t taste “gluten-free” in the traditional sense – no dry, crumbly, or overly dense cookies here! Instead, you’ll find a tender interior, crisp edges, and a delightful chewiness that rivals any conventional cookie. Plus, the recipe is incredibly versatile. Not a fan of white chocolate? Feel free to swap it for dark chocolate or milk chocolate chips to customize your perfect batch. Get ready to fall in love with these easy-to-make, freezer-friendly sweet and tart delights!
Why These Gluten-Free Cookies Are a Must-Try
Our Gluten-Free Raspberry White Chocolate Cookies are more than just a sweet treat; they’re a testament to how delicious and satisfying gluten-free baking can be. Here’s why this recipe should be at the top of your baking list:
- Gluten-Free & Dairy-Free Friendly: Perfectly suited for those with dietary restrictions, with simple dairy-free substitution options that don’t compromise on taste or texture. You can enjoy a delightful treat without worrying about allergens.
- The Ultimate Flavor Combo: A harmonious blend of rich, sweet white chocolate and vibrant, tart raspberries creates an unforgettable taste experience. This classic pairing is a symphony of flavors that will tantalize your taste buds.
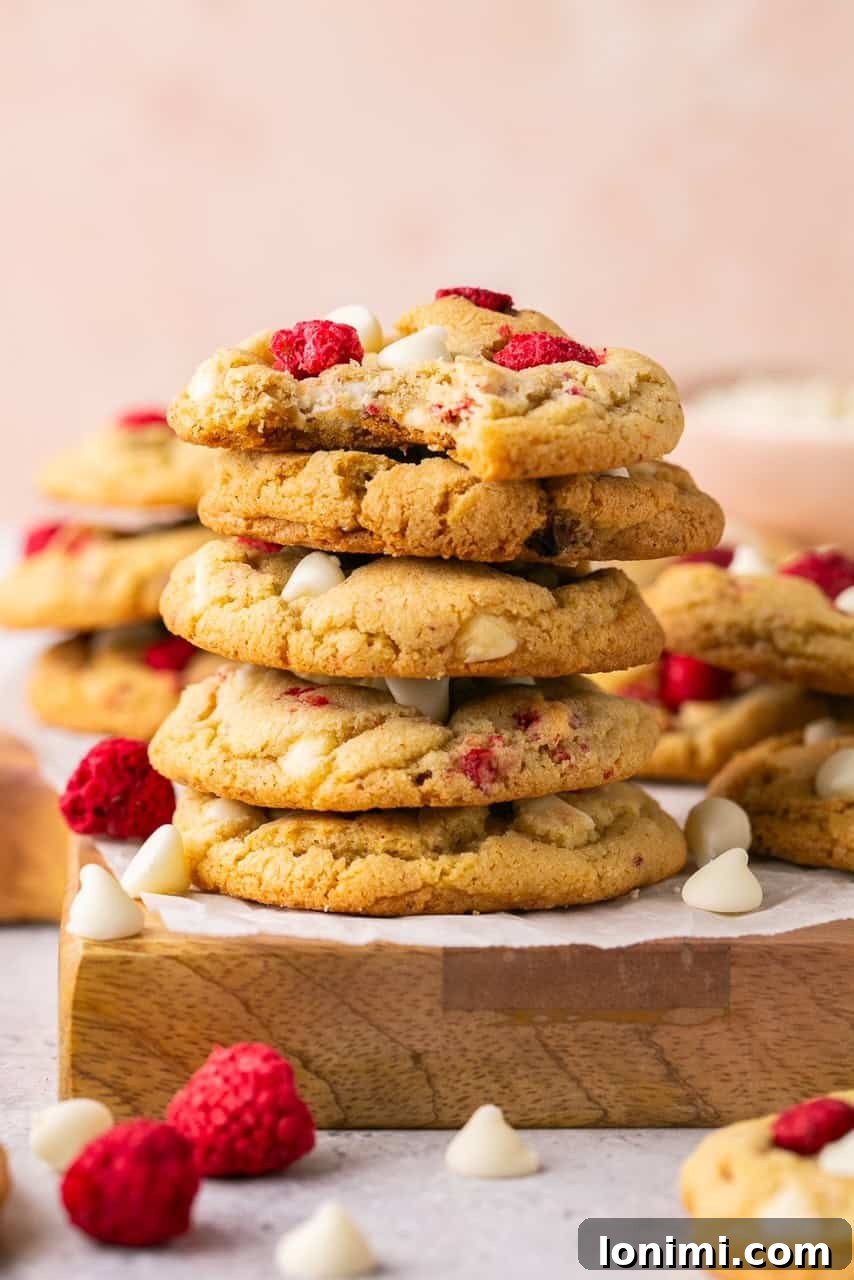
- Perfect Texture: Forget dry or crumbly gluten-free baked goods. Expect gloriously soft, chewy centers with lightly crisped edges, a signature of truly great cookies. Every bite offers a satisfying chewiness.
- Effortless Baking: This straightforward recipe is easy to follow, making homemade gluten-free cookies a breeze for bakers of all skill levels. Minimal fuss, maximum deliciousness!
- Freezer-Friendly: Bake a big batch and freeze them for future cravings, unexpected guests, or to enjoy throughout the week. They thaw beautifully and taste just as fresh.
- Festive & Versatile: Their vibrant colors make them ideal for holidays like Valentine’s Day or Christmas, adding a pop of color to any dessert table. Yet, they’re delightful to enjoy any time of year, perfect for a cozy afternoon or a special occasion.
- Customizable: Easily adapt the chocolate type (dark or milk chocolate are great alternatives) or add extra mix-ins like nuts or coconut to suit your personal preferences.
Decoding the Deliciousness: Key Ingredients Explained
Achieving the perfect batch of gluten-free raspberry white chocolate cookies starts with understanding each ingredient’s role. Here’s a detailed look at what makes these cookies so special and how to select the best components:
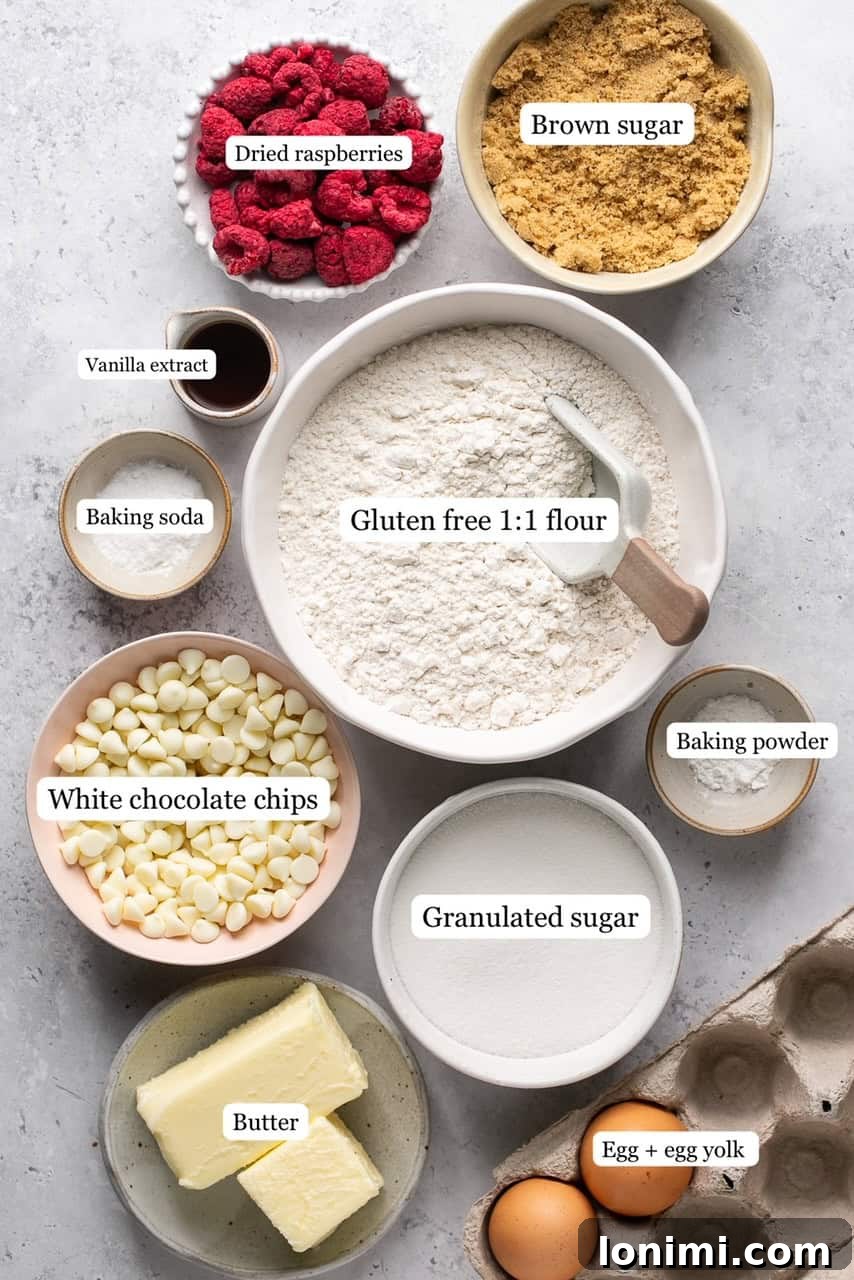
Butter (or Vegan Butter)
Butter is the bedrock of these cookies, providing a rich, creamy flavor and contributing significantly to their tender and chewy texture. For a dairy-free version, opting for a high-quality vegan butter is essential. Brands like Miyoko’s Kitchen and Kite Hill have consistently yielded excellent results, mimicking the texture and richness of traditional butter. Always ensure your butter (whether dairy or vegan) is softened to room temperature before you begin. This allows it to cream properly with the sugars, creating a light and airy base for your dough, which is critical for a well-textured cookie.
Granulated Sugar
This classic white sugar does more than just sweeten the cookies. It plays a vital role in their structure and appearance, helping the cookies spread beautifully and contributing to those desirable slightly crisp edges. Granulated sugar also helps achieve that signature uniform texture found in classic cookies.
Brown Sugar (Light, Packed)
Light brown sugar is a secret weapon for achieving truly soft and chewy cookies. Its molasses content is key, adding essential moisture to the dough and imparting a subtle, warm caramel flavor that beautifully complements the raspberries and white chocolate. When measuring, remember to pack the brown sugar firmly into the measuring cup. This ensures you have the correct amount, which is crucial for the perfect moisture balance and chewiness in your gluten-free raspberry white chocolate cookies.
Egg + Egg Yolk
This specific egg combination is a deliberate choice for superior cookie texture. The whole egg provides essential binding and structure, helping to hold the gluten-free dough together. The addition of an extra egg yolk, however, is where the magic happens; it introduces additional fat and moisture without adding too much liquid, resulting in an incredibly rich, soft, and chewy cookie. This small but significant detail helps prevent gluten-free cookies from becoming dry or crumbly.
Gluten-Free 1:1 Measure for Measure Flour
The success of gluten-free baking often hinges on the quality of your flour blend. A good 1:1 “Measure for Measure” gluten-free flour blend is formulated to substitute cup-for-cup for wheat flour in most recipes, simplifying the baking process. I highly recommend King Arthur Baking Company’s Measure for Measure Gluten-Free Flour due to its consistent performance and excellent results in producing tender, well-structured cookies. These blends typically contain a thoughtful combination of rice flours, starches, and xanthan gum, which works together to replicate the elasticity and structure normally provided by gluten.
Vanilla Extract
Pure vanilla extract is more than just a flavoring; it’s an enhancer. A generous dash of vanilla adds warmth, depth, and complexity to the cookies, harmonizing all the other ingredients and allowing the distinct flavors of white chocolate and raspberry to truly shine.
Raspberries: Freeze-Dried vs. Fresh vs. Frozen
Choosing the right type of raspberry is crucial for the optimal look and texture of these gluten-free raspberry white chocolate cookies. While fresh raspberries are undeniably delicious, they can introduce a significant amount of moisture into the dough. More importantly, the acidity in fresh raspberries can react with the baking soda during baking, potentially causing your cookies to turn an unappealing purple or grayish-blue color. They also tend to break apart easily, further impacting dough consistency.
For the best results—vibrant color, intense flavor, and ideal texture—freeze-dried or dehydrated raspberries are highly recommended. They provide a concentrated burst of tart raspberry flavor without altering the cookie’s appearance or moisture balance. I’ve found Good & Gather brand freeze-dried raspberries from Target to work exceptionally well. They incorporate beautifully into the dough and maintain their striking red hue. If you choose to use fresh raspberries, be aware of the potential color change and a slightly softer cookie texture. Frozen raspberries are generally not recommended as they can lead to even more moisture and a stronger likelihood of discoloration (sometimes even green!), though the flavor will still be present.
White Chocolate Chips (or Chunks)
The creamy sweetness of white chocolate is the perfect indulgent partner to the tartness of the raspberries. When selecting white chocolate, look for high-quality, gluten-free brands. Popular options include Tollhouse, Good & Gather, Lily’s, Pascha, and Enjoy Life. If you require a dairy-free option, Enjoy Life and Pascha brands offer fantastic dairy-free white chocolate chips. Using white chocolate chunks, rather than just chips, can also create delightful pockets of gooey, melted chocolate throughout your baked cookies.
Baking Soda & Baking Powder
These two leavening agents work in tandem to give our cookies their ideal lift, texture, and chewiness. Baking soda, an alkali, reacts with the acidic components in the brown sugar, while baking powder provides an additional boost of carbon dioxide, ensuring a tender crumb. For gluten-free baking, it’s particularly important to ensure your baking powder is labeled as gluten-free and aluminum-free. Aluminum-free baking powder prevents any metallic aftertaste and ensures the purest flavor in your delicious raspberry white chocolate cookies.
Step-by-Step Guide to Perfect Raspberry White Chocolate Cookies
Baking these irresistible gluten-free raspberry white chocolate cookies is a delightful and straightforward process. Follow these detailed instructions to achieve a batch of perfectly baked, soft, and chewy treats that everyone will adore!
Preparation & Dry Ingredients
- Preheat Oven & Prepare Baking Sheets: Begin by preheating your oven to 375°F (190°C). This ensures the oven is at the correct temperature when your dough is ready. Line two standard baking sheets with parchment paper; this simple step prevents sticking and ensures your cookies bake evenly and release easily.
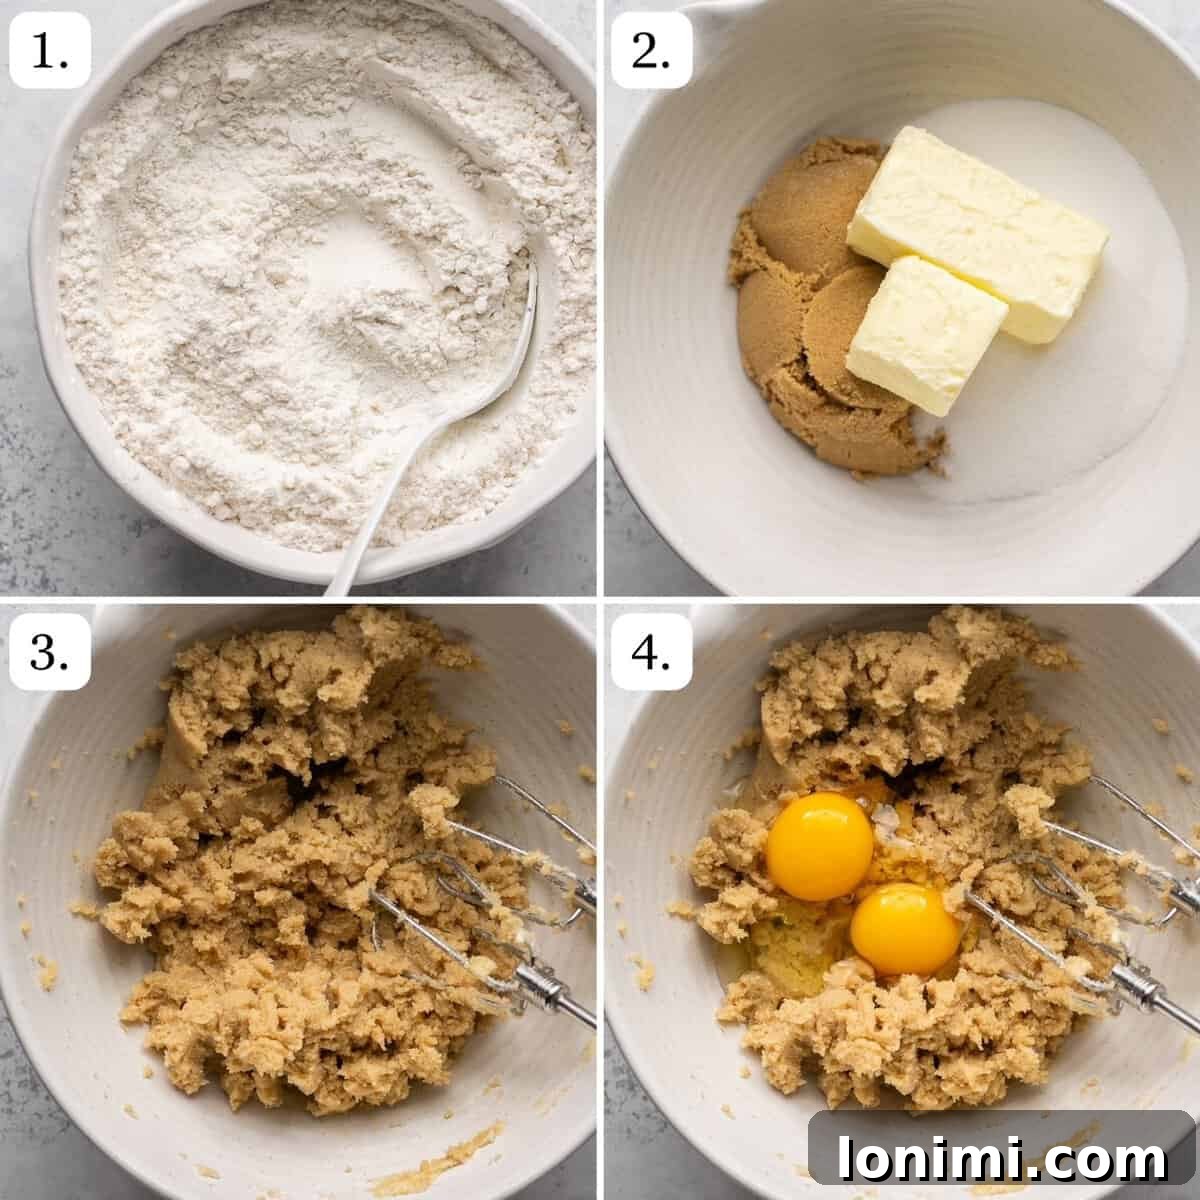
- Combine Dry Ingredients: In a medium-sized bowl, whisk together the gluten-free 1:1 flour blend, baking soda, baking powder, and a pinch of salt. It’s crucial to whisk these thoroughly to ensure the leavening agents and salt are evenly distributed throughout the flour, preventing uneven rising or salty spots in your cookies. Set this bowl aside for later.
Wet Ingredients & Dough Formation
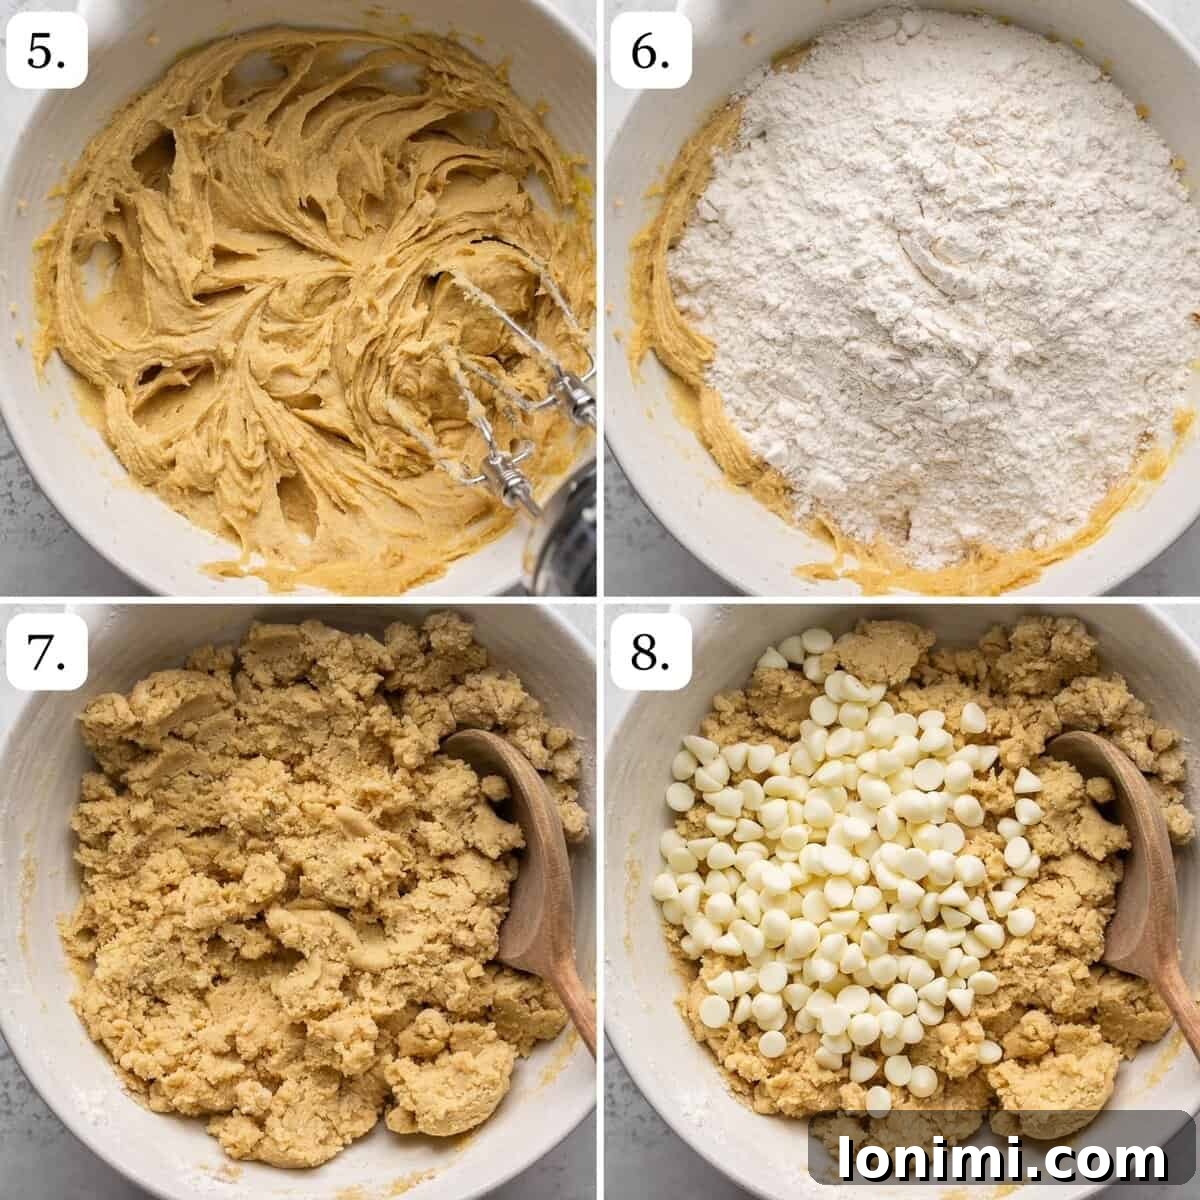
- Cream Butter & Sugars: In a separate, larger mixing bowl, add the softened salted butter (or vegan butter if making dairy-free), granulated sugar, and packed light brown sugar. Using an electric mixer (either a handheld mixer or a stand mixer fitted with the paddle attachment), cream these ingredients together on medium speed. Continue mixing until the mixture becomes notably light, fluffy, and well combined, typically 2-3 minutes. This process incorporates air, which is vital for creating a tender and soft texture in the finished cookies.
- Add Egg & Vanilla: Once the butter and sugars are perfectly creamy, add the whole egg, the additional egg yolk, and the vanilla extract to the bowl. Beat the mixture again on medium speed until everything is smoothly incorporated and the mixture looks consistently creamy. Remember to pause and scrape down the sides of the bowl with a spatula to ensure all ingredients are fully blended.
- Combine Wet & Dry: Gradually add the whisked dry flour mixture from the medium bowl into the wet ingredients in the larger bowl. Mix on low speed until the ingredients are just combined. It’s important not to overmix at this stage; overmixing can lead to tougher cookies, especially with gluten-free flours. You might find that gluten-free dough can be a bit stiffer than traditional dough, so be prepared to use a little “elbow grease” to ensure all dry streaks of flour have disappeared.
- Fold in White Chocolate Chips: Gently stir in the white chocolate chips using a spatula until they are evenly distributed throughout the dough. Avoid crushing the chips too much.
Adding Raspberries & Chilling
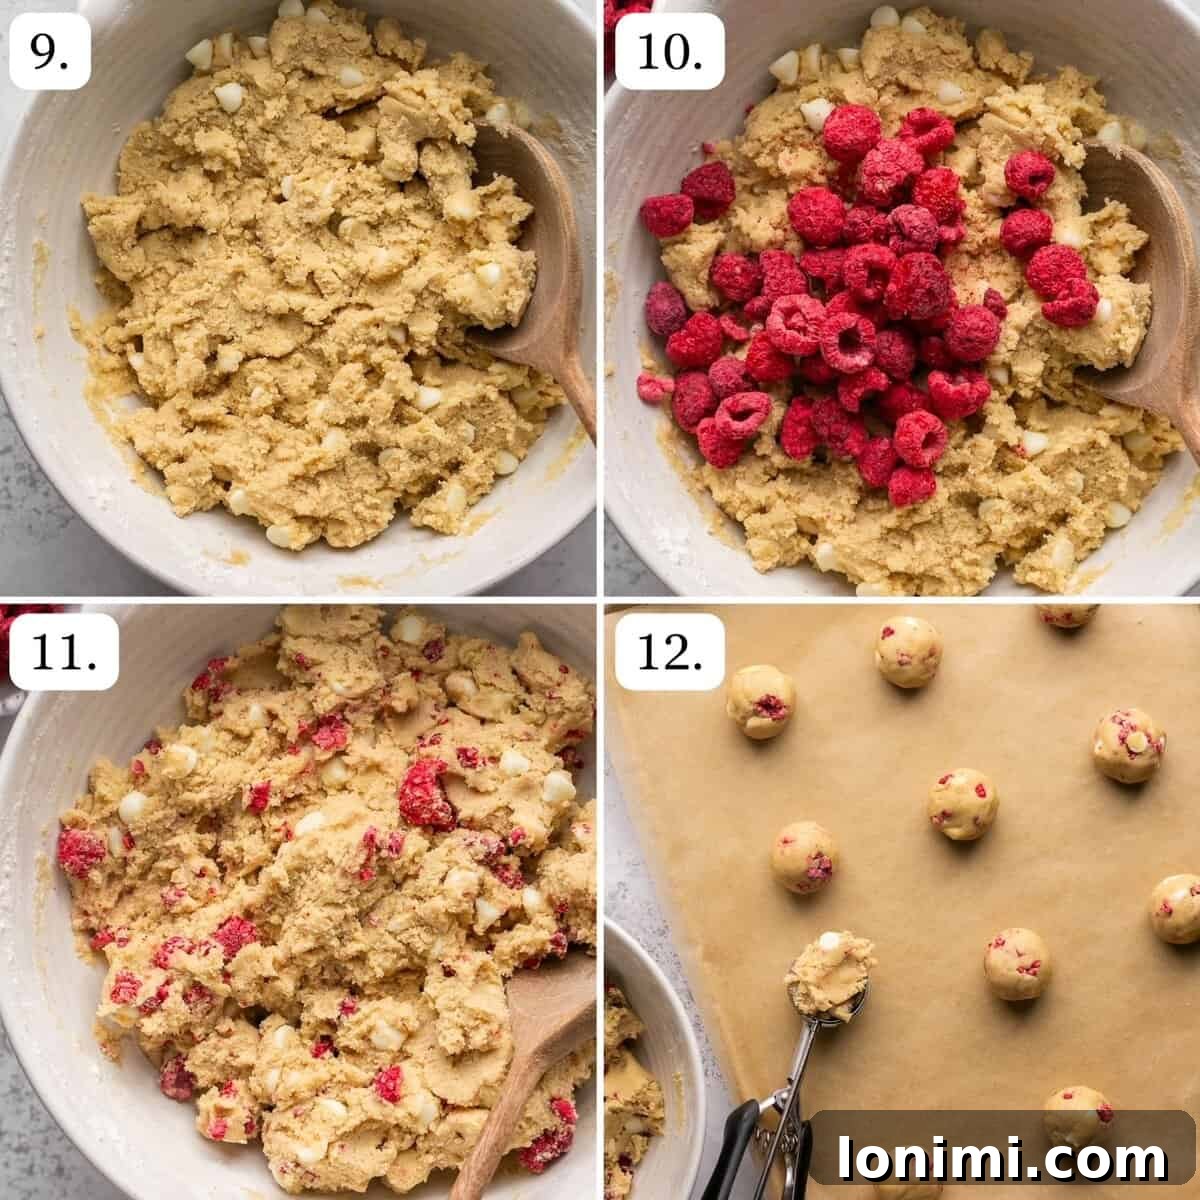
- Incorporate Raspberries: Add the freeze-dried raspberries to the dough. Using a spatula, gently fold them in by hand. It’s perfectly fine if some of the raspberries break into smaller pieces as you fold; this will help distribute their lovely tangy flavor even more throughout your delicious cookies.
- Chill the Dough: This is a crucial step for achieving soft, chewy cookies and preventing them from spreading excessively during baking. Cover the bowl tightly with plastic wrap and refrigerate the dough for at least 30 minutes. If you have more time, chilling for up to 2 hours can yield an even deeper flavor and chewier texture. Skipping this step may result in flatter, harder cookies, though they will still be tasty.
Baking & Finishing
- Scoop & Place: Once your cookie dough has been sufficiently chilled, use a 1.5 tablespoon cookie scoop to portion out the dough. Roll each portion gently into smooth balls with your hands. Place the cookie dough balls 1-2 inches apart on your parchment-lined baking sheets to allow for proper air circulation and spreading during baking. This recipe typically yields approximately 24 delightful cookies.
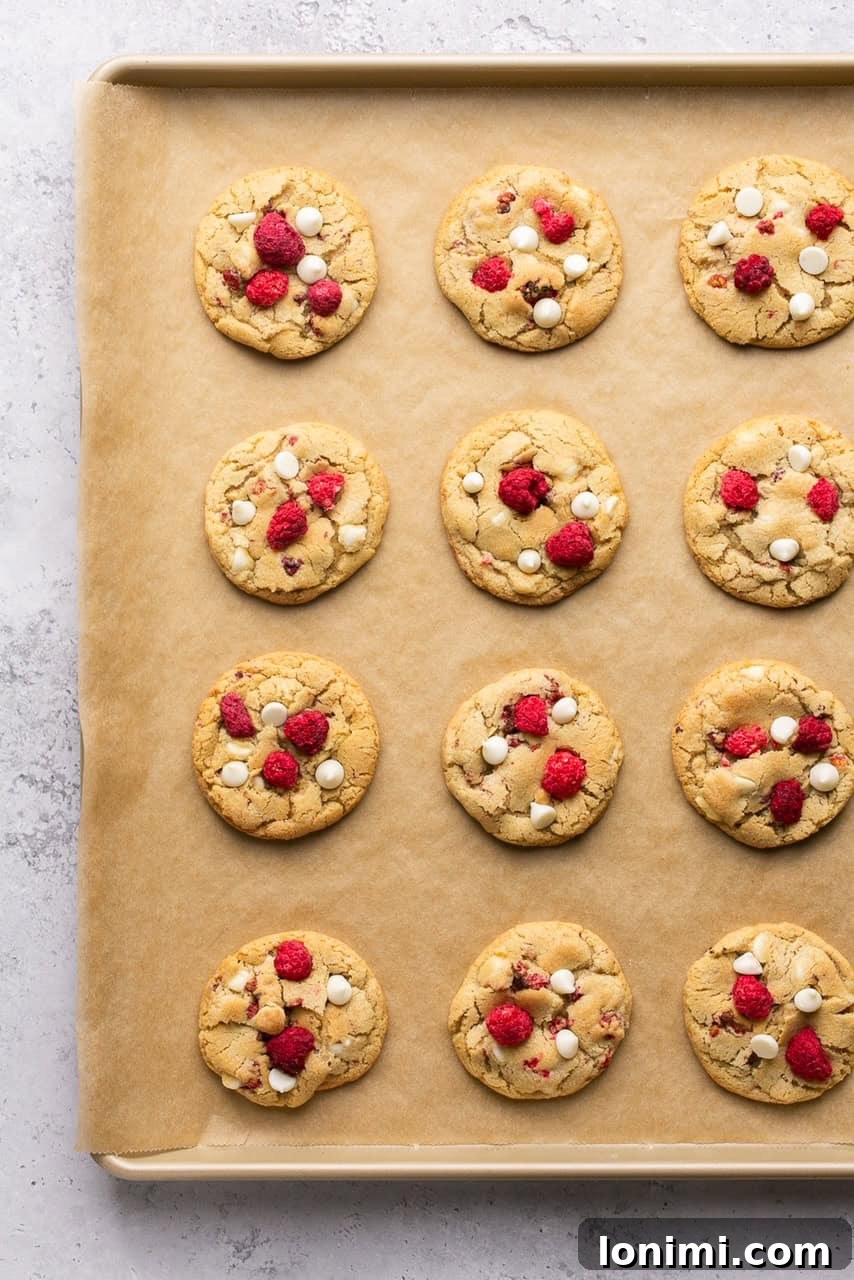
- Bake to Perfection: Carefully transfer the baking sheets to your preheated oven. Bake for 10-12 minutes. The key is to look for edges that are just starting to turn golden brown, while the centers still appear slightly soft and gooey. This indicates a perfect, chewy interior. Be careful not to overbake, as this can lead to dry and crumbly cookies.
- Cooling Process: Once baked, remove the baking sheets from the oven. Allow the cookies to cool on the baking sheets for about 5 minutes. This crucial resting period allows them to set up and firm up slightly without breaking. After 5 minutes, carefully transfer the cookies to a wire cooling rack to cool completely.
- Garnish & Enjoy: For an extra-pretty, bakery-style finish that enhances their visual appeal, gently press a few additional white chocolate chips and freeze-dried raspberry pieces onto the top of each warm cookie immediately after removing them from the oven. This step makes your cookies look even more irresistible. Serve and enjoy these amazing gluten-free raspberry white chocolate cookies!
Expert Tips, Creative Tricks & Delicious Variations
Take your gluten-free raspberry white chocolate cookies from great to extraordinary with these expert tips, clever tricks, and creative variations:
- The Importance of Chilling the Dough: This step is non-negotiable for achieving perfect, soft, and chewy cookies. Chilling the dough for at least 30 minutes (and up to 2 hours) serves multiple purposes:
- It solidifies the butter, which significantly prevents the cookies from spreading too much in the oven, resulting in thicker, more substantial cookies.
- It allows the gluten-free flours to fully hydrate, leading to a much better, more uniform texture and preventing a gritty mouthfeel.
- Chilling also deepens the flavors, allowing the white chocolate and raspberry notes to meld together beautifully for a more robust and complex cookie.
- Proper Storage for Maintaining Freshness: Once your gluten-free raspberry white chocolate cookies have completely cooled to room temperature, store them in an airtight container. Kept on the counter, they will remain wonderfully soft and delicious for up to 5 days. Storing them correctly prevents them from drying out and maintains their desirable chewy texture.
- Freezing Baked Cookies for Future Enjoyment: These cookies are excellent candidates for freezing, making them perfect for meal prep or unexpected cravings! To freeze, first allow the baked cookies to cool completely. Then, arrange them in a single layer on a baking sheet and freeze until solid (this usually takes about 1-2 hours). Once frozen, transfer the solid cookies to an airtight freezer-safe container or a heavy-duty freezer bag. They will maintain their quality for up to 6 months. To enjoy, simply thaw them at room temperature, or gently warm them in the microwave for a truly fresh-baked experience.
- Additional Mix-ins for Custom Flavors: Don’t hesitate to get creative and customize your raspberry white chocolate cookies with other delicious additions:
- Nuts: Macadamia nuts are a classic pairing with white chocolate and add a delightful crunch. Almonds or pistachios would also be fantastic choices, offering a different nutty flavor profile.
- Coconut: Shredded coconut (sweetened or unsweetened) adds a wonderful tropical note and an extra layer of chewy texture that complements the other flavors beautifully.
- Other Berries: If you’re looking to explore alternatives to raspberries, freeze-dried strawberries or cranberries work wonderfully and will maintain their beautiful color during baking, offering a similar sweet-tart experience.
- Chocolate Variations: As mentioned earlier, dark chocolate chips or milk chocolate chips can easily replace white chocolate for a different, yet equally delicious, flavor profile. Consider even a mix of different chocolates!
- Pro-Tip for Perfectly Round Cookies: Sometimes, cookies come out of the oven a little misshapen. For a professional, bakery-style finish, use a large round cookie cutter or the rim of a glass that is slightly larger than your cookies. Immediately after removing the baking sheet from the oven, gently place the cookie cutter around each warm cookie and swirl it around. This trick will gently push the edges inward, reshaping them into perfectly round circles before they set.
Frequently Asked Questions About Raspberry White Chocolate Cookies
Here are some common questions about making and enjoying these gluten-free raspberry white chocolate cookies, along with helpful answers:
Why did my white chocolate and raspberry cookies turn green or blue?
This is a common, albeit surprising, phenomenon, especially when using fresh or frozen raspberries. The natural acidity present in raspberries can react with the alkaline baking soda and baking powder in the cookie dough. This chemical reaction leads to a greenish-blue discoloration in the baked goods. While the color might be unexpected and even a little off-putting, rest assured that the cookies are still perfectly safe and delicious to eat! To entirely avoid this color change, we highly recommend using freeze-dried raspberries, which maintain their vibrant color during the baking process.
Do white chocolate and raspberries really go well together?
Absolutely, 100%! This is a classic and beloved flavor combination for a very good reason. The rich, creamy sweetness of white chocolate provides a delightful and harmonious contrast to the bright, tangy burst of raspberries. Together, they create a beautifully balanced and incredibly satisfying flavor profile that elevates these gluten-free cookies into something truly exceptional and irresistible.
Are these gluten-free cookies nut-free?
Yes, this specific recipe, as written, is inherently nut-free. This makes it a fantastic option for individuals with nut allergies or sensitivities. However, it is always crucial to double-check the labels of all your individual ingredients, especially white chocolate chips and your chosen gluten-free flour blend, to ensure they are certified nut-free or processed in a nut-free facility if severe allergies are a concern.
Can I make these cookies dairy-free?
Yes, absolutely! This recipe is wonderfully adaptable for those following a dairy-free diet. To make them dairy-free, simply substitute the salted butter with your favorite high-quality vegan butter (Miyoko’s Kitchen or Kite Hill are excellent and widely recommended choices). Additionally, ensure you use dairy-free white chocolate chips; brands like Enjoy Life and Pascha offer great dairy-free options. The results will be just as delicious, soft, and satisfying!
What if I don’t have freeze-dried raspberries?
While freeze-dried raspberries are highly recommended for the best color retention and moisture control in these cookies, you can use fresh raspberries if that’s all you have. However, be aware that fresh berries may cause a slight color change (a green or blue tint) in the cookies due to the chemical reaction between their acidity and the leavening agents. They might also make the cookies slightly softer due to their moisture content. If using fresh, gently fold them in and avoid overmixing. We generally advise against using frozen raspberries, as they tend to introduce even more moisture and can lead to a more pronounced color change.
More Irresistible Gluten-Free Dessert Recipes
If you’ve fallen in love with these gluten-free raspberry white chocolate cookies, you’re in for a treat! Explore more delicious and easy-to-make gluten-free desserts from our collection:
- The Best Gluten-Free Chocolate Chipless Cookies
- Easy No-Bake Mini Gluten-Free & Dairy-Free Cheesecakes
- Addictive Gluten-Free Pretzel Christmas Crack
- Simple Gluten-Free Cranberry Orange Scones (Dairy-Free Option)
- Zesty Gluten-Free Key Lime Pie
Love this recipe? We’d be thrilled if you could leave a 5-star 🌟🌟🌟🌟🌟 rating and a review below to help other bakers discover these amazing gluten-free raspberry white chocolate cookies. Don’t forget to follow us on Facebook, Pinterest, or Instagram for more delicious recipes and baking inspiration!
Gluten-Free Raspberry White Chocolate Cookies Recipe Card
Raspberry and White Chocolate Cookies (Gluten Free)
By: Mary Smith
These gluten free Raspberry and White Chocolate Cookies are the perfect mix of sweet and tart flavors. They are soft, chewy, and absolutely irresistible!
Prep Time: 10 mins
Cook Time: 12 mins
Total Time: 22 mins
Yield: 24 cookies
Rating: 5 out of 5 stars (from 2 votes)
Equipment
- Mixing bowls
- Electric mixer
- Cookie sheets
- Cookie scoop
Ingredients
- ¾ cup salted butter, softened (or vegan butter for dairy-free)
- ¾ cup granulated sugar
- ¾ cup light brown sugar, packed
- 1.5 tsp vanilla extract
- 1 egg
- 1 egg yolk
- 2 ¼ cups gluten free 1:1 Measure for Measure flour (King Arthur Baking brand recommended)
- 1 tsp baking soda
- ½ tsp baking powder (gluten-free, aluminum-free)
- ¾ cup white chocolate chips, plus more for topping (dairy-free options available)
- ½ cup freeze-dried raspberries, plus more for topping (see notes regarding fresh/frozen)
Instructions
- Preheat oven to 375°F (190°C). Line 2 baking sheets with parchment paper.
- In a medium bowl, mix the gluten-free flour, baking soda, baking powder, and salt.
- In a separate larger bowl, cream the butter and sugars together until combined. Beat in the egg, egg yolk, and vanilla extract until smooth and creamy.
- Add the dry ingredients into the wet ingredients bowl and mix to combine. You may need to use some elbow grease to fully incorporate the dough.
- Add in the white chocolate chips and stir to combine.
- Add the freeze-dried raspberries to the bowl and gently fold them in. It’s okay if they break into pieces.
- Refrigerate the dough for at least 30 minutes to prevent spreading and enhance chewiness.
- Use a 1.5 tbsp cookie scoop and roll the dough into balls. Place them 1-2 inches apart on your parchment-lined baking sheets. This recipe makes 24 cookies.
- Bake for 10-12 minutes until the edges are just starting to turn golden brown. The centers should still look slightly soft.
- Remove from the oven and let them cool for 5 minutes on the baking sheet, then transfer to a cooling rack to cool completely.
- For a beautiful finish, press some additional white chocolate chips and freeze-dried raspberries into the top of each warm cookie. Enjoy!
Notes
- Raspberries: While delicious, fresh or frozen raspberries may cause the cookies to turn a blue or green color due to a chemical reaction with the baking soda during baking. They will still taste good, but the color may be off-putting. Freeze-dried raspberries are highly recommended for best results.
- Storage: Store baked cookies in an airtight container at room temperature for up to 5 days to maintain freshness.
- Freezing: Baked cookies can be stored in an airtight freezer-safe container or bag for up to 6 months. Thaw at room temperature.
- Additional Mix-ins: Feel free to customize! Macadamia nuts, shredded coconut, or freeze-dried strawberries make wonderful additions to this recipe.
Nutrition Facts (per cookie, estimated)
- Serving: 1 cookie
- Calories: 175 kcal
- Carbohydrates: 25g
- Protein: 2g
- Fat: 8g
- Saturated Fat: 5g
- Polyunsaturated Fat: 0.4g
- Monounsaturated Fat: 2g
- Trans Fat: 0.2g
- Cholesterol: 31mg
- Sodium: 110mg
- Potassium: 31mg
- Fiber: 1g
- Sugar: 17g
- Vitamin A: 200 IU
- Vitamin C: 0.03mg
- Calcium: 33mg
- Iron: 1mg
All nutrition facts are an estimate and automatically calculated. While I fact-check them using My Fitness Pal, please note that they may not always be 100% accurate and depend on ingredients used. For the most accurate grams per serving size, weigh your total batch and divide by the number of servings.
Did you make this?
Rate & comment below, and tag me on Instagram @maryswholelife