
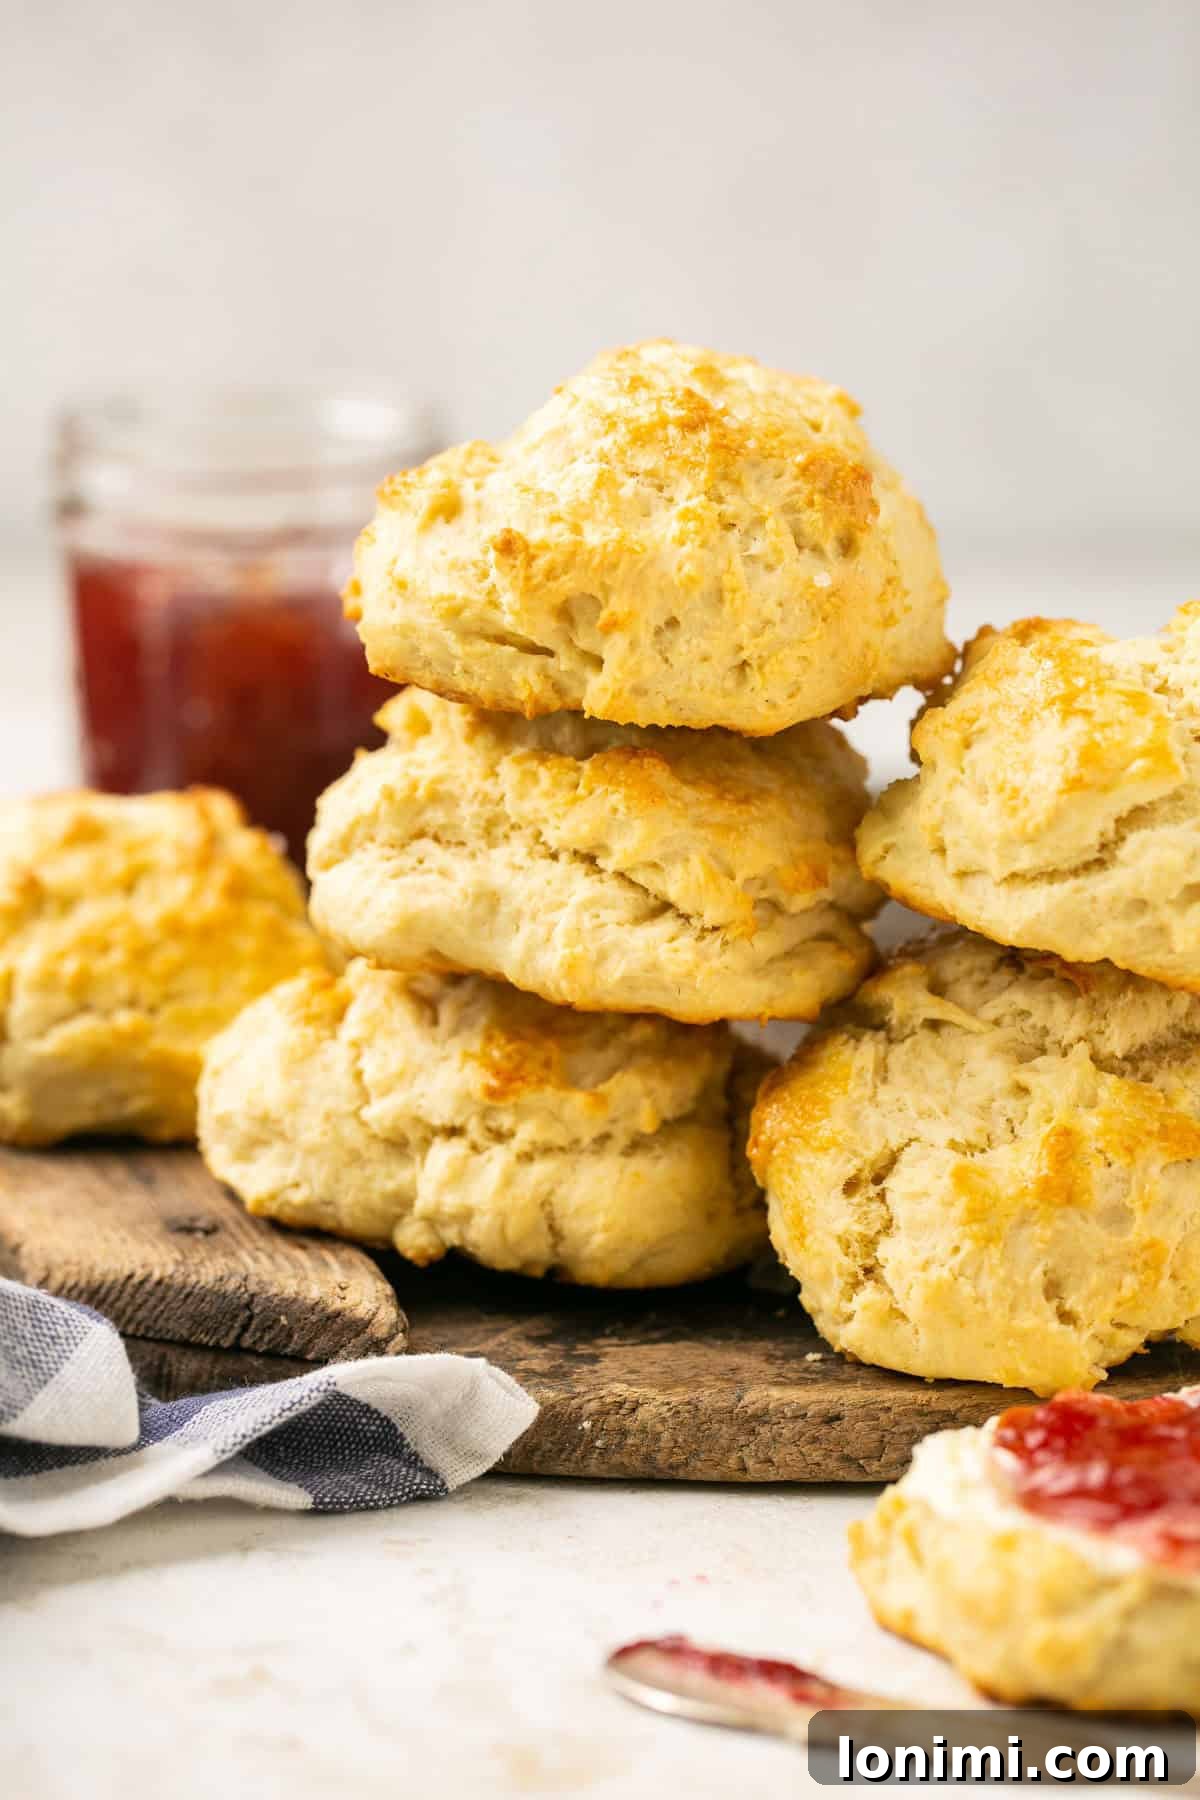
There’s nothing quite like the comforting aroma of freshly baked biscuits, and for those navigating a gluten-free lifestyle, the craving can be intense. These incredibly fluffy gluten-free biscuits redefine comfort food, offering a tender, soft interior crowned with a beautifully golden, subtly crisp top. They stand proudly alongside any cherished Southern classic, proving that dietary restrictions don’t mean sacrificing flavor or texture. Crafted with a handful of simple, wholesome ingredients and featuring a clever dairy-free buttermilk alternative, these biscuits are the delicious answer to enjoying authentic, satisfying biscuits while adhering to a gluten-free diet.
Whether you dream of a hearty breakfast, a delightful side for your evening meal, or a convenient grab-and-go snack, these versatile gluten-free drop biscuits are truly a game-changer. They pair perfectly with a rich, savory sausage gravy, a warm bowl of soup, or simply adorned with your favorite fruit jam. Beyond their incredible taste and texture, these biscuits are also freezer-friendly, making them an ideal staple for busy families and an excellent option for meal prepping. Get ready to rediscover the joy of homemade biscuits, made accessible and utterly delicious for everyone.
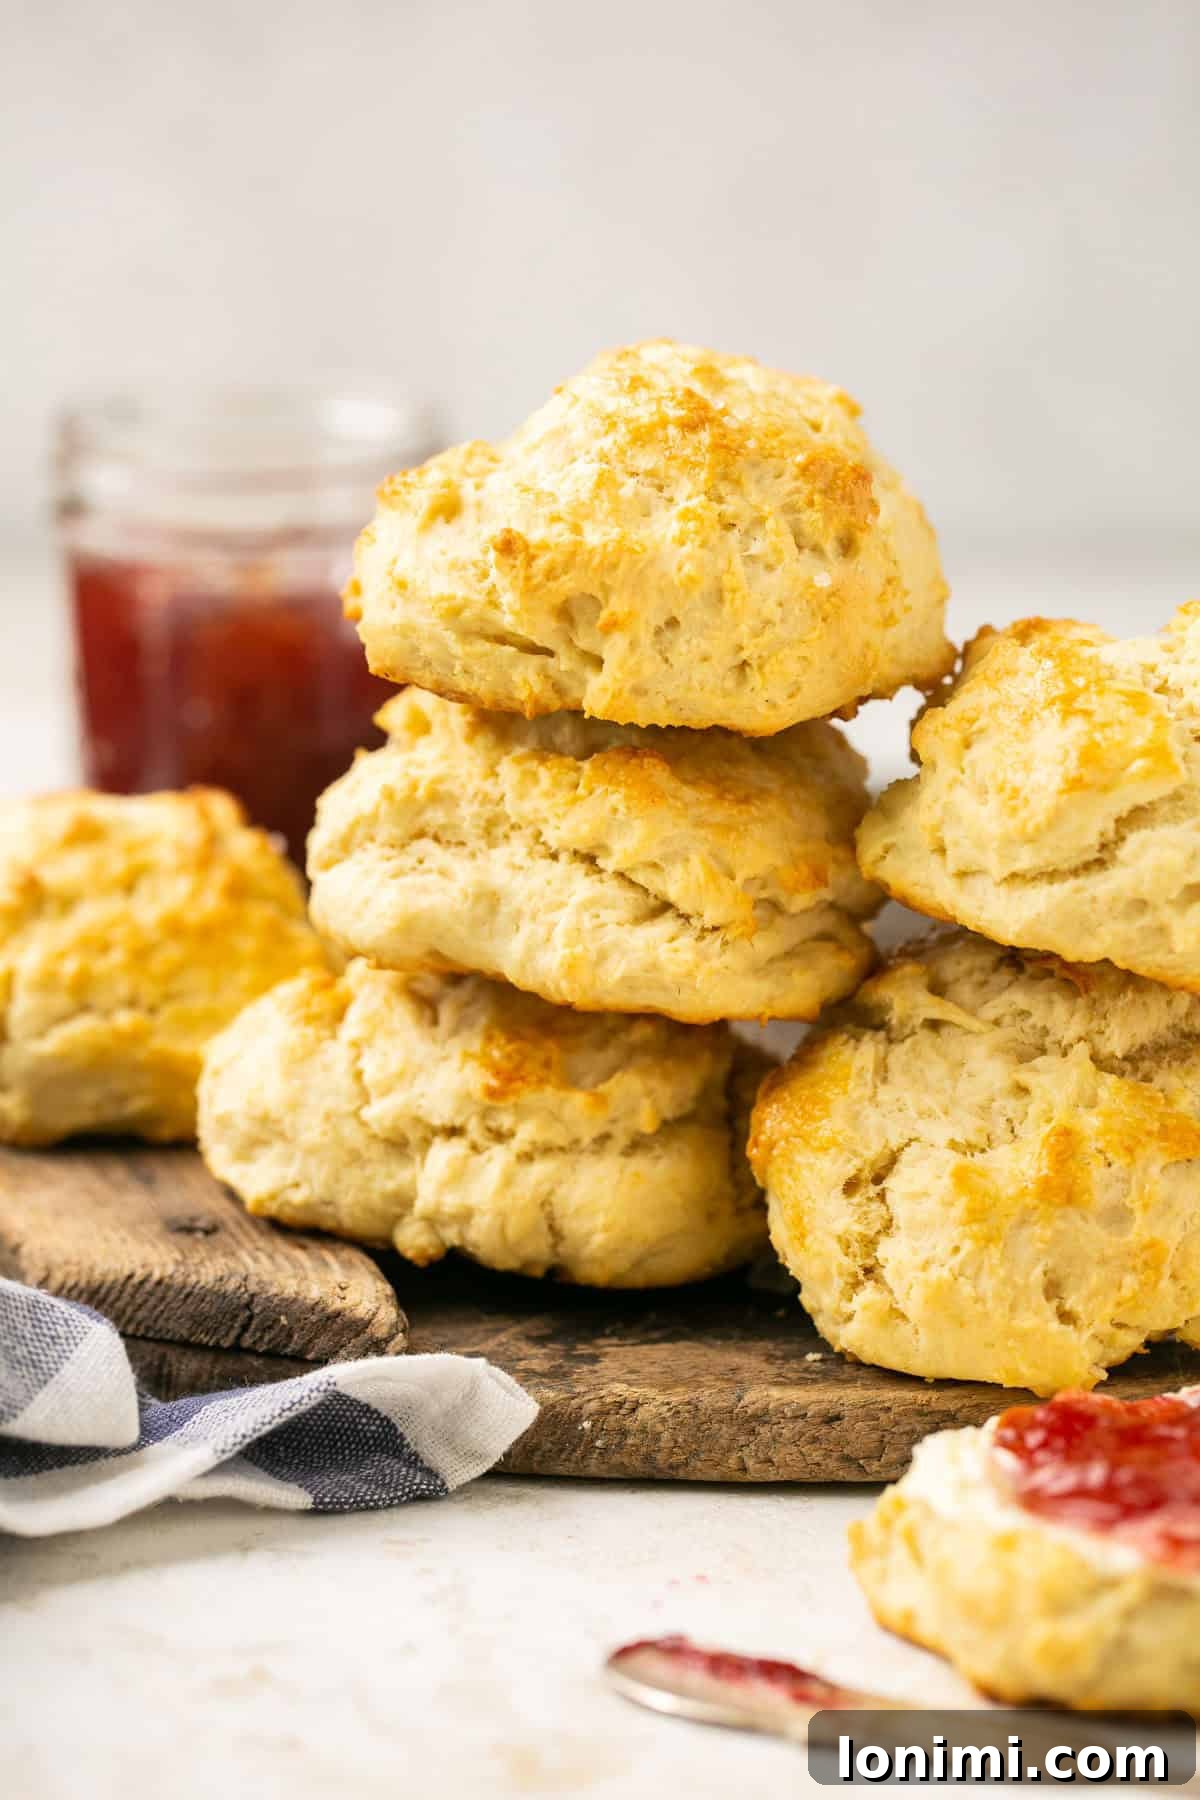
Why You’ll Fall in Love with These Fluffy Gluten-Free Biscuits
For many, biscuits represent a cherished connection to comfort and tradition. After my Celiac diagnosis, the thought of missing out on those buttery, flaky layers that were a staple at family brunches and holiday dinners was truly disheartening. But these gluten-free buttermilk biscuits brought that joy right back into my life, and they can do the same for you! They aren’t just a substitute; they’re a delicious experience that stands on its own.
The secret to their incredible texture and rise lies in a simple yet effective trick: combining almond milk with apple cider vinegar. This mixture flawlessly mimics traditional buttermilk, creating the essential acidity needed for the baking powder to react properly. This single step makes a monumental difference in the final product, helping these biscuits achieve their remarkable lift and maintain a delightfully soft, tender crumb on the inside. It’s an easy dairy-free hack that truly transforms the recipe.
What makes these biscuits even more appealing is their sheer simplicity. You won’t need an arsenal of specialized baking tools or advanced culinary skills. Forget the biscuit cutter, the pastry blender, or intricate folding techniques. All you require is a single bowl, a trusty fork, and a few common pantry ingredients. The dough comes together effortlessly and quickly, making this a perfect recipe for both novice and experienced bakers alike. Furthermore, the dough freezes beautifully, offering unparalleled convenience for future cravings.
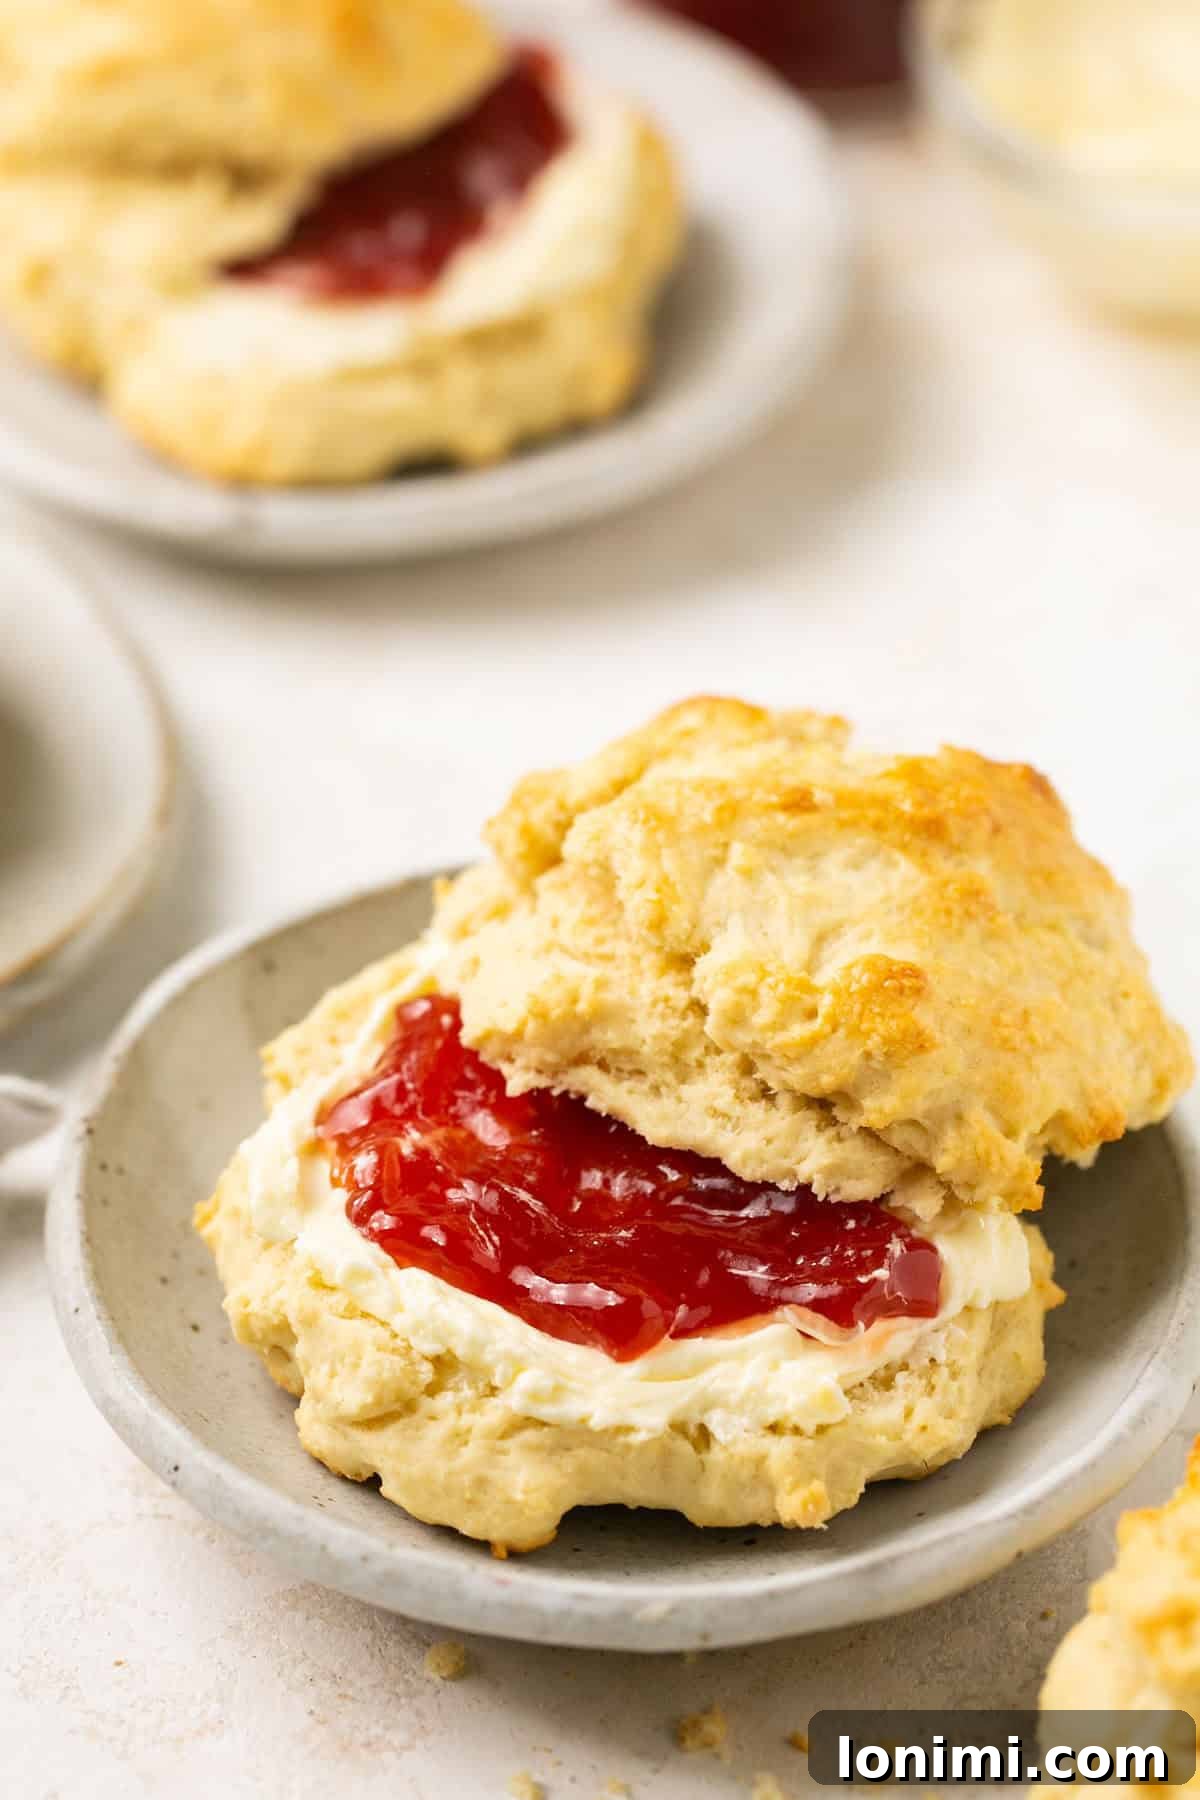
Imagine the possibilities: a batch of warm biscuits ready in minutes for a quick gluten-free breakfast, a hearty addition to last-minute dinners, or a welcome treat for unexpected guests. These versatile biscuits are an ideal companion to a myriad of dishes. Serve them alongside a rich and creamy Keto Sausage Gravy, or use them to soak up the comforting broth of Chicken and Dumplings. They also serve as an excellent gluten-free bread substitute for breakfast sandwiches, open-faced melts, or simply enjoyed on a snack plate with butter and jam. These are truly biscuits that keep on giving!
Essential Ingredients for Your Gluten-Free Biscuits
Creating these delightful gluten-free biscuits starts with a carefully selected list of ingredients. Each component plays a crucial role in achieving the desired fluffy texture, golden crust, and rich flavor. Here’s a closer look at what you’ll need and why:
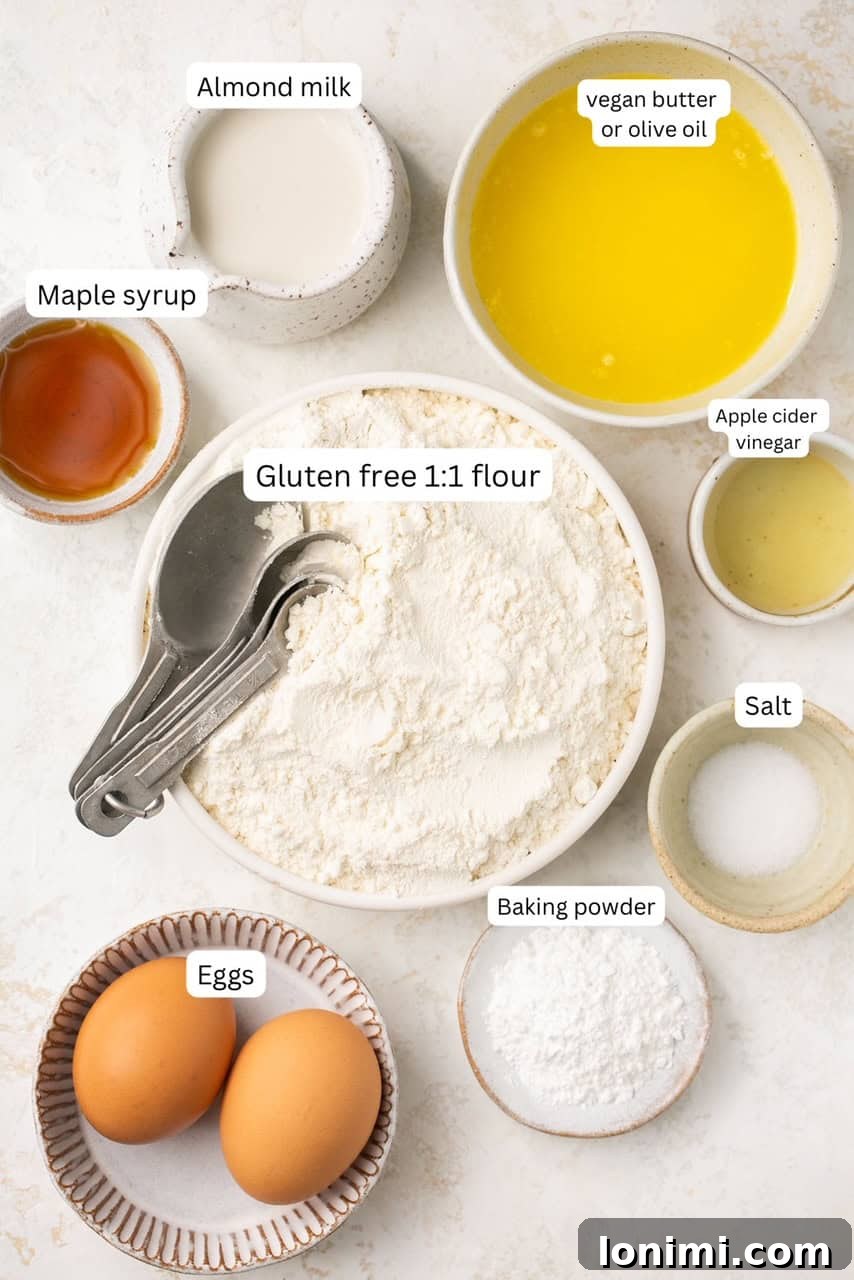
- Gluten-Free 1:1 Flour Blend: This is the cornerstone of our biscuits. I highly recommend using a high-quality 1:1 (cup-for-cup) gluten-free flour blend, such as King Arthur’s Measure for Measure or Cup4Cup. These blends are specifically formulated with a mix of different gluten-free flours and starches (like rice flour, tapioca starch, potato starch, xanthan gum) to closely mimic the texture and behavior of traditional wheat flour. This ensures your dough has the right consistency, rises properly, and yields a tender, not crumbly, biscuit.
- Almond Milk + Apple Cider Vinegar: This dynamic duo is our secret to a fantastic dairy-free buttermilk substitute. The acidity from the apple cider vinegar curdles the almond milk, creating a thick, tangy liquid that reacts beautifully with the baking powder, promoting a magnificent rise and contributing to the biscuits’ signature soft crumb. Let it sit for just 1-2 minutes to allow the “buttermilk” to form before incorporating it into your dry ingredients.
- Eggs: Eggs are vital binders in this gluten-free recipe. They add moisture, structure, and contribute significantly to the overall lift and richness of the biscuits. Using eggs helps create a more cohesive dough and a tender, well-risen final product.
- Ghee or Vegan Butter: For that classic biscuit richness and softness, fat is key. Ghee (clarified butter) offers a delicious buttery flavor without the lactose, making it suitable for many with dairy sensitivities. For a fully dairy-free and vegan option, a high-quality stick vegan butter (like Miyoko’s Kitchen or Earth Balance sticks) works wonderfully. If dairy isn’t a concern for you, feel free to use regular unsalted butter. Ensure it’s melted before adding to the dough.
- Maple Syrup: Just a touch of pure maple syrup plays a crucial role in balancing the flavors. It provides a subtle sweetness that harmonizes with the sea salt, enhancing the overall depth and making the biscuits even more irresistible without making them overly sweet.
- Gluten-Free Baking Powder: This is a critical leavening agent that works in conjunction with our “buttermilk” to give the biscuits their characteristic rise and airy texture. Always ensure your baking powder is fresh, as expired baking powder can lead to flat, dense biscuits.
- Sea Salt: A pinch of fine sea salt is essential for enhancing all the other flavors in the biscuits. It also contributes to that delightful slight crunch on the golden tops, adding another layer of texture and taste.
Step-by-Step Guide: How to Make Fluffy Gluten-Free Drop Biscuits
Making these gluten-free drop biscuits is remarkably straightforward, requiring minimal fuss and yielding maximum deliciousness. Follow these simple steps to create your perfect batch of fluffy, golden biscuits.
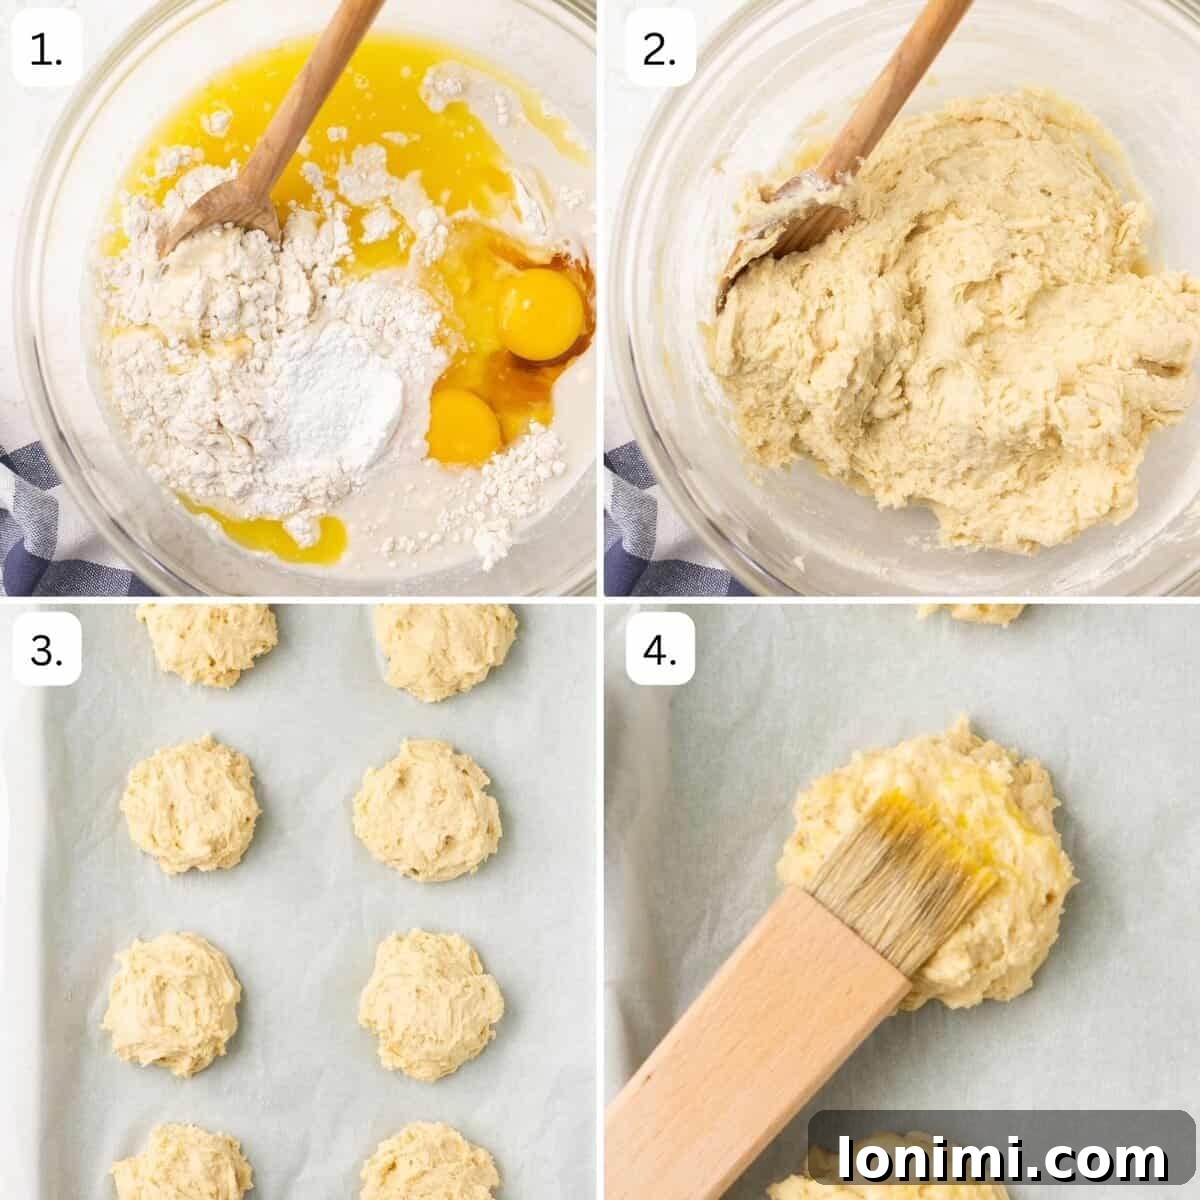
Step 1: Prepare Your Oven and Buttermilk Substitute
Begin by preheating your oven to a hot 450°F (232°C). This high temperature helps the biscuits rise quickly and achieve that beautiful golden crust. Line a baking sheet with aluminum foil or parchment paper for easy cleanup, and lightly coat it with cooking oil spray to prevent sticking. In a small bowl, combine the almond milk and apple cider vinegar. Give it a gentle stir and let it sit for 1-2 minutes. You’ll notice it will curdle slightly – this is exactly what we want, as it creates our dairy-free buttermilk substitute essential for the biscuit’s rise.
Step 2: Combine Wet and Dry Ingredients to Form Dough
In a large mixing bowl, combine all your pre-measured ingredients: the gluten-free 1:1 flour blend, eggs, gluten-free baking powder, maple syrup, sea salt, melted ghee or vegan butter, and your prepared “buttermilk.” Stir everything together with a fork or spatula until a soft, cohesive dough forms. Avoid overmixing, as this can lead to tougher gluten-free biscuits. The dough should be soft enough to handle but firm enough to hold its shape. If the dough feels too wet or sticky, add another tablespoon or two of gluten-free flour, stirring until it reaches the right consistency.
Step 3: Shape and Arrange the Biscuits
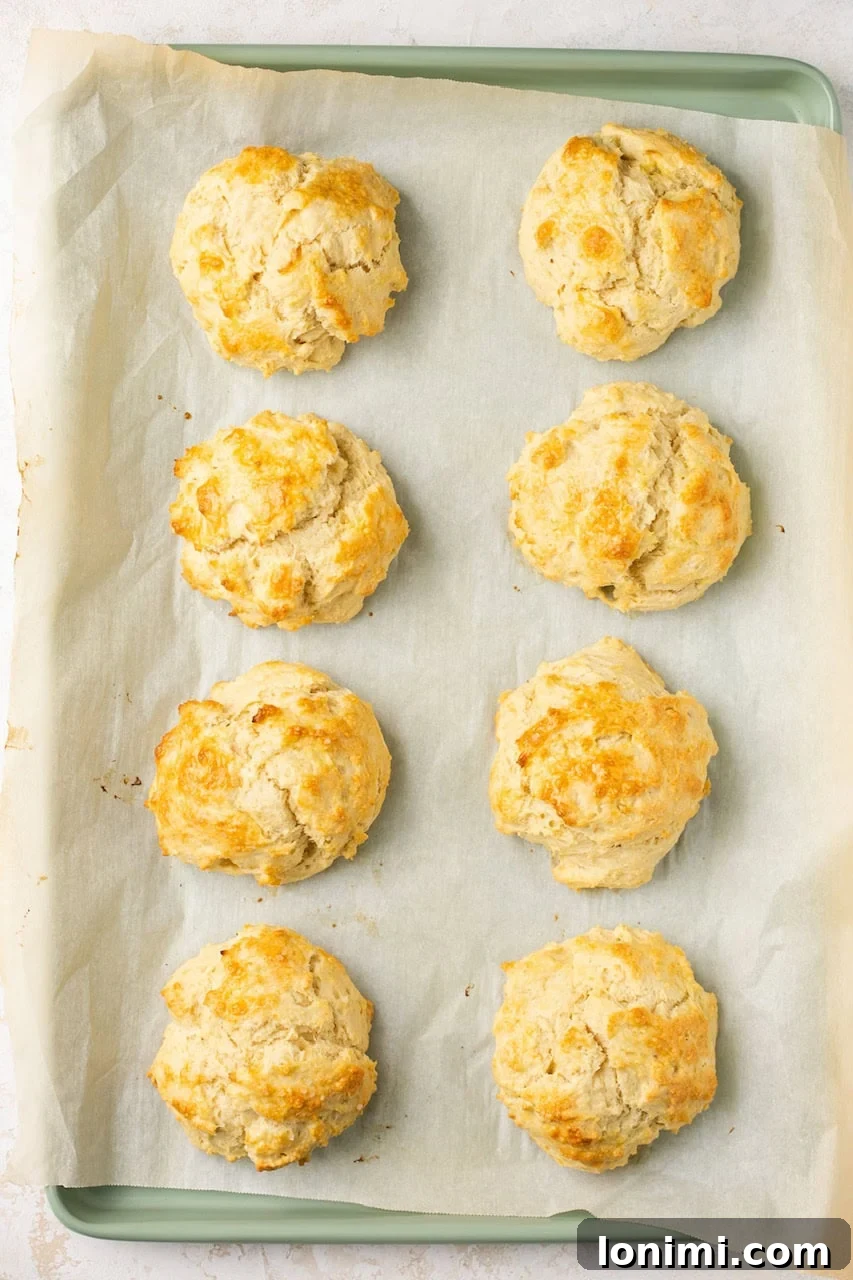
Lightly dust your hands with a bit of gluten-free flour. Divide the dough into 8 equal portions. Roll each portion gently between your palms to form a ball, then slightly flatten it into a biscuit shape, aiming for about 3 inches wide and 1 inch thick. Arrange these shaped biscuits on your prepared baking sheet, ensuring there’s enough space between each one to allow for proper airflow and even baking. This step is crucial for achieving an even cook and consistent texture.
Step 4: Apply Egg Wash and Sea Salt Topping
In a small bowl, whisk the extra egg vigorously until it’s well-beaten and smooth. Using a pastry brush, gently brush the tops of each biscuit with this egg wash. The egg wash will contribute to a beautiful golden-brown color and a slightly glossy finish. Immediately after brushing, sprinkle a pinch of flaky sea salt over the top of each biscuit. This not only enhances the flavor but also adds a lovely visual appeal and a delicate textural crunch to the crust.
Step 5: Bake to Golden Perfection
Carefully transfer the baking sheet to your preheated oven. Bake for 13-15 minutes, or until the biscuits have risen significantly and their tops are a beautiful golden brown. The exact baking time may vary slightly depending on your oven, so keep an eye on them towards the end. Once baked, remove the baking sheet from the oven and let the biscuits cool on the sheet for at least 5 minutes before serving. This cooling time allows them to set and makes them easier to handle, ensuring they hold their shape and internal softness.
Expert Tips for Fluffy, Tender Gluten-Free Biscuits
Achieving truly fluffy and tender gluten-free biscuits is easily within reach with a few key techniques. These tips will help you perfect your baking and ensure crumb-free, delicious results every time:
- Mind the Dough Texture: The consistency of your dough is paramount. It should be soft, pliable, and slightly sticky, but still firm enough to hold its shape without spreading excessively. If your dough feels too wet or runny, add gluten-free flour one tablespoon at a time, mixing gently until the desired consistency is reached. Conversely, if it’s too dry, a tiny splash of almond milk can help. Remember, gluten-free dough tends to be a bit stickier than traditional dough, so embrace the softness!
- Accurate Flour Measurement is Key: Unlike wheat flour, gluten-free flour blends can be dense. To avoid dense biscuits, always spoon your gluten-free flour into your measuring cup and then level it off with a straight edge (the “spoon and level” method). Never scoop directly from the bag, as this can compact the flour and lead to adding too much, resulting in dry, crumbly biscuits.
- Freeze Smart for Future Enjoyment: These biscuits are wonderfully freezer-friendly, offering ultimate convenience. You can freeze them in two ways:
- Baked Biscuits: Allow freshly baked biscuits to cool completely. Wrap them individually in plastic wrap, then place them in an airtight freezer bag. Reheat gently in the microwave (10-15 seconds per biscuit) or a warm oven.
- Unbaked Biscuits: After shaping the dough balls, arrange them on a baking sheet and freeze until solid (about 1-2 hours). Transfer the frozen dough rounds to an airtight freezer bag. When ready to bake, place them directly from frozen onto a prepared baking sheet, add the egg wash, and bake at the same temperature, adding a few extra minutes to the baking time (e.g., 15-18 minutes).
- The Right Flour Makes All the Difference: The quality of your gluten-free flour blend can truly make or break this recipe. Avoid generic or single-ingredient gluten-free flours that aren’t specifically formulated for 1:1 baking, as they can result in gritty, dense, or crumbly textures. Stick to reputable brands like King Arthur Measure for Measure, Cup4Cup, or Bob’s Red Mill 1:1 Baking Flour for the best light and flaky gluten-free baking results.
- Pro Tip: Chill the Dough for Better Height: If your kitchen is particularly warm, or if you find your dough spreading too much during shaping, consider chilling it. Place the mixed dough in the refrigerator for 10-15 minutes before shaping. This helps solidify the fats and relaxes the dough, which can contribute to better height and a more stable structure during baking, leading to even fluffier biscuits.
- Optimal Storage and Reheating: To keep your leftover biscuits tasting fresh, store them in an airtight container at room temperature for up to 3 days. For slightly longer storage, they can be kept in the refrigerator for up to 5 days. To bring back their delicious softness and warmth, reheat gently in the microwave for 10-15 seconds per biscuit, or warm them in a low oven for a few minutes until heated through.
Frequently Asked Questions About Gluten-Free Biscuits
The key to achieving a good rise in gluten-free biscuits lies in a combination of factors. First, use a high-quality 1:1 gluten-free flour blend that contains xanthan gum. Second, ensure your gluten-free baking powder is fresh and active. Third, the “buttermilk” substitute (almond milk + apple cider vinegar) is crucial for activating the baking powder. Finally, avoid overmixing the dough; mix just until combined. The high oven temperature (450°F) also helps create a quick lift.
Absolutely! These biscuits are perfect for freezing. For baked biscuits, allow them to cool completely, then wrap individually and store in an airtight freezer bag for up to 2-3 months. Reheat from frozen in the microwave or oven. For unbaked biscuits, shape the dough rounds and freeze them solid on a baking sheet before transferring to a freezer bag. You can bake them directly from frozen; just add a few extra minutes to the baking time.
You can certainly experiment with making these biscuits egg-free. A flax egg (1 tablespoon ground flaxseed meal mixed with 3 tablespoons water, left to sit for 5 minutes) can often serve as a substitute for one egg. For two eggs, you might try two flax eggs or a commercial egg replacer like Bob’s Red Mill Egg Replacer. Please note that the texture may vary slightly, potentially being a bit denser. The egg wash on top is entirely optional and can be omitted for an egg-free version; the biscuits will still brown nicely.
For achieving truly light and flaky gluten-free biscuits, I consistently recommend 1:1 gluten-free flour blends. Brands like King Arthur Measure for Measure, Cup4Cup, or Bob’s Red Mill 1:1 Baking Flour are excellent choices. These blends contain the right combination of flours and starches, along with binders like xanthan gum, to deliver the best texture and rise for gluten-free baked goods. Avoid using single-grain gluten-free flours (like just almond or coconut flour) unless specified by a recipe designed for them.
Yes, with a small adjustment, these biscuits can be made vegan! The recipe already calls for almond milk and a dairy-free butter alternative (ghee or vegan butter). To make them fully vegan, you would need to use an egg replacer for the two eggs in the dough and omit the egg wash. As mentioned in the egg-free FAQ, a flax egg or commercial egg replacer can work, though texture may vary slightly.
Absolutely! These biscuits are a fantastic canvas for various additions. For savory options, consider adding grated cheese (dairy or dairy-free), chopped fresh herbs (like chives or rosemary), or a pinch of garlic powder to the dough. For a sweeter treat, you could gently fold in dried cranberries, mini chocolate chips, or a hint of cinnamon before shaping. Just be careful not to overmix the dough once the additions are in.
These fluffy gluten-free biscuits have quickly become one of my go-to recipes, whether I need a quick and satisfying snack for busy mornings or a comforting side dish for holiday gatherings. Their versatility also means they double well if you’re feeding a crowd or simply want to bake a larger batch to stock your freezer with delicious extras. Enjoy the freedom of indulging in truly delightful homemade biscuits again!
More Delicious Gluten-Free Breakfast Recipes to Try
If you’re looking for more ways to make your mornings or any meal gluten-free and delicious, explore these other fantastic recipes:
- Gluten-Free Protein Pancakes: Start your day with a protein-packed and fluffy stack.
- Gluten-Free Breakfast Casserole: A hearty, flavorful dish perfect for feeding a family or for meal prep.
- Gluten-Free Apple Cinnamon Muffins: Deliciously moist muffins bursting with apple and cinnamon flavor.
- Gluten-Free Blueberry Muffins: A classic favorite, made easy and gluten-free.
Love this recipe? Please leave a 5-star 🌟🌟🌟🌟🌟 rating in the recipe card below & a review in the comment section. Or, follow me on Facebook, Pinterest or Instagram today!

Fluffy Gluten Free Biscuits (Dairy-Free Option!)
Video
Equipment
- baking sheet
Ingredients
- 2 cups gluten free 1:1 flour, I like King Arthur brand
- 2 eggs, + 1 extra for egg wash at the end
- 3.5 tsp gluten free baking powder
- 1 tbsp maple syrup
- ¾ tsp sea salt
- ½ cup melted ghee or vegan butter, can use regular grass-fed butter if not dairy free
- ¾ cup almond milk, or dairy free milk of choice
- 1 tsp apple cider vinegar
Instructions
- Preheat oven to 450°F (232°C) and line a baking sheet with foil or parchment paper. Spray it lightly with cooking oil.
- In a small bowl, mix the almond milk and apple cider vinegar together. Let it sit for a minute to form the “buttermilk”.
- In a large bowl, combine all the ingredients, including your prepared “buttermilk”. Stir until a soft dough forms. If the dough appears too wet or runny, add an additional ¼ cup of 1:1 gluten-free flour, stirring until it reaches the correct consistency.
- Lightly flour your hands and use them to form 8 even balls of dough.
- Gently press down on each dough ball to form a biscuit shape, aiming for about 3 inches wide and 1 inch thick. Place them on the prepared baking sheet, ensuring they are spaced out evenly.
- Whisk the remaining egg in a small dish to create an egg wash. Use a pastry brush to brush some of the egg wash onto the top of each biscuit. Sprinkle flaky sea salt on top for added flavor and texture.
- Bake for 13-15 minutes, or until the biscuits have risen and are beautifully golden brown on top. Let them cool for at least 5 minutes on the baking sheet before serving to allow them to set.
Notes
Nutrition
All nutrition facts are an estimate and automatically calculated. While I fact check them using My Fitness Pal, please note that they may not always be 100% accurate and depend on ingredients used. For the most accurate grams per serving size, it’s recommended to weigh your total yield and divide by the number of servings.