
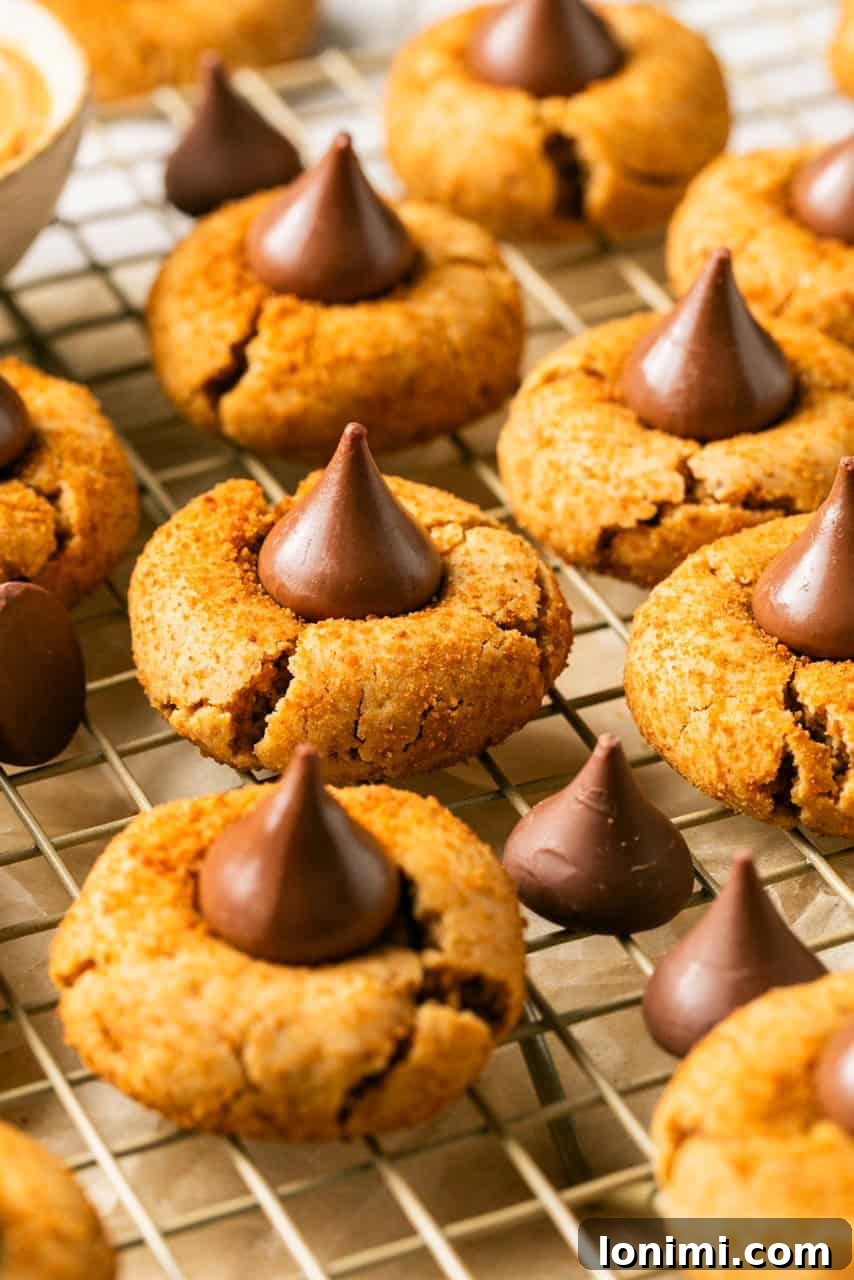
Welcome to the ultimate recipe for Gluten-Free Peanut Butter Blossoms! These delightful cookies are a healthier reimagining of the beloved holiday classic, famously crowned with a Hershey’s Kiss. Crafted with care, they are entirely gluten-free, free from refined sugars, and can be easily adapted to be dairy-free, ensuring everyone can enjoy these sweet treats. They’re incredibly simple to prepare, making them perfect for festive baking or any time you crave a comforting, guilt-free indulgence. Get ready for a batch of soft, chewy, and utterly irresistible cookies that will melt in your mouth and quickly become a family favorite!
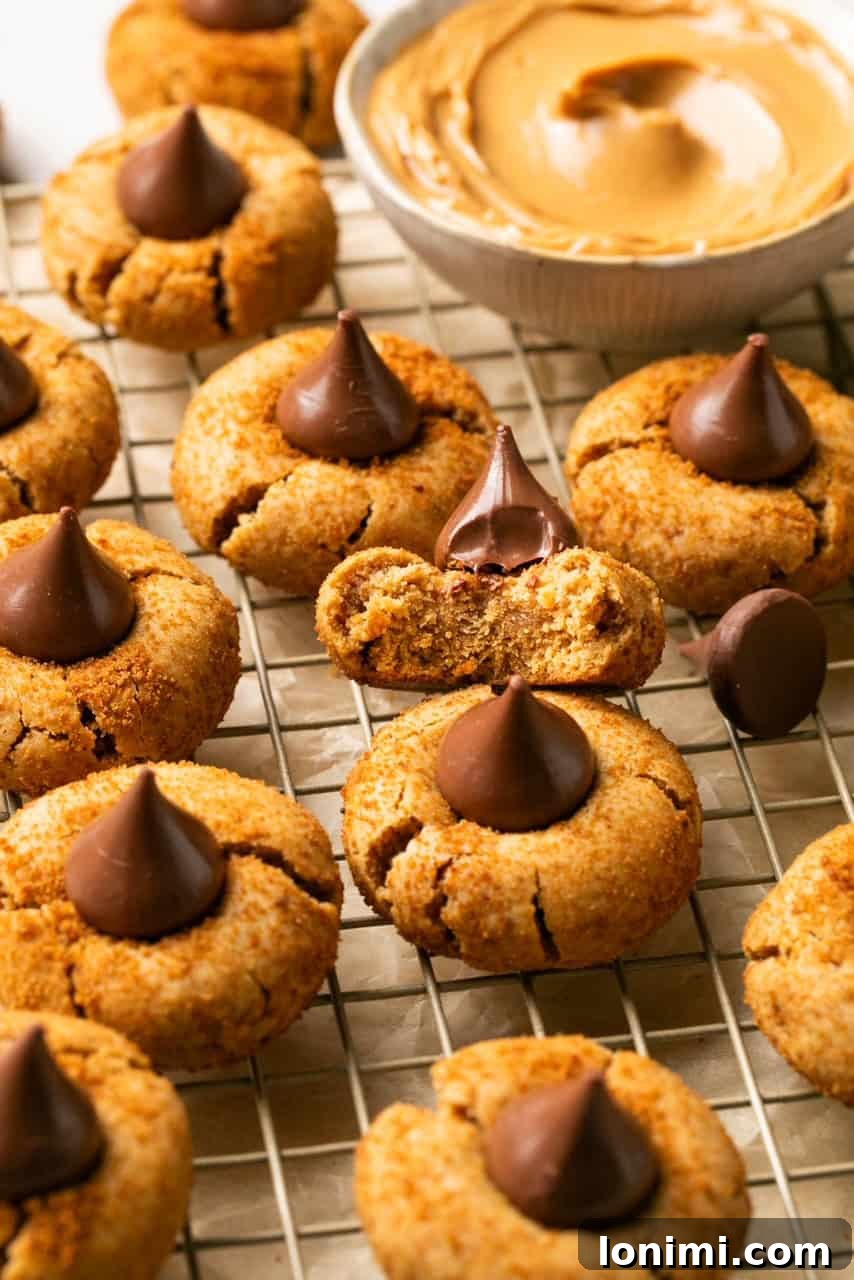
Why These Gluten-Free Peanut Butter Blossoms Are a Must-Try
For many, Peanut Butter Blossoms evoke cherished childhood memories, especially during the festive holiday season. I vividly recall baking these iconic cookies with my mom, their irresistible aroma filling our home. If I had to pick one Christmas cookie to savor, these would undoubtedly be it! Recognizing the need for a healthier, more inclusive version, I embarked on a mission to create a gluten-free and refined-sugar-free alternative that retains all the nostalgic charm and deliciousness of the original. Among the countless peanut butter blossom cookie recipes available, I’m confident this one will quickly earn a spot as your new go-to. Each bite delivers a perfect balance of rich peanut butter flavor and a decadent chocolate surprise that’s simply unmatched.
My recipe thoughtfully replaces traditional ingredients with wholesome alternatives to make these cookies accessible to more people without sacrificing taste or texture. Instead of conventional wheat flour, we utilize a premium gluten-free 1:1 flour blend, ensuring a perfect texture that mimics classic cookies. Regular butter is swapped for a high-quality vegan butter, making these cookies dairy-free friendly. For sweetness, we turn to natural options like nutrient-rich coconut sugar and pure maple syrup, eliminating refined sugars while still achieving that quintessential sweet flavor. If you’re aiming for a completely paleo or dairy-free chocolate experience, feel free to substitute standard Hershey’s Kisses with chopped-up dairy-free chocolate or even melt vegan dark chocolate into kiss molds for a homemade touch. All these simple, health-conscious ingredients are readily available at most local grocery stores, and you might even find several of them already stocked in your pantry!
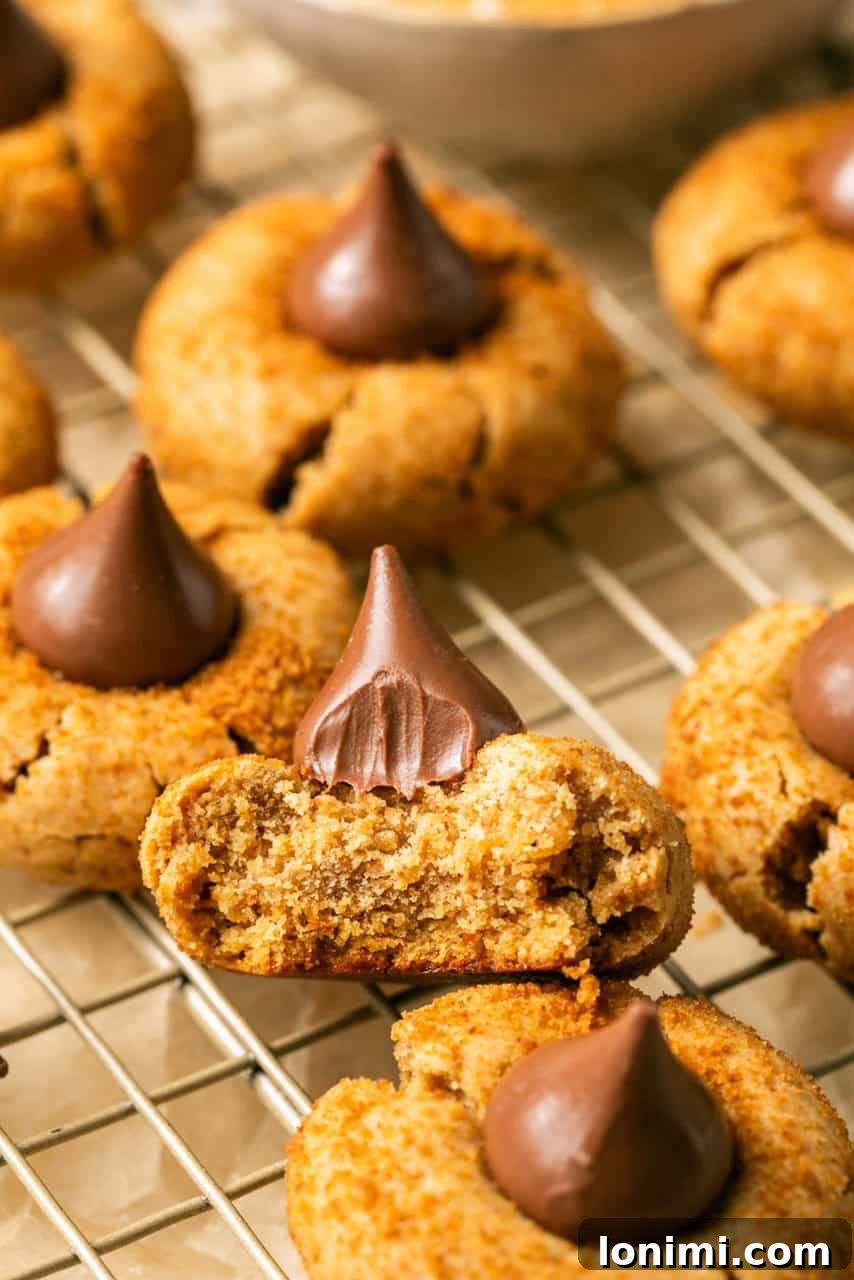
The magic begins with a simple, creamy peanut butter cookie dough base, which is then rolled in a delicate sugar coating for that signature sparkle and a hint of extra sweetness. Once baked to golden perfection, a soft chocolate kiss is gently pressed into the center of each warm cookie, creating a beautiful crinkled effect and a luscious, melty surprise within. The resulting treats are wonderfully soft, delightfully chewy, and boast a melt-in-your-mouth chocolate center that makes them truly the *best*. They are perfect for holiday platters, bake sales, or simply enjoying with a warm cup of coffee or tea.
If you’re a devoted peanut butter enthusiast and looking for more delightful ways to enjoy this classic flavor, be sure to explore my other fantastic recipes! You’ll love my Chocolate Peanut Butter Rice Krispies for a no-bake delight, these timeless Classic Gluten-Free Peanut Butter Cookies, or the festive Christmas Puppy Chow, all designed to satisfy your peanut butter cravings with a wholesome twist.
Essential Ingredient Notes for Perfect Blossoms
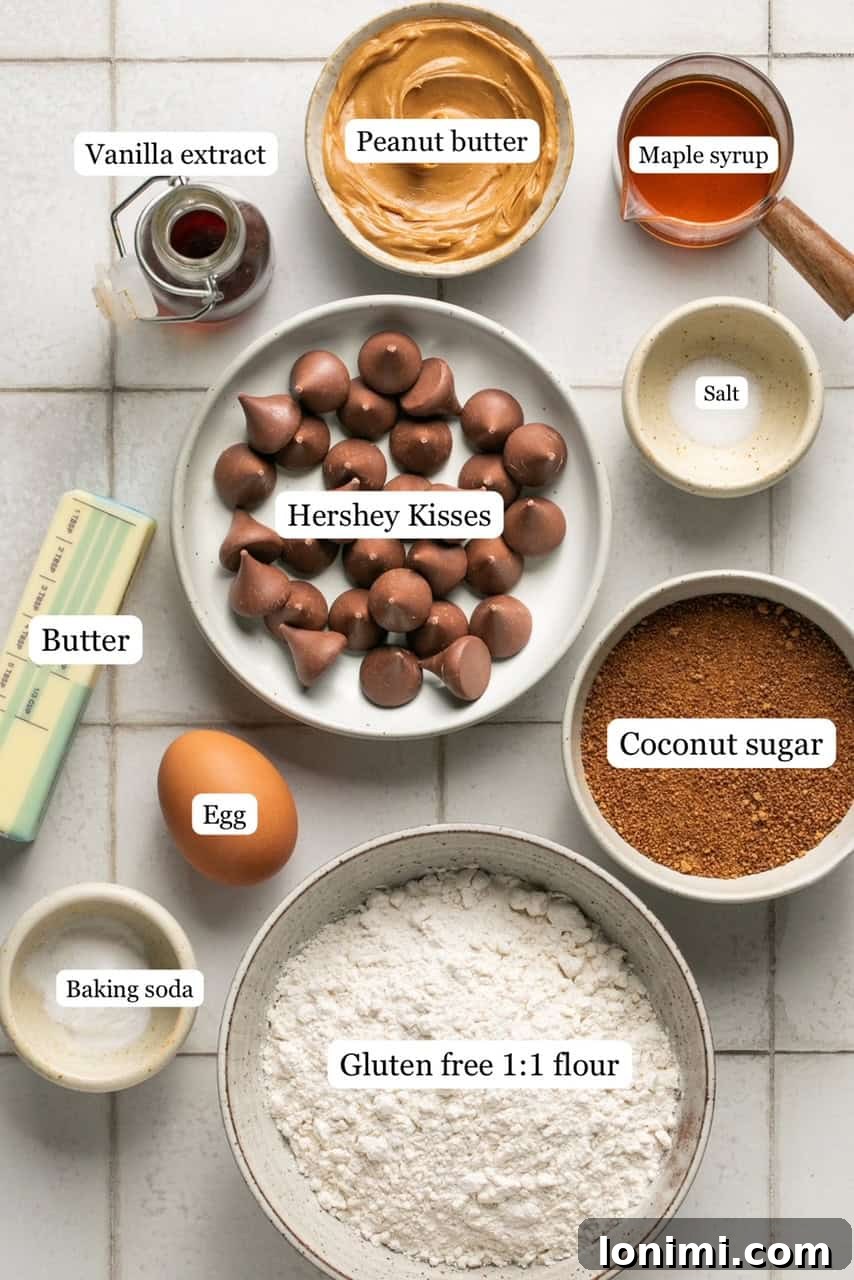
Crafting the perfect batch of Gluten-Free Peanut Butter Blossoms starts with understanding the role of each ingredient. Here’s a closer look at what you’ll need and some helpful tips for the best results:
- Gluten-Free Flour Blend: Choosing the right gluten-free flour is crucial for achieving the ideal cookie texture. I highly recommend a high-quality 1:1 gluten-free flour blend, such as King Arthur Baking Measure For Measure Flour. These blends are specifically formulated to replace regular wheat flour cup-for-cup in most recipes, simplifying the baking process. Brands like Cup4Cup are also excellent choices. Ensure your blend contains xanthan gum, or add 1/2 teaspoon per cup of flour if it doesn’t, to help with structure and elasticity.
- Baking Soda: This leavening agent reacts with acidic ingredients in the dough to create carbon dioxide gas, which helps the cookies rise slightly and contributes to their soft, chewy texture. Don’t skip it!
- Salt: A small amount of salt is essential to balance the sweetness and enhance the overall flavor of the peanut butter and chocolate. I prefer fine sea salt for its clean taste.
- Vegan Butter: For a dairy-free option that still delivers rich flavor and tender crumb, vegan butter is key. My top recommendations are Miyoko’s Kitchen Cultured Vegan Butter or Kite Hill Plant-Based Butter. Ensure your vegan butter is softened to room temperature for easier creaming with the peanut butter and sugars, but not melted, as this can alter the dough’s consistency.
- Creamy Peanut Butter (or Almond Butter): The star of the show! You’ll want a creamy, non-runny brand of natural peanut butter. Look for “no-stir” varieties or those with minimal oil separation, as overly oily peanut butter can make your dough difficult to handle and lead to greasy cookies. Brands like Justin’s, Skippy Natural, or Wild Friends are great options. If you prefer to make these cookies paleo, or simply enjoy the flavor, creamy almond butter can be used as a direct substitute. Ensure whichever nut butter you choose is smooth and well-mixed before adding to the dough.
- Coconut Sugar: A fantastic unrefined alternative to brown sugar, coconut sugar offers a caramel-like flavor and a wonderful moistness to the cookies. It measures 1:1 with brown sugar, making it an easy swap. You can also use regular brown sugar if that’s what you have on hand. Don’t forget to reserve some extra coconut sugar (or granulated sugar) for rolling the cookie balls, which gives them a beautiful crackled appearance and a delightful sugary crust.
- Maple Syrup: Use 100% pure maple syrup, not pancake syrup. Maple syrup adds another layer of natural sweetness and helps to keep the cookies moist and chewy. Its distinct flavor complements the peanut butter beautifully.
- Egg: The egg acts as a binder, holding the ingredients together and providing structure to the cookies. It also contributes to moisture and richness. For a vegan version, see the “Expert Tips” section for flax egg substitution.
- Vanilla Extract: A touch of pure vanilla extract enhances all the other flavors, adding warmth and depth to the cookie dough. It’s a small but mighty ingredient!
- Hershey’s Kisses: The iconic topping! While Hershey’s Kisses do specify they are gluten-free on the package (I often use the Special Dark variety for a richer chocolate flavor), it’s important to note they contain both soy and dairy. If you are aiming for a fully dairy-free or paleo recipe, substitute these with chunks of your favorite vegan or paleo-friendly chocolate bar. You could even use dairy-free chocolate chips or melt a bar and pour it into small molds for a “kiss” shape.
Easy Step-by-Step Instructions
Baking these Gluten-Free Peanut Butter Blossoms is a straightforward and enjoyable process. Follow these detailed steps to achieve perfect, mouth-watering cookies every time:
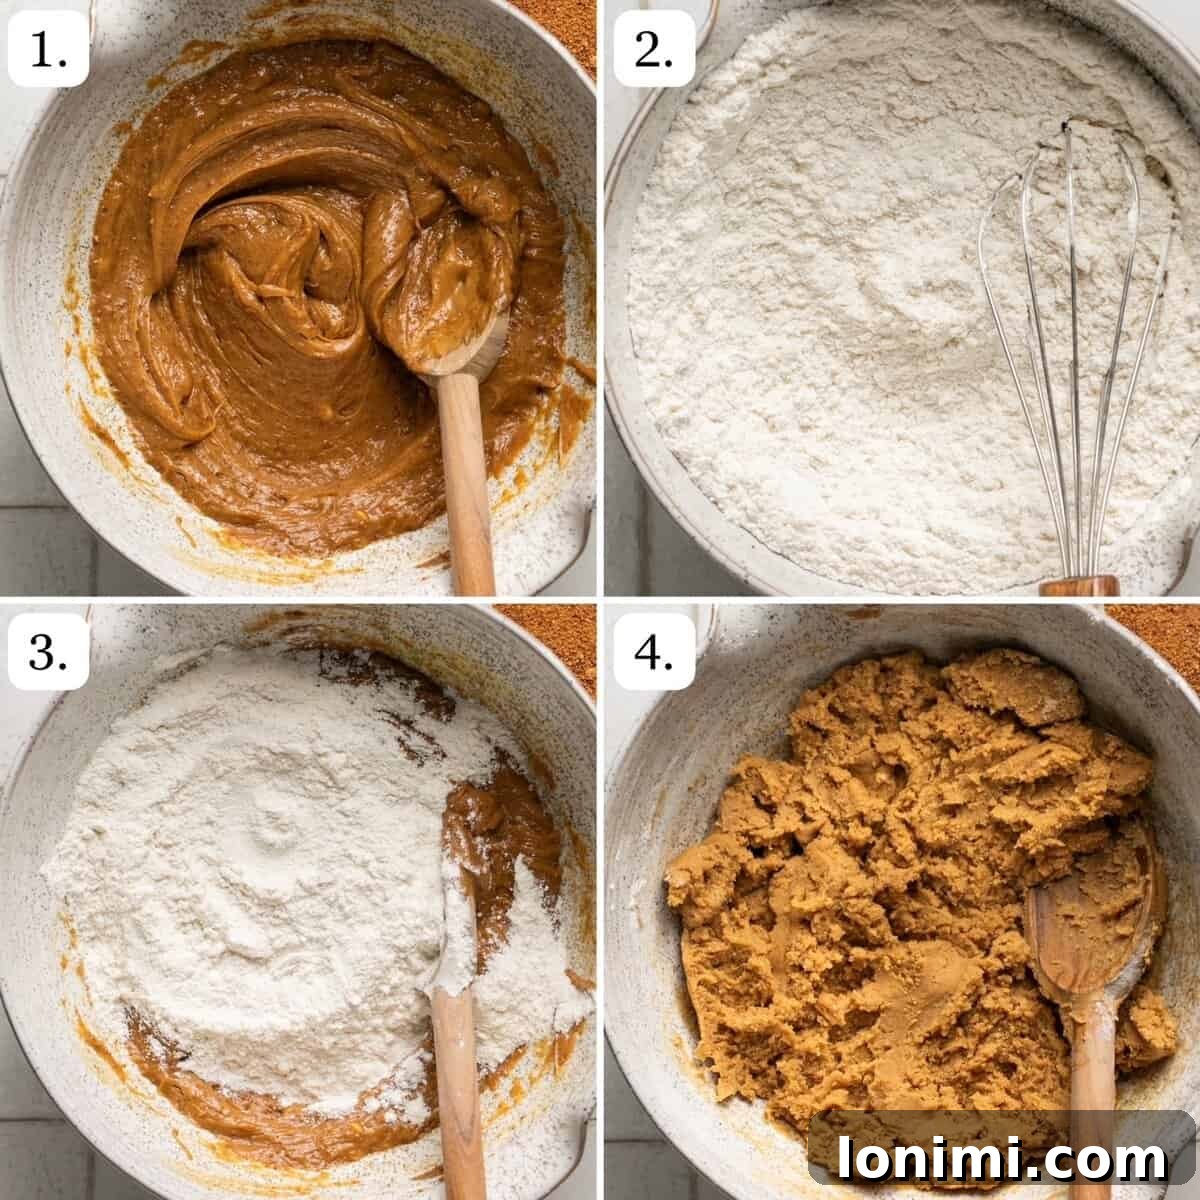
Step 1: Cream the Wet Ingredients
Begin by combining the softened vegan butter, creamy peanut butter (or almond butter), the egg, coconut sugar, maple syrup, and vanilla extract in a large mixing bowl. Using a sturdy fork or an electric mixer on medium speed, beat these ingredients together until the mixture is beautifully smooth and creamy. Ensure the vegan butter is truly softened (but not melted) to incorporate air, which results in a lighter cookie texture. If it’s a bit firm, you can microwave it for about 10 seconds to soften, but be careful not to melt it completely.
Step 2: Whisk the Dry Ingredients
In a separate, medium-sized bowl, thoroughly whisk together your dry ingredients: the gluten-free flour blend, baking soda, and salt. Whisking ensures these ingredients are evenly distributed, which is essential for uniform baking and consistent flavor throughout your cookies.
Step 3: Combine Wet and Dry
Gradually add the whisked dry ingredients into the bowl containing your wet ingredients. It’s best to add them in two or three batches, mixing lightly after each addition, to prevent a cloud of flour and ensure everything combines smoothly.
Step 4: Mix to Form Dough
Continue mixing until all the ingredients are just combined and a cohesive cookie dough forms. Be careful not to overmix, especially with gluten-free flours, as this can sometimes lead to a tougher texture. The dough should be soft, pliable, and easy to roll. At this point, your kitchen will start smelling wonderfully of peanut butter!
Step 5: Roll and Coat the Dough Balls
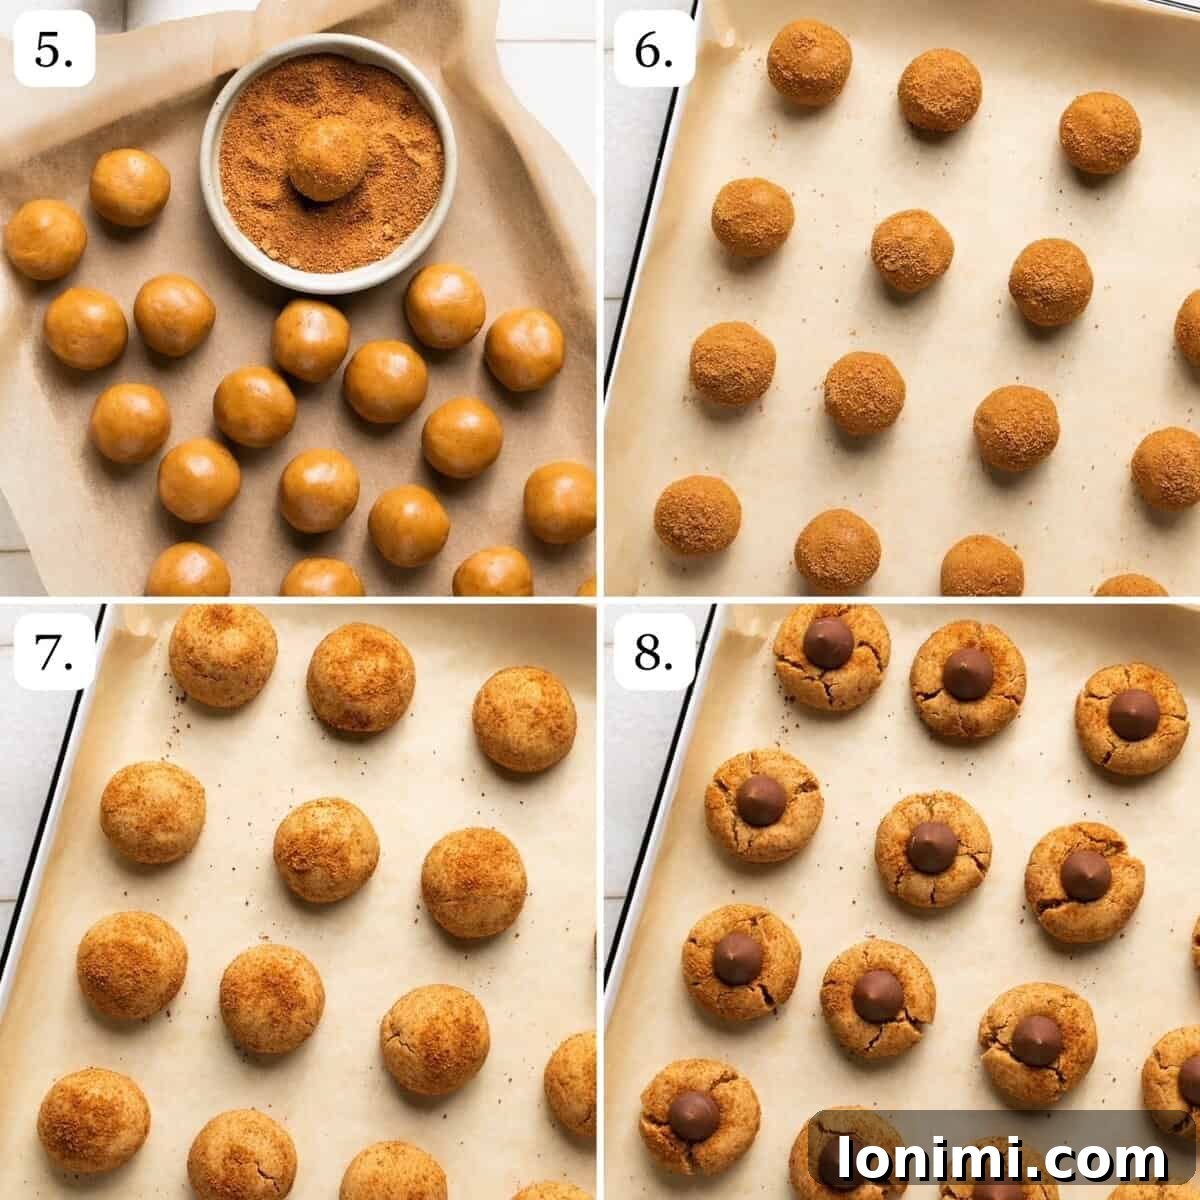
Preheat your oven to 375°F (190°C) and prepare your chocolate kisses by unwrapping them (or chopping your dairy-free chocolate). Scoop out portions of the dough and roll them into uniform balls, approximately 1.5 inches in diameter. This recipe typically yields about 24 cookies of this size. For that classic blossom look and a touch of extra sweetness, place additional coconut sugar (or regular granulated sugar) on a shallow plate and roll each dough ball until it’s fully coated. This sugar coating also helps create those beautiful crinkles as the cookies bake.
Step 6: Prepare for Baking
Arrange the sugar-coated dough balls onto an ungreased baking sheet, ensuring they are spaced about 2 inches apart to allow for proper spreading during baking. If you overcrowd the sheet, the cookies might merge, or bake unevenly.
Step 7: Initial Bake
Bake the cookies in the preheated oven for exactly 8 minutes. You’re looking for the edges to be lightly set and just beginning to turn golden, while the centers still look slightly soft. Remember that ovens can vary, so keep an eye on them. Overbaking can lead to dry cookies.
Step 8: Add Kisses and Finish Baking
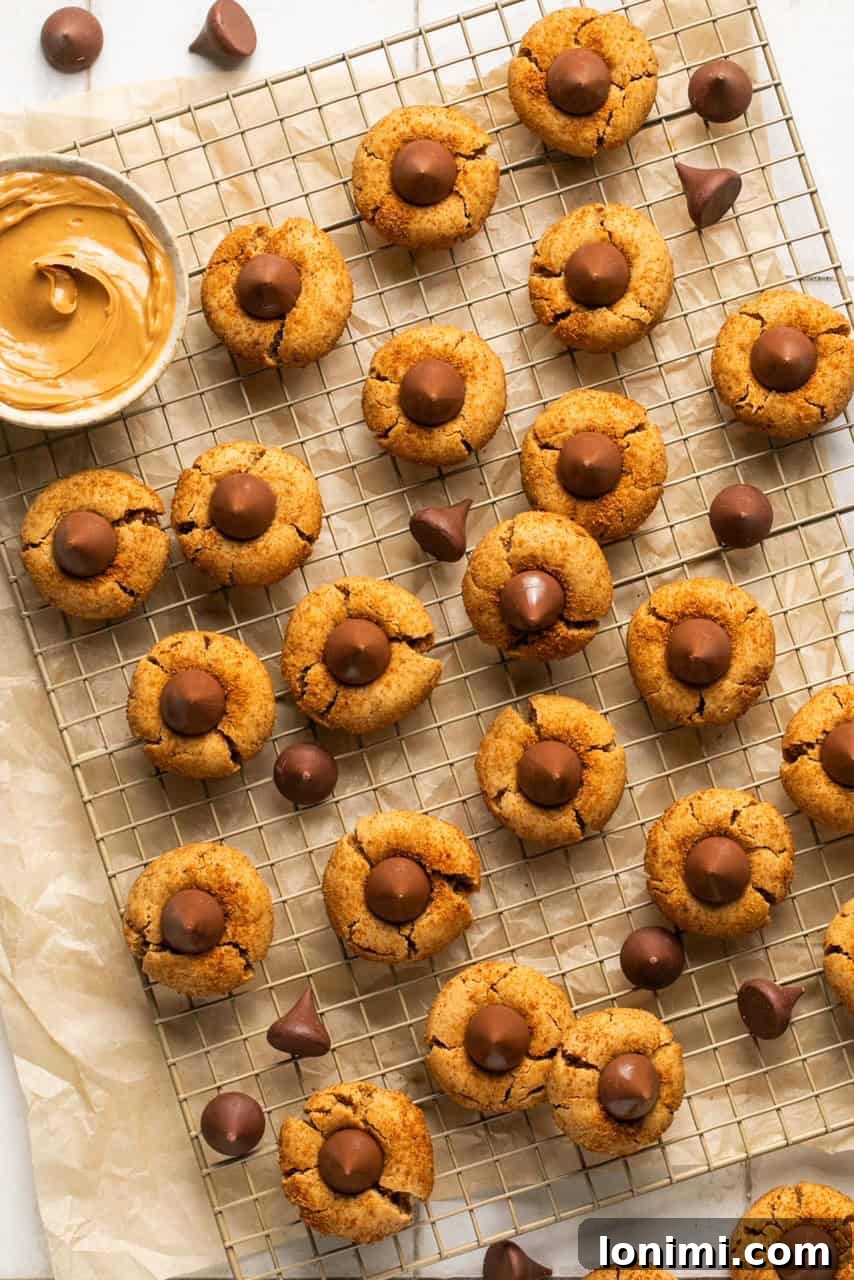
Promptly remove the baking sheet from the oven. While the cookies are still warm and soft, gently press a Hershey’s Kiss (or your chosen dairy-free chocolate chunk) into the center of each cookie. Press just enough until the cookie dough crinkles slightly around the base of the chocolate. Immediately return the baking sheet to the oven for one additional minute. This brief second bake allows the chocolate to soften and meld with the warm cookie without fully melting into a puddle. Once removed, let the cookies cool on the baking sheet for about 15 minutes to firm up before transferring them to a wire rack to cool completely. This cooling time is crucial for the cookies to set properly and for the chocolate to firm up just enough to handle. Then, enjoy your perfect Gluten-Free Peanut Butter Blossoms!
Expert Baking Tips for Gluten-Free Peanut Butter Blossoms
Achieving bakery-quality Gluten-Free Peanut Butter Blossoms is easier than you think with a few clever tricks. Here are my top expert tips to ensure your cookies turn out perfectly every time:
- Dairy-Free Adaptation Done Right: While the base cookie recipe is inherently dairy-free when using vegan butter, traditional Hershey’s Kisses contain dairy. To ensure your peanut butter blossoms are completely dairy-free, simply swap the Kisses for a high-quality vegan chocolate alternative. Dairy-free chocolate chips, chunks from a vegan chocolate bar (like Hu Kitchen or Enjoy Life brands), or even small squares of dark chocolate with a high cocoa content (check labels to ensure no hidden dairy) work beautifully. You can also find vegan “kiss” shaped chocolates online or mold your own melted vegan chocolate for an authentic look.
- Making Them Fully Vegan: To transform this recipe into a fully vegan delight, you’ll need to replace the egg. A “flax egg” is an excellent substitute: simply combine 1 tablespoon of ground flaxseed meal with 3 tablespoons of water, stir, and let it sit for 5-10 minutes until it forms a gel-like consistency. This flax egg acts as a binder and provides the necessary moisture. Combine this with the dairy-free chocolate alternative mentioned above, and you have a scrumptious vegan peanut butter blossom!
- Don’t Overbake! One of the most common mistakes with any cookie, especially gluten-free ones, is overbaking. These peanut butter blossoms are meant to be soft and chewy. Bake them just until the edges are lightly golden and the centers still look slightly underdone. They will continue to set as they cool on the baking sheet, leading to that perfect tender crumb.
- Chilling the Dough (Optional but Recommended): If your kitchen is particularly warm, or if your peanut butter is on the runnier side, you might find the dough a bit sticky or hard to handle. A quick chill in the refrigerator for 20-30 minutes can make it much easier to roll into perfect balls. This also helps prevent excessive spreading during baking, ensuring your cookies hold their shape better.
- Precision in Measuring: Especially with gluten-free flour, accurate measurements are paramount. It’s best to weigh your flour for the most precise results. If using measuring cups, spoon the flour into the cup and level it off with a straight edge rather than scooping directly from the bag, which can compact the flour and lead to too much being used.
- Uniform Cookie Size: For even baking, try to make your cookie balls as uniform in size as possible. A small cookie scoop (about 1.5 tablespoons) is an excellent tool for this, ensuring consistent results across your entire batch.
Storage Tips for Ultimate Freshness
To keep your Gluten-Free Peanut Butter Blossoms tasting their best, proper storage is key. Whether you plan to enjoy them over a few days or save some for later, here’s how to store them effectively:
For short-term storage, place the cooled cookies in an airtight container at room temperature. They will maintain their delicious softness and flavor for up to a week. To prevent them from sticking together or becoming soggy, you can place a piece of parchment paper between layers of cookies.
If you wish to enjoy these delightful cookies for an extended period, they freeze beautifully. Arrange the completely cooled cookies in a single layer on a baking sheet and flash freeze them for about 30 minutes until they are firm. This prevents them from sticking together in storage. Once firm, transfer them to an airtight freezer-safe container, separating layers with parchment paper. Alternatively, you can place them into gallon-sized freezer bags, gently pressing out any excess air before sealing. Frozen Gluten-Free Peanut Butter Blossoms will stay fresh and delicious for up to 3 months. When you’re ready to enjoy them, simply thaw them at room temperature for an hour or two, and they’ll be as good as freshly baked!
Recipe FAQs
Yes, absolutely! Peanuts in their natural, unprocessed form are inherently gluten-free. However, it’s always wise to check labels when purchasing peanut butter or other peanut products, as some brands might contain additives or be processed on shared equipment with gluten-containing items, leading to cross-contamination. While peanuts are gluten-free, they are generally not considered paleo due to being legumes. If you’re looking to make the base of these cookies paleo-friendly, I recommend substituting with almond butter, which is a great paleo alternative.
Yes, indeed! The cookie dough itself is dairy-free, thanks to the use of vegan butter. The only component that typically contains dairy is the Hershey’s Kiss topping. To make these blossoms entirely dairy-free, simply substitute the Hershey’s Kisses with a dairy-free chocolate alternative. You can use chopped pieces of your favorite paleo or vegan chocolate bar (such as Hu Kitchen, Enjoy Life, or Pascha brands), or even dairy-free chocolate chips. These alternatives will provide the same delightful chocolate burst without any dairy.
Based on the provided nutritional estimates, each delicious Gluten-Free Peanut Butter Blossom cookie contains approximately 140 calories. For individual Hershey’s Kisses, each one typically has about 22 calories, 2.5 grams of sugar, and 1.3 grams of fat. Please remember that nutritional values can vary slightly depending on the specific brands of ingredients used and any modifications made to the recipe. For the most accurate calculation, it’s best to weigh your total batch and divide by the number of servings.
To make these peanut butter blossoms suitable for a ketogenic diet, you would need to make a few key substitutions. Replace the coconut sugar and maple syrup with low-carb, low-glycemic sweeteners or sugar substitutes like erythritol, xylitol (ensure it’s safe for pets if you have them, as it’s toxic to dogs), monk fruit sweetener, or stevia. Be sure to use a granulated sweetener for rolling the balls as well. Additionally, ensure your chosen chocolate topping is sugar-free and keto-friendly (look for brands like Lily’s or ChocZero). You might also consider using almond butter instead of peanut butter, as some prefer almond butter for keto due to its slightly different macronutrient profile.
Absolutely! This is a great time-saving tip, especially during busy holiday seasons. You can prepare the cookie dough up to 2-3 days in advance. Simply cover the bowl tightly with plastic wrap and refrigerate. When you’re ready to bake, let the dough sit at room temperature for about 15-20 minutes to soften slightly, making it easier to roll into balls. You can also roll the dough into balls and freeze them unbaked for up to a month in an airtight container. When ready to bake, place frozen dough balls on a baking sheet and add 1-2 minutes to the baking time.
Gluten-free cookies can sometimes be more prone to crumbling due to the lack of gluten, which provides elasticity and structure. This can happen if too much flour is used (always spoon and level!), if there isn’t enough fat or liquid, or if the dough is overmixed. Ensure your gluten-free flour blend contains xanthan gum (or add it separately), which helps mimic gluten’s binding properties. Also, make sure your peanut butter isn’t too dry. If your dough feels overly crumbly, try adding a tiny bit more maple syrup or a tablespoon of non-dairy milk to achieve a more cohesive texture. Allowing the cookies to cool completely on the baking sheet before moving them also helps them firm up and reduces crumbling.
Discover More Gluten-Free Cookie Delights
If you’ve fallen in love with these Gluten-Free Peanut Butter Blossoms, you’re in for a treat! Explore more of my delicious and wholesome gluten-free cookie recipes that are perfect for any occasion:
- Scrumptious Raspberry & White Chocolate Cookies (Gluten-Free)
- The Best Gluten-Free Chocolate Chipless Cookies
- Fun & Flavorful Gluten-Free Monster Cookies (with Dairy-Free Option)
- Mary’s Famous Classic Gluten-Free Peanut Butter Cookies
- Hearty Chocolate Chip Almond Butter Oatmeal Cookies (Gluten-Free)
Love this recipe? Please consider leaving a 5-star 🌟🌟🌟🌟🌟 rating in the recipe card below and a review in the comment section. Your feedback truly helps! Or, connect with me on Facebook, Pinterest or Instagram for daily inspiration!
Easy Gluten Free Peanut Butter Blossoms Recipe
Ingredients
- ½ cup vegan butter, I used Kite Hill brand
- ½ cup creamy peanut butter or almond butter, A thick / non-runny brand will work best! I like Justins.
- ¾ cup coconut sugar, + extra for rolling the balls
- 2 tbsp pure maple syrup
- 1 egg
- 1 tsp vanilla extract
- 1 and ¾ cups gluten free flour, King Arthur Measure for Measure is my favorite
- 1 tsp baking soda
- ½ tsp sea salt
- 30-36 Hershey’s Kisses, depending on how big your cookies are, For dairy free, use a chunk of Hu Kitchen or other paleo chocolate!
Instructions
-
Preheat oven to 375°F (190°C). Unwrap all of your Hershey’s Kisses or chop your paleo/dairy-free chocolate into bite-sized pieces, preparing them for the topping.
-
In a large bowl, combine the softened vegan butter, creamy peanut butter, coconut sugar, maple syrup, egg, and vanilla extract. Mix thoroughly until the mixture is light, smooth, and creamy. If your vegan butter is too firm, microwave it for about 10 seconds to soften, but be sure it doesn’t melt completely.
-
In a separate, smaller bowl, whisk together the dry ingredients: gluten-free flour, baking soda, and salt. Gradually add this dry mixture to the wet ingredients, mixing until just combined and a soft, cohesive dough forms. Avoid overmixing.
-
Roll the dough into uniform 1.5-inch balls (this should yield about 24 cookies). Place extra coconut sugar (or regular granulated sugar) on a plate and roll each dough ball in it until fully coated. Arrange the coated balls on an ungreased cookie sheet, leaving about 2 inches between each cookie. Bake for 8 minutes.
-
Immediately after removing the cookies from the oven, gently press a Hershey’s Kiss (or a paleo/dairy-free chocolate chunk) into the center of each warm cookie until the cookie crinkles slightly around it. Return the baking sheet to the oven for one additional minute.
-
Allow the cookies to cool on the baking sheet for at least 15 minutes to set properly, especially the chocolate. After this initial cooling, transfer them to a wire rack to cool completely. Enjoy your freshly baked Gluten-Free Peanut Butter Blossoms!
Notes
Expert Tips
- To make these peanut butter blossoms dairy-free, use a vegan chocolate alternative. The cookie portion of this recipe is dairy-free, however, Hershey’s Kisses contain dairy.
- While I haven’t tested this recipe with a flax egg, I think it should work! If you try it, be sure to let me know how it goes in the comments below. Use a flax egg and a chocolate alternative to make this recipe vegan.
Storage Tips
Store in an airtight container at room temperature for up to a week.
To freeze, place them into an airtight container with layers separated by parchment paper. Alternatively, you can also place them into gallon-sized storage bags and freeze. They will stay good in the freezer for up to 3 months.
Nutrition
All nutrition facts are an estimate and automatically calculated. While I fact check them using My Fitness Pal, please note that they may not always be 100% accurate and depend on ingredients used. Weigh your total and divide by the number of servings for the most accurate grams per serving size.
This post contains affiliate links. This means if you use one of my links to make a purchase, I may receive a small commission at no additional cost to you. Thank you for supporting Mary’s Whole Life!