
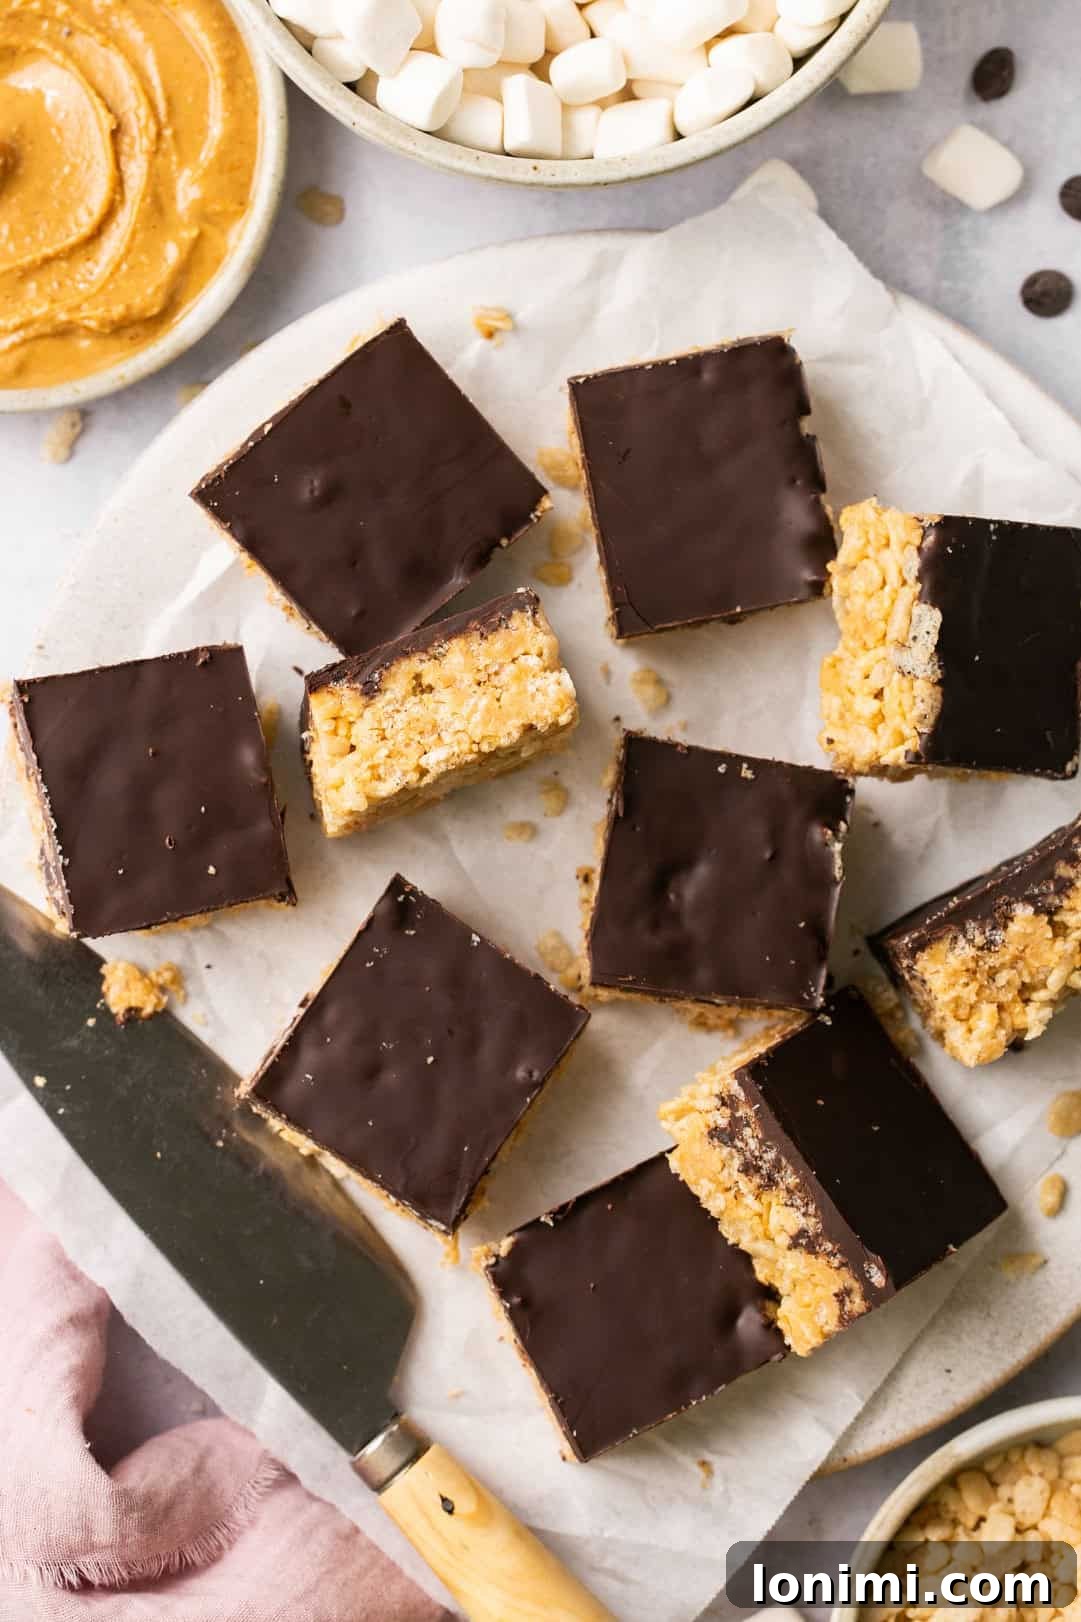
Welcome to the ultimate guide for crafting the most irresistible, no-bake **Chocolate Peanut Butter Rice Krispie Treats**! If you’re searching for an easy, crowd-pleasing dessert that caters to various dietary needs without compromising on flavor, you’ve found your new go-to recipe. These gooey, chewy bars bring together the classic, beloved combination of rich chocolate and creamy peanut butter with the satisfying crunch of crispy rice cereal, all bound by sweet, melted marshmallow. Perfect for any occasion, from casual family snacks to festive gatherings, these treats are guaranteed to be a hit with both kids and adults alike. Best of all, this recipe is naturally gluten-free, dairy-free, and vegan, making it accessible for almost everyone!
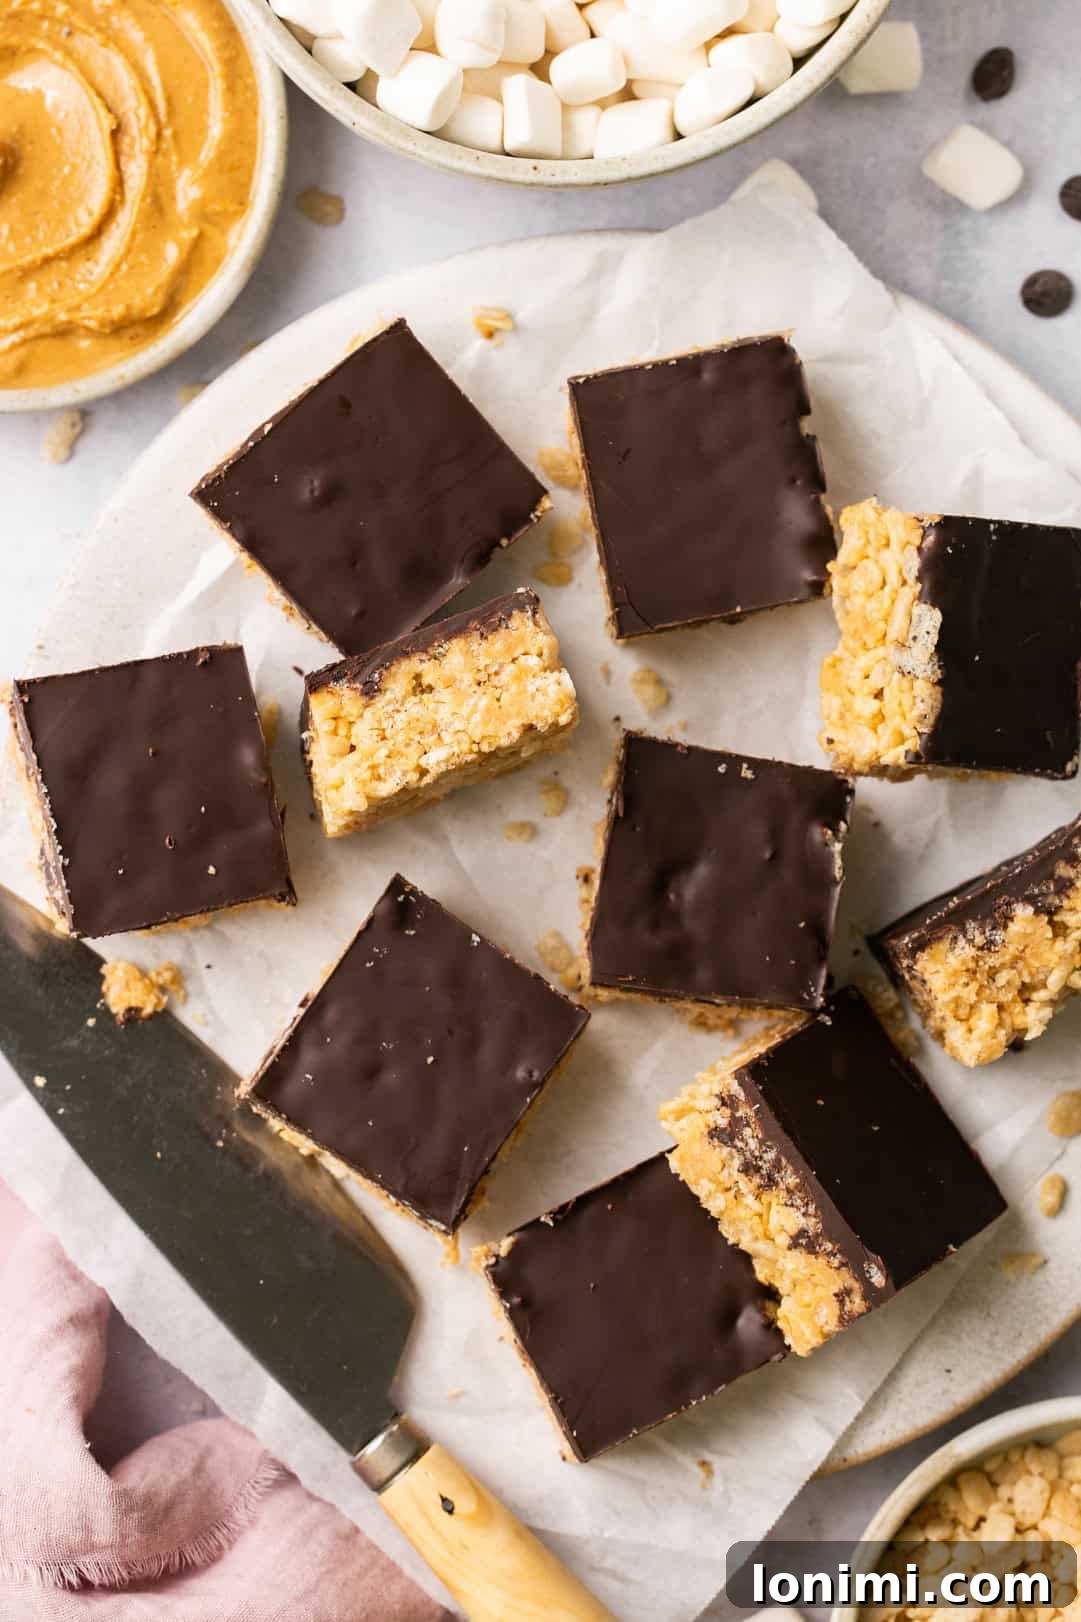
Why These Chocolate Peanut Butter Rice Krispie Treats Are a Must-Try
There’s a reason why the pairing of peanut butter and chocolate has stood the test of time, captivating taste buds worldwide. When you combine this legendary duo with the nostalgic charm of a crispy rice treat, you get an unparalleled dessert bar that’s simply divine. What truly sets this particular recipe apart is its inclusive nature: it’s meticulously designed to be **gluten-free, dairy-free, and vegan**, ensuring that more people can indulge in its deliciousness without worry. No need to hunt for specialized ingredients that compromise taste; these bars are bursting with authentic flavor and a wonderfully chewy texture.
Beyond their incredible taste and dietary considerations, these no-bake wonders offer unmatched convenience. They require minimal kitchen skills and come together in under 30 minutes of active prep and cook time. Imagine whipping up a batch of these ooey-gooey delights in just 15 minutes before letting them chill to perfection! They’re the ideal sweet treat for busy weeknights, last-minute party contributions, or simply satisfying that sudden craving for something truly special. Whether you’re a devoted peanut butter enthusiast or a chocolate lover, these bars strike the perfect balance, delivering rich, satisfying flavor in every single bite. Make a modest batch for your immediate family, or double the recipe to share with friends, colleagues, or for larger celebrations. Their make-ahead and freeze-ahead capabilities also mean you can always have a delightful treat on hand, ready to enjoy whenever the mood strikes.
Key Highlights of This Recipe
- Effortless Preparation: From start to finish, these treats are ready to chill in just 15 minutes.
- Unforgettable Flavor: Enjoy the classic, irresistible combination of creamy peanut butter and smooth chocolate in every square.
- Allergy-Friendly: A fantastic option for those with dietary restrictions, being completely Gluten-Free, Dairy-Free, and Vegan.
- Family Favorite: A universally loved dessert that’s guaranteed to be a hit with both children and adults.
- Incredibly Simple: Perfect for beginner bakers or anyone looking for a quick and easy dessert solution.
Essential Ingredients for Your Crispy Treats
Crafting these delectable Chocolate Peanut Butter Rice Krispie Treats starts with a selection of high-quality ingredients, thoughtfully chosen to deliver maximum flavor and adhere to dietary preferences. Here’s a closer look at what you’ll need and why certain choices make all the difference:
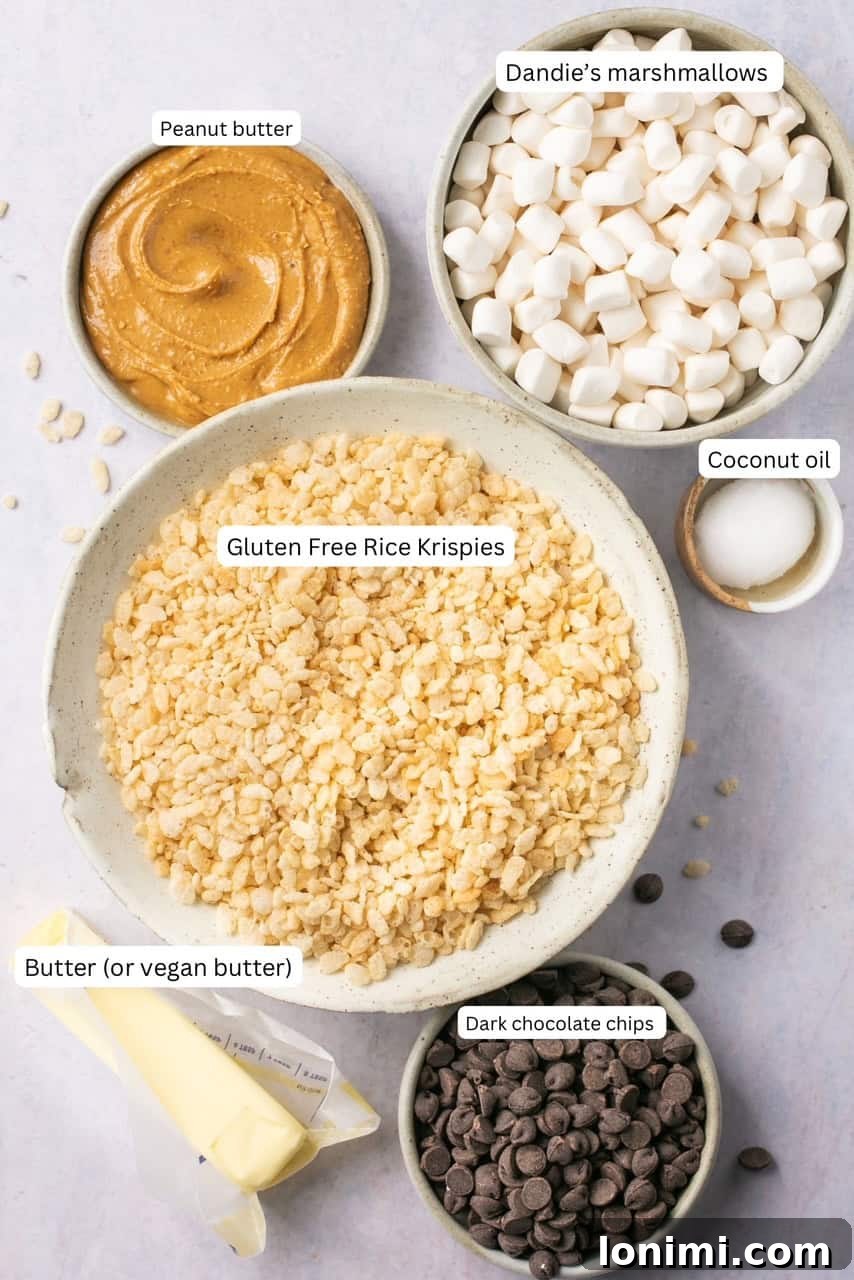
- Gluten-Free Rice Krispies Cereal: This is a crucial swap for our gluten-free friends. While Kellogg’s original Rice Krispies contain malt barley syrup (making them not gluten-free), many other brands offer excellent gluten-free crisp rice cereal alternatives. Look for brands like Barbara’s Organic, One Degree, Nature’s Path, or Aldi’s Crisp Rice Cereal. These are often found in health food sections of major grocery stores like Sprouts, Whole Foods, or online retailers like Amazon and Thrive Market. Always double-check the label to ensure it’s certified gluten-free.
- Dandies Vegan Marshmallows: To keep this recipe vegan and dairy-free, Dandies are my top recommendation. Unlike traditional marshmallows that contain gelatin, Dandies use plant-based ingredients. While they might take a little longer to melt than conventional mini marshmallows, their texture and taste are perfect for these treats. If you don’t require the recipe to be vegan or dairy-free, regular mini marshmallows can be used.
- Vegan Butter: A good quality vegan butter is essential for achieving that rich, buttery flavor and gooey texture. Brands like Miyoko’s Kitchen and Kite Hill offer excellent dairy-free butter alternatives that melt beautifully and add depth to the treats. These are readily available in most grocery stores in the refrigerated vegan section.
- Creamy Peanut Butter: For the best results, opt for a creamy, smooth peanut butter. I highly advise against using natural peanut butter (the kind that separates with oil on top) as its inconsistent texture can prevent the treats from setting properly. A stable, creamy variety, like Justin’s Honey Peanut Butter (if not strictly vegan, check ingredients) or a standard Jif/Skippy equivalent (ensure it’s vegan if desired), works perfectly, contributing to the irresistible chewiness. While I haven’t personally tried crunchy peanut butter for this specific recipe, I imagine it would add a delightful texture if you enjoy a little extra crunch!
- Dark Chocolate Chips: The chocolate topping is where these treats truly shine. For a gluten-free and dairy-free option, Enjoy Life brand dark chocolate morsels are fantastic and melt smoothly. If dairy is not a concern, you can certainly use your favorite semi-sweet chocolate chips. Dark chocolate offers a lovely contrast to the sweet peanut butter and marshmallows, creating a perfectly balanced flavor profile.
- Coconut Oil: A small amount of coconut oil helps the chocolate melt into a smooth, pourable consistency and gives it a glossy finish when hardened. You can use regular virgin coconut oil for a subtle coconut flavor or refined coconut oil if you prefer a neutral taste. Both work equally well.
Step-by-Step Guide to Crafting Your Treats
Follow these simple steps to create a batch of perfectly chewy, chocolatey, peanut buttery Rice Krispie Treats. This recipe is designed to be straightforward, making it an enjoyable process for cooks of all experience levels.
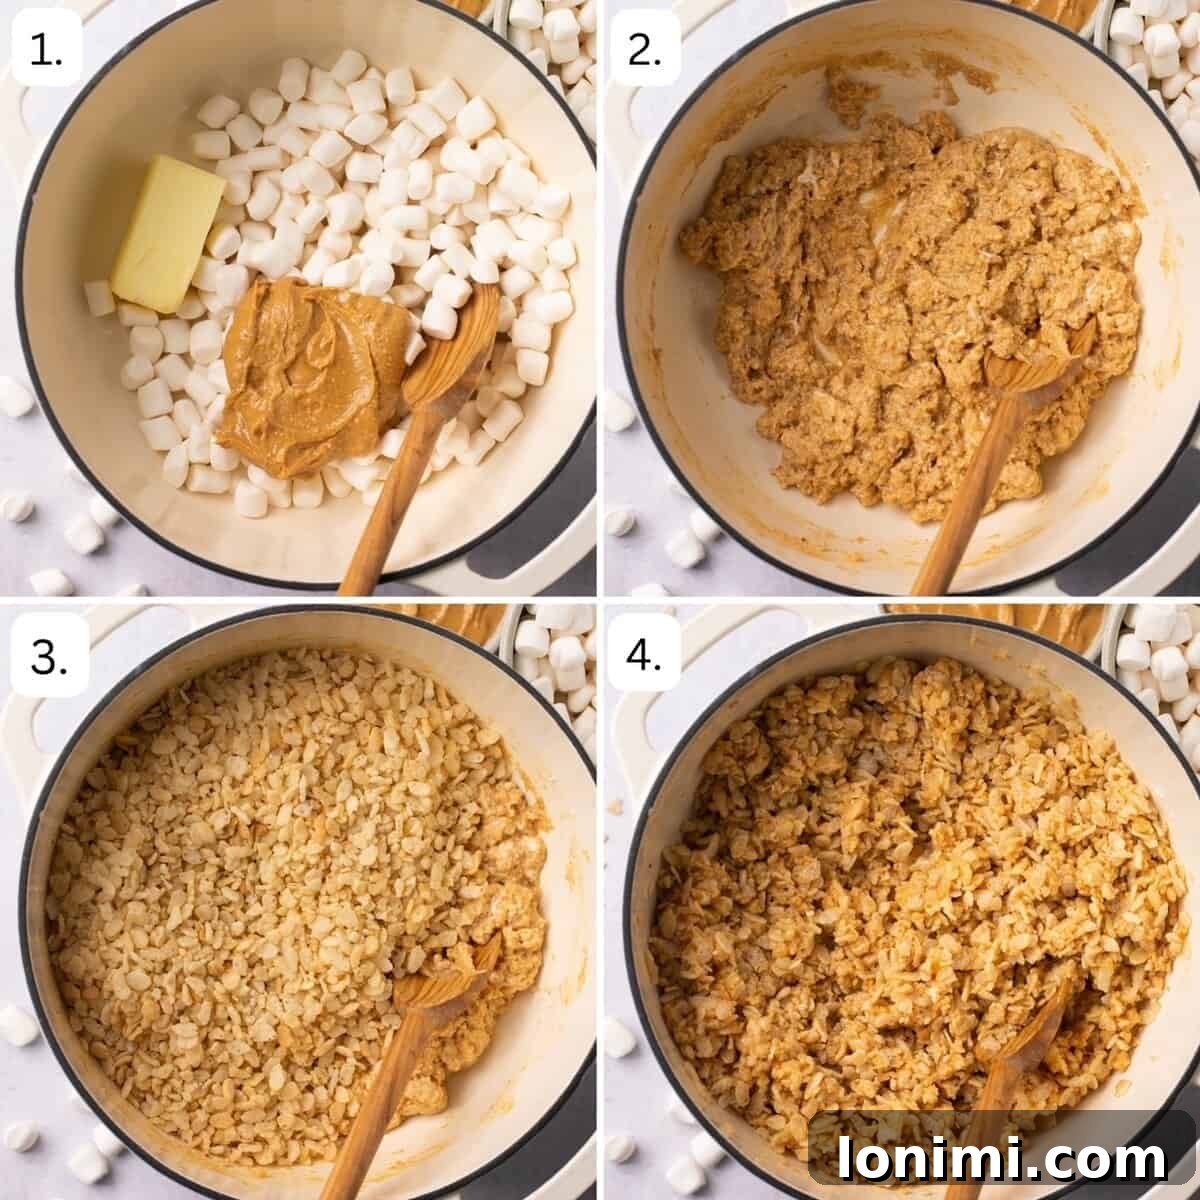
- Prepare the Marshmallow Base: In a large saucepan or a spacious pot, combine the creamy peanut butter, vegan butter, and Dandies vegan marshmallows. Place the saucepan over **LOW heat**. Patience is key here, as Dandies marshmallows are known to melt slower than their traditional counterparts. Resist the urge to crank up the heat too high.
- Melt and Stir: Continuously heat and stir the marshmallow mixture with a wooden spoon. This constant stirring is vital to prevent burning and ensure an even melt. Continue until all the marshmallow pieces have completely dissolved into a sticky, smooth, and cohesive mixture. If absolutely necessary, you may briefly increase the heat to medium-low, but monitor it very closely, as marshmallows can burn quickly.
- Combine with Cereal: As soon as the marshmallow mixture is fully melted and smooth, immediately remove the saucepan from the heat. Quickly add the gluten-free crisp rice cereal to the pot. Time is of the essence here; you want to mix it before the marshmallow starts to cool and harden.
- Evenly Coat Cereal: Stir vigorously and continuously until every single piece of rice cereal is thoroughly coated with the warm, sticky marshmallow-peanut butter mixture. Ensure there are no dry spots.
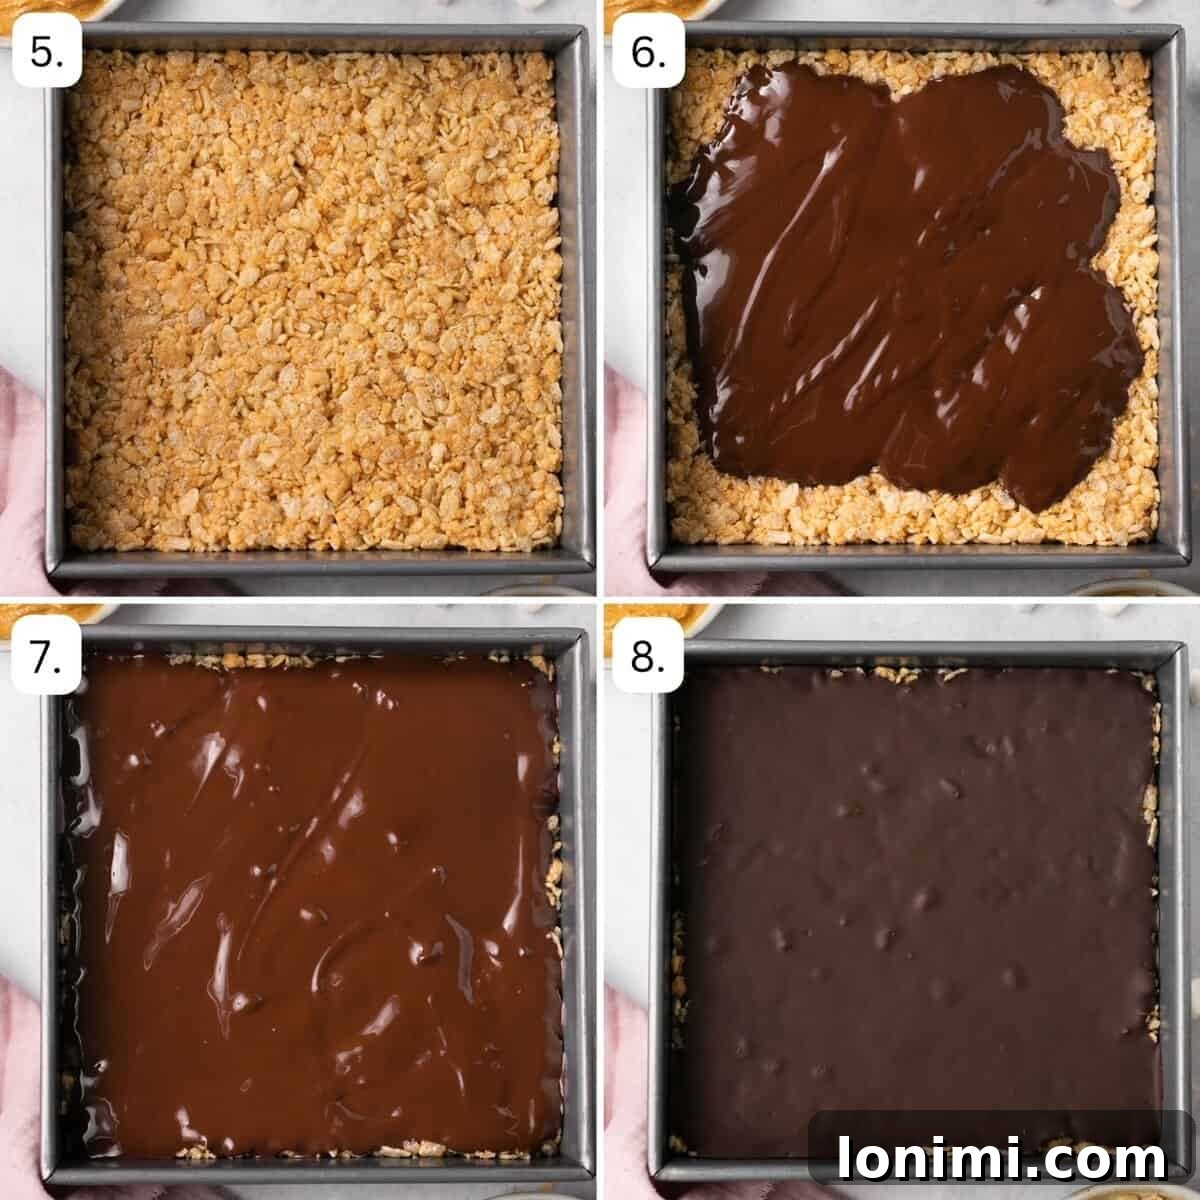
- Press into Pan: Lightly spray a 9×9 inch metal square pan with avocado oil or your preferred cooking spray. Carefully transfer the coated cereal mixture into the prepared pan. To prevent the mixture from sticking to your hands, lightly spray your hands with a little oil. Gently press the mixture down into the pan until it forms a flat, even layer. Alternatively, you can use the bottom of a clean cup or a piece of parchment paper to achieve a perfectly smooth and compact surface.
- Prepare Chocolate Topping: In a separate microwave-safe bowl, combine the dark chocolate chips and coconut oil. Microwave in 30-second intervals, stirring thoroughly after each interval. Continue this process until the chocolate is completely melted and beautifully smooth. Be careful not to overheat, as chocolate can seize.
- Apply Chocolate Layer: Pour the melted chocolate mixture evenly over the pressed Rice Krispies base in the pan. Use a spatula to gently spread the chocolate across the entire surface, ensuring a uniform layer.
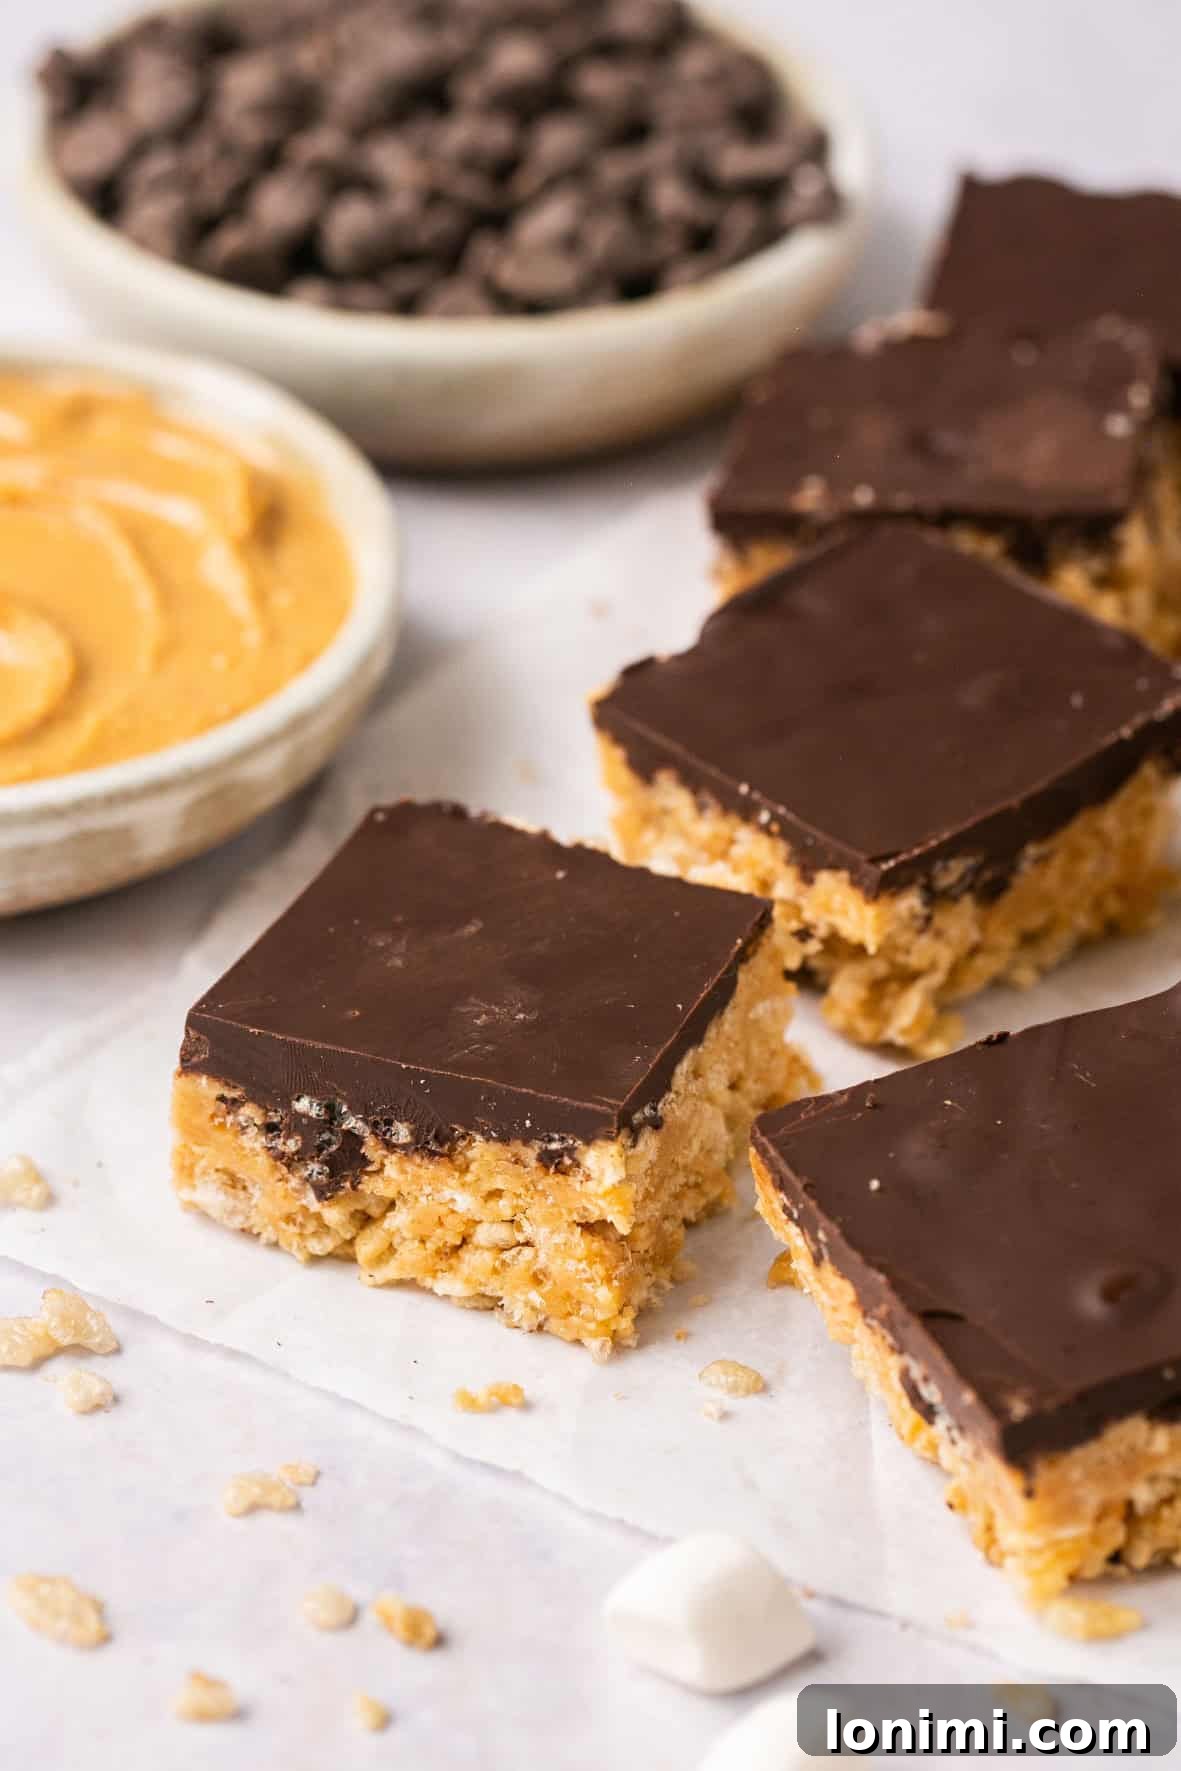
- Cool and Serve: Allow the treats to cool at room temperature until the chocolate layer has fully hardened. For a quicker set, you can refrigerate them for about 30-60 minutes or place them in the freezer for approximately 15 minutes. Once the chocolate is firm, slice the large bar into 16 smaller squares for bite-sized delights, or 9 larger pieces for a more substantial treat. Enjoy your homemade, perfectly chewy, and indulgent Chocolate Peanut Butter Rice Krispie Treats!
Expert Tips & Customization Tricks
Making these Chocolate Peanut Butter Rice Krispie Treats is straightforward, but a few expert tips can elevate your experience and ensure perfect results every time. Plus, discover ways to customize them to your liking!
Storage Best Practices
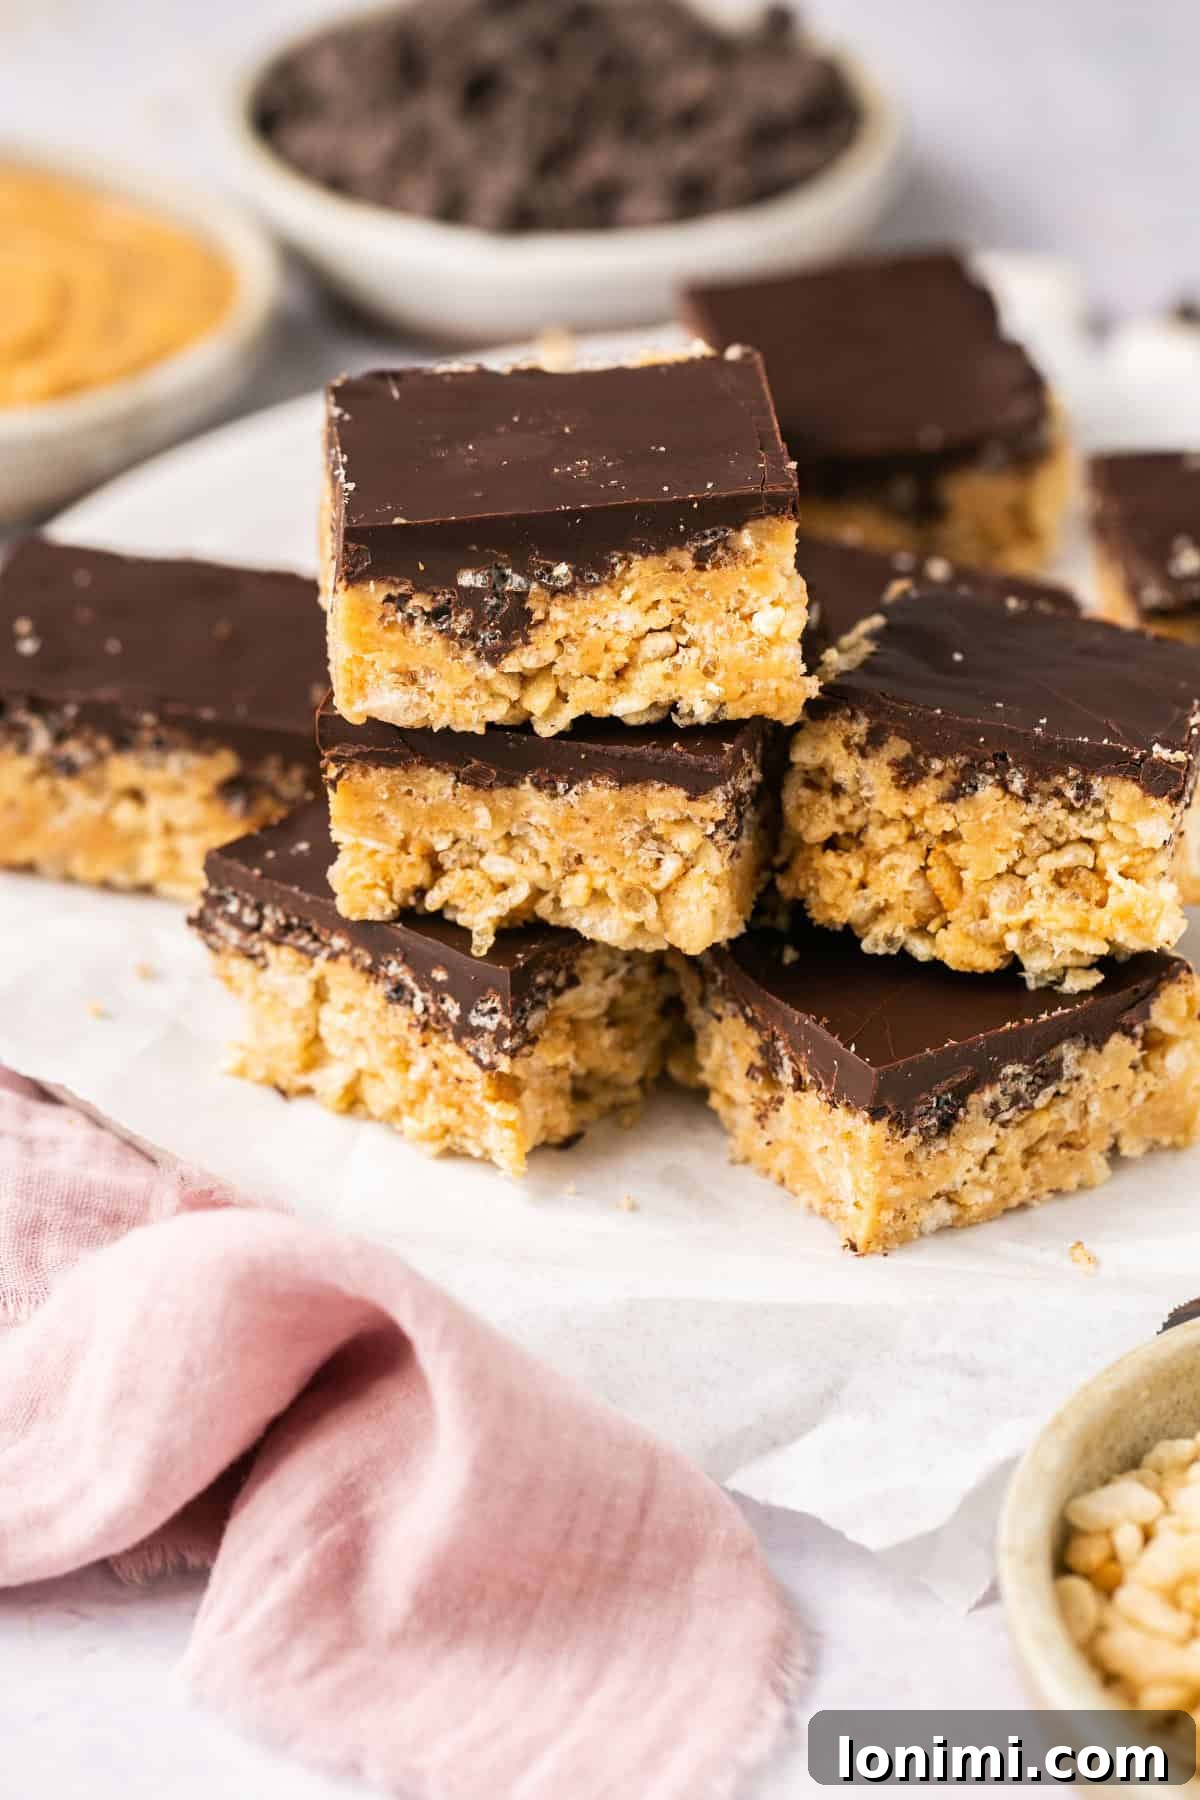
To maintain their optimal texture and freshness, always store your finished chocolate peanut butter Rice Krispie treats in an airtight container at room temperature. They will remain delightfully chewy and delicious for up to 3-4 days. It’s crucial to **avoid storing them in the refrigerator**, as the cold temperature will cause them to become very hard and difficult to eat, significantly diminishing their enjoyable chewiness.
Freezing for Future Enjoyment
These treats are fantastic for meal prepping or making ahead for future events! To freeze them, first ensure they are fully cooled and the chocolate topping is completely set. Slice them into individual squares. Arrange the squares in a single layer on a parchment-lined baking sheet and freeze until solid. Once frozen, transfer them to a freezer-safe airtight container, separating layers with wax paper or parchment paper to prevent sticking. They can be stored in the freezer for up to 1-2 months. When ready to enjoy, simply thaw them at room temperature for about 30 minutes to an hour before serving.
Simple Ingredient Swaps for Dietary Needs
This recipe is designed to be vegan and gluten-free, but it’s easily adaptable:
- Dairy Options: If dairy is not a concern for you, feel free to use regular butter instead of vegan butter, and traditional semi-sweet chocolate chips for the topping.
- Marshmallow Alternatives: If you’re not strictly vegan, regular mini marshmallows (gelatin-based) melt faster and can be used in place of Dandies. Marshmallow fluff can also be a quick substitute, though it might yield a slightly different texture.
- Cereal Choices: If you are not following a gluten-free diet, classic Kellogg’s Rice Krispies cereal works perfectly fine.
Flavor Variations and Add-Ins
Get creative and customize your treats:
- Nut Butter Alternatives: While creamy peanut butter is recommended for consistency, you can experiment with other smooth nut butters like almond butter or cashew butter if peanut allergies are a concern. Seed butter (like sunflower seed butter) can also be a good option for nut-free households. Note that the texture and setting might vary slightly, so proceed with caution and let us know your results!
- Chocolate Drizzle: Instead of a full chocolate layer, you can simply drizzle melted chocolate over the set peanut butter Rice Krispie base for a lighter touch.
- Extra Crunch: Fold in a handful of crushed pretzels, chopped peanuts, or mini chocolate chips into the Rice Krispie mixture before pressing into the pan for added texture and flavor.
- Sprinkles: For a festive touch, add some colorful sprinkles to the melted chocolate topping before it sets.
Troubleshooting Common Issues
- Treats are too hard: This usually happens if the marshmallows were cooked at too high a heat or for too long. Keep the heat low and stir constantly. Also, avoid refrigerating them!
- Treats are too sticky: Not enough cooking time for the marshmallows, or not enough butter/peanut butter. Ensure the marshmallow mixture is fully melted and sticky before adding cereal.
- Chocolate topping not setting: Ensure you’ve added the coconut oil, which helps it harden smoothly. If your kitchen is very warm, a brief stint in the freezer or fridge will speed up the setting process.
Frequently Asked Questions (FAQs)
Absolutely! Freezing is a fantastic way to store these delicious treats for longer periods. To do so, place the finished and cooled treats in a freezer-safe container. For best results and to prevent them from sticking together, layer them with wax paper or parchment paper between each row. When you’re ready to enjoy them, simply take them out of the freezer and let them thaw at room temperature for about 30-60 minutes until soft and chewy. They’ll maintain their quality in the freezer for up to 1-2 months.
I highly advise against using natural peanut butter for this recipe. Natural peanut butter, especially the kind that requires stirring due to oil separation, has a different consistency and fat content compared to creamy, processed peanut butter. This difference often leads to the treats not setting properly and becoming either too crumbly or too oily. For the best, most consistent results and a perfectly chewy texture, stick to smooth, creamy peanut butter.
Surprisingly, no, regular Kellogg’s Rice Krispies cereal is not gluten-free. This is because they contain malt barley syrup, which is a gluten-containing ingredient. However, there are many excellent gluten-free crisp rice cereal brands available that make perfect substitutions for this recipe. Some popular brands to look for include Barbara’s Organic, One Degree, Nature’s Path, and Aldi’s Crisp Rice Cereal. You can typically find these at health food stores like Sprouts and Whole Foods, as well as mainstream grocery stores like Aldi, and online retailers such as Amazon, Thrive Market, and Vitacost. Always check the packaging to confirm it is certified gluten-free.
While I haven’t personally tested this recipe with almond butter, it’s certainly an interesting idea! If you decide to try it, make sure to use a creamy, smooth almond butter that doesn’t separate excessively, similar to the recommendation for peanut butter. Other nut butters like cashew butter, or seed butters (like sunflower seed butter for a nut-free option), might also work. The final texture and flavor profile will likely differ slightly from the original peanut butter version, but it could be a delicious alternative. If you do experiment, please share your results in the comments – we’d love to hear how they turn out!
More Indulgent Peanut Butter and Chocolate Desserts
If you’re a true enthusiast of the glorious chocolate and peanut butter combination, your culinary journey doesn’t have to end here! Explore these other delightful recipes that celebrate this iconic pairing, perfect for expanding your dessert repertoire:
- Gluten Free Peanut Butter Blossoms
- Vegan Millionaire Shortbread Bars
- Gluten Free Chocolate Chip Almond Butter Oatmeal Cookies
- Gluten Free Peanut Butter Cookies
Chocolate Peanut Butter Rice Krispie Treats
Mary Smith
5 mins
10 mins
35 mins
16 treats
Equipment
-
1 9×9 metal pan
Ingredients
- 3 cups gluten free Rice Krispies cereal, see notes above for brands/where to find these!
- 10 oz bag Dandie’s vegan marshmallows, minis preferred, but the big ones will work if that is all you can find!
- ¼ cup vegan butter
- ½ cup smooth peanut butter, I love Justin’s honey PB
- 1.5 cups dark chocolate morsels, I like Enjoy Life Brand for dairy free gluten free
- 1 tbsp coconut oil
Instructions
- Add the peanut butter, butter, & marshmallows to a large saucepan over LOW heat. Melting will take some time because Dandies do not melt as quickly as regular marshmallows.
- Heat and stir the marshmallow pieces with a wooden spoon continuously until they melt into each other and become sticky. You can turn the heat up to medium heat if needed, but be careful because the marshmallows will burn quickly. Low to medium-low heat is best.
- Remove from heat and quickly add in the Rice Krispies. Stir immediately until all Rice Krispies are coated with the marshmallow mixture.
- Spray a 9×9 metal baking dish with avocado oil and carefully transfer the mixture into the pan. Spray your hands with oil to prevent sticking. Then, gently press down until the mixture is flat and even in the pan. You can also use the bottom of a cup to press it down evenly.
- In a microwave-safe dish, combine chocolate and coconut oil. Microwave at 30-second intervals, stirring each time, until melted and smooth.
- Pour the chocolate over the Rice Krispies mixture. Cool at room temperature until the chocolate is hardened, or refrigerate or freeze them until hardened. It will take about 15 minutes in the freezer. Slice up into 16 squares for smaller treats, or 9 pieces for larger treats, and enjoy!
Notes
Swaps: If you are okay with dairy, you can use regular butter and semi sweet chocolate chips.
Nutrition
Calories: 247 kcal |
Carbohydrates: 31g |
Protein: 4g |
Fat: 13g |
Saturated Fat: 7g |
Polyunsaturated Fat: 2g |
Monounsaturated Fat: 3g |
Trans Fat: 0.01g |
Cholesterol: 0.2mg |
Sodium: 122mg |
Potassium: 162mg |
Fiber: 1g |
Sugar: 17g |
Vitamin A: 544IU |
Vitamin C: 4mg |
Calcium: 56mg |
Iron: 2mg
All nutrition facts are an estimate and automatically calculated. While I fact check them using My Fitness Pal, please note that they may not always be 100% accurate and depend on ingredients used. Weigh your total and divide by the number of servings for the most accurate grams per serving size.
Did you make this?
Rate & comment below, and tag me on Instagram @maryswholelife
Love this recipe? Please leave a 5-star 🌟🌟🌟🌟🌟 rating in the recipe card above & a review in the comment section. Or, follow me on Facebook, Pinterest or Instagram today!