
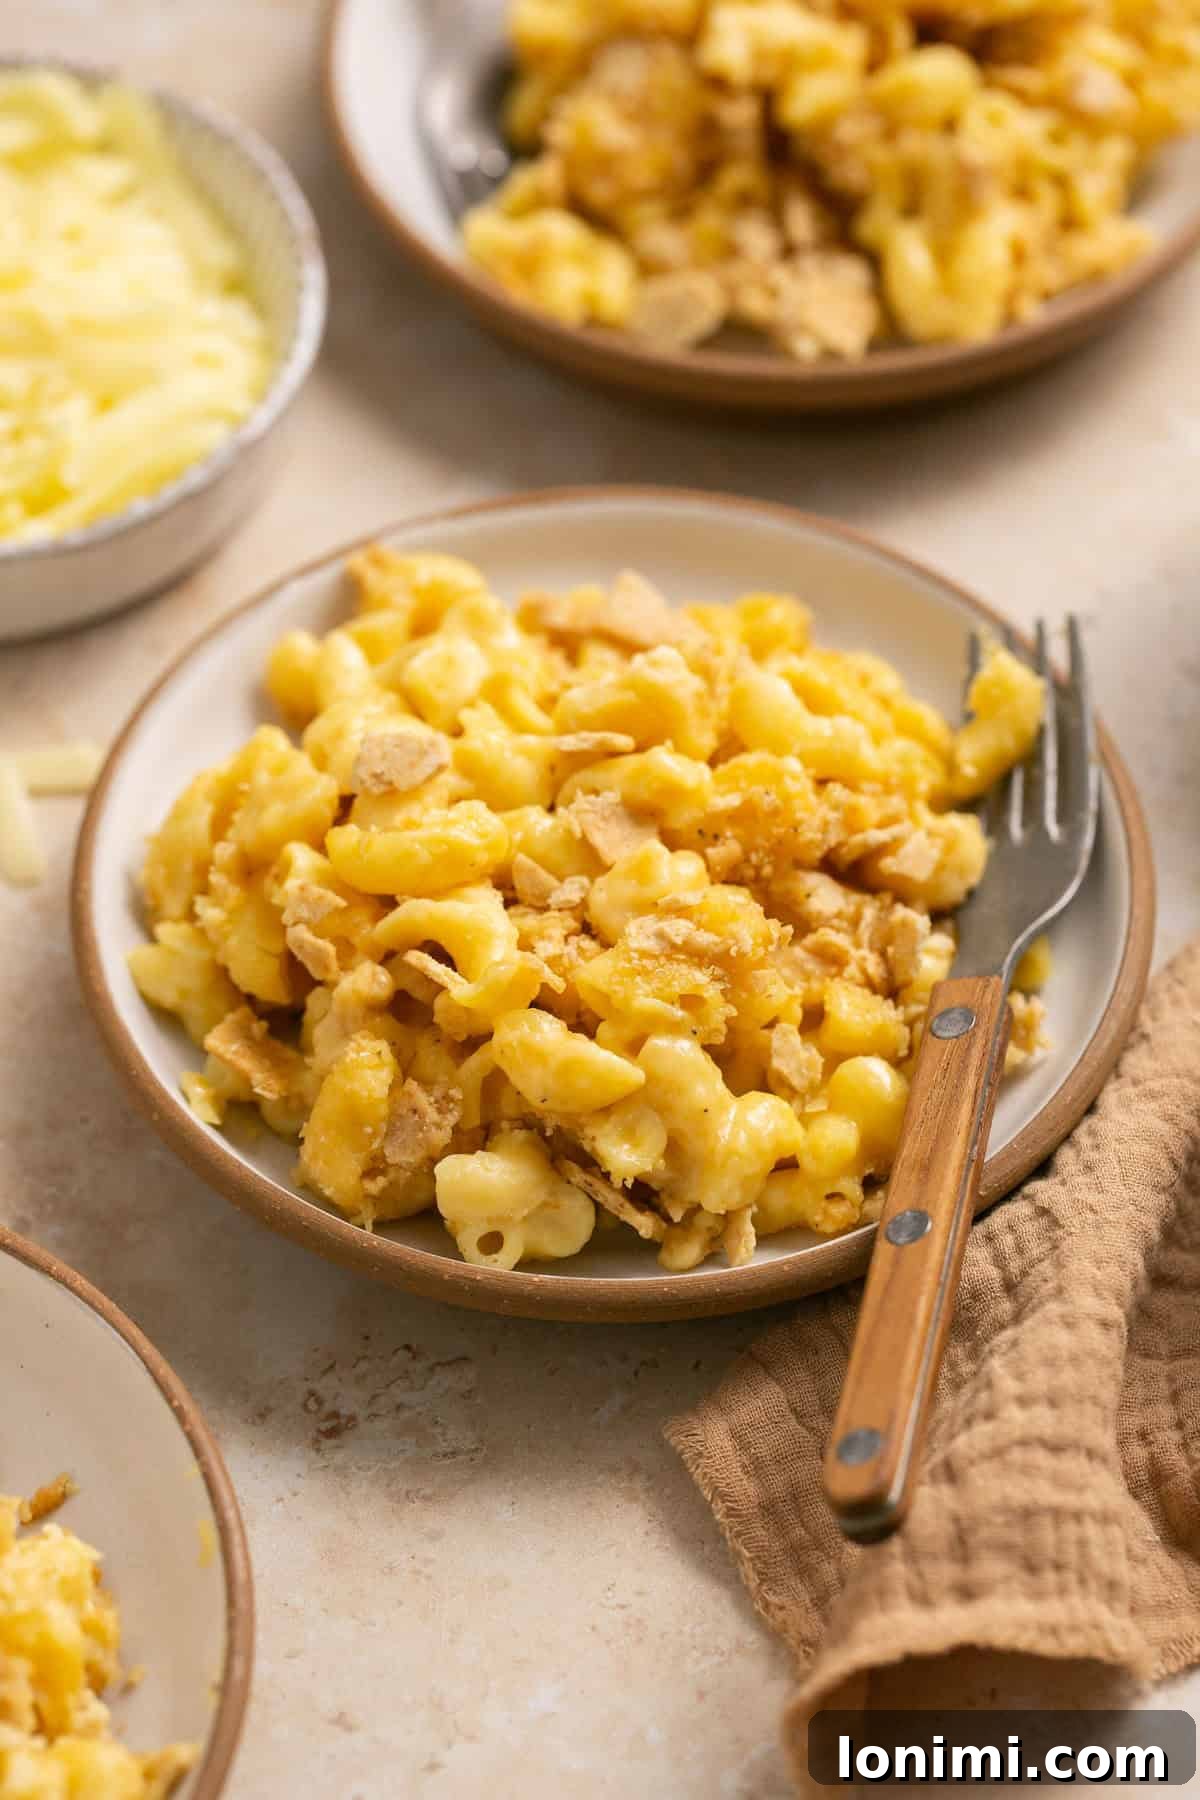
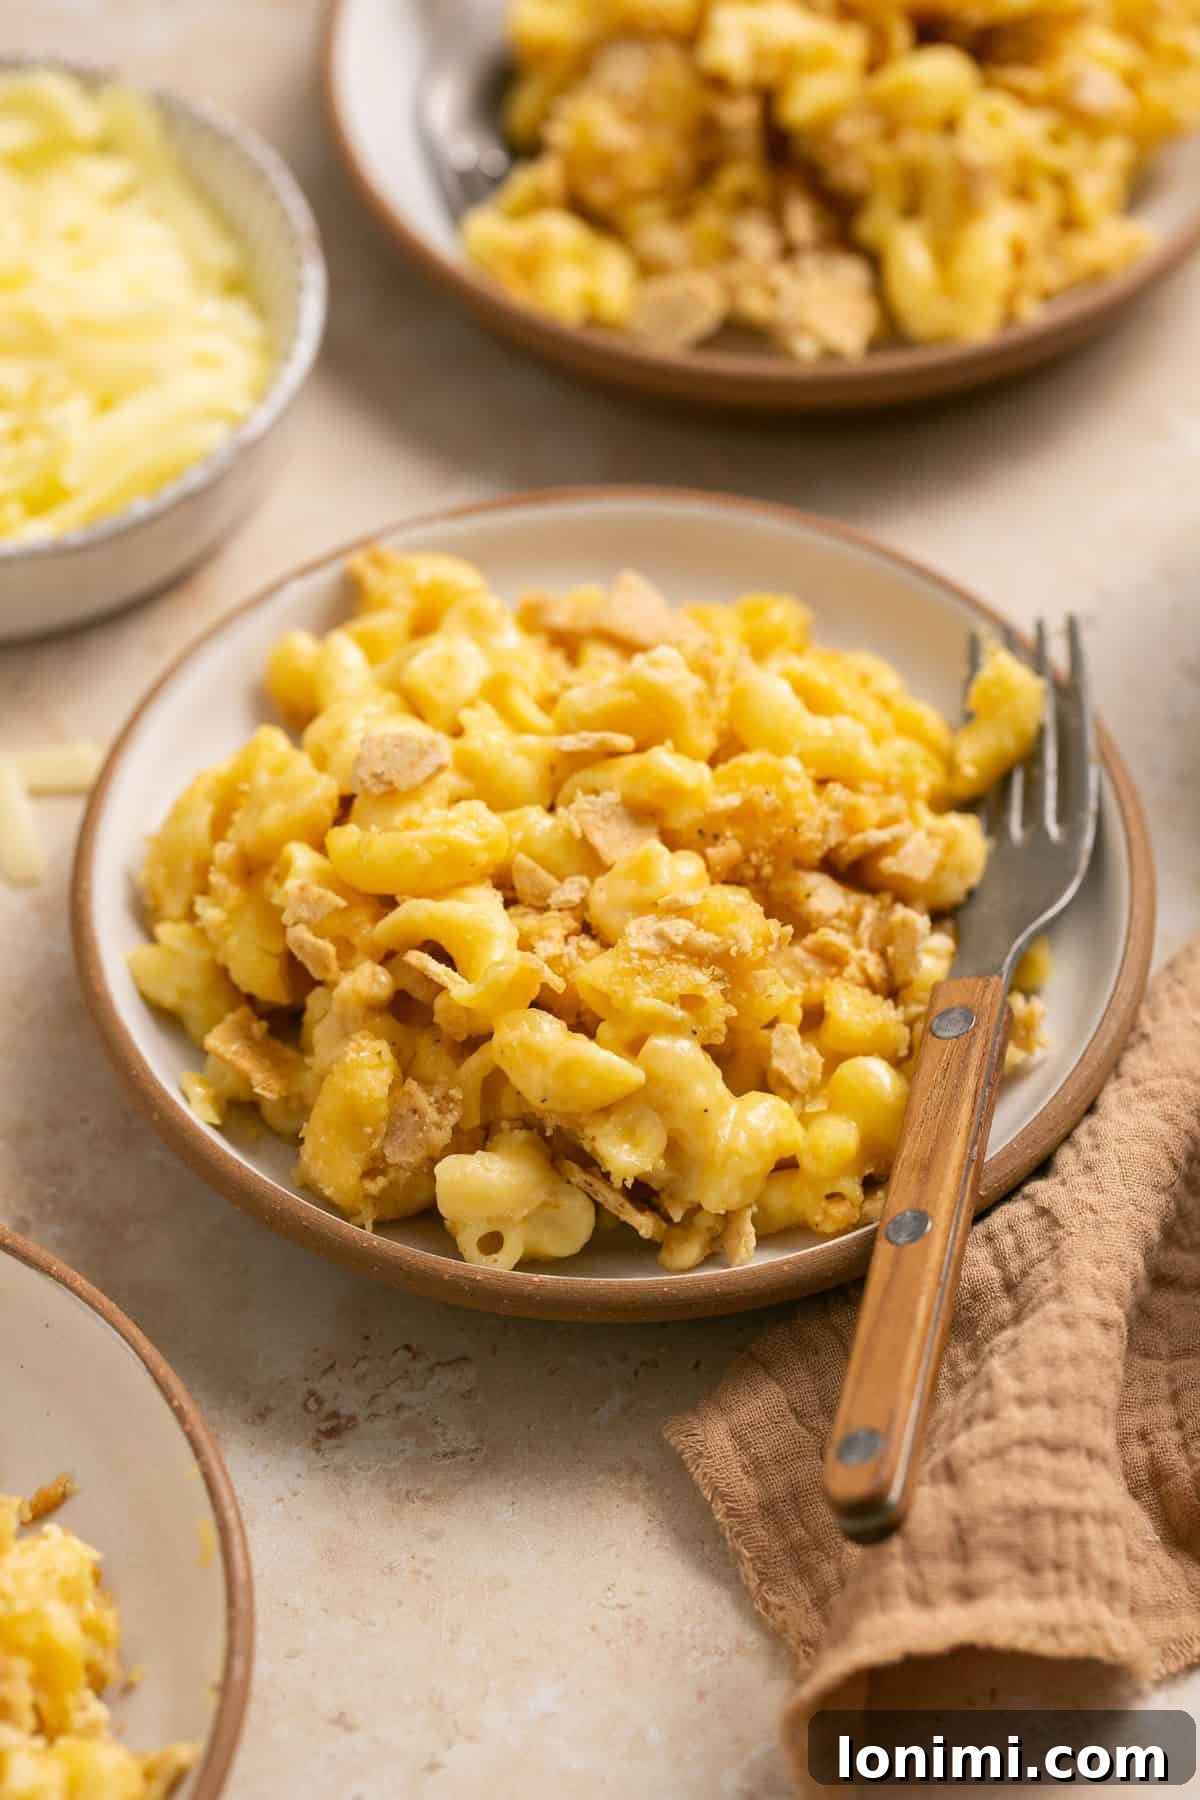
Welcome to a culinary journey that transforms a beloved American classic into a wholesome, gluten-free sensation. This isn’t just any mac and cheese; it’s a dreamy, creamy, incredibly cheesy indulgence with a delightful, unexpected crunch from its secret topping. Prepare to discover the best Gluten Free Mac and Cheese recipe that promises to be an instant favorite for both kids and adults, without compromising on flavor or texture. If you’ve been searching for a healthier twist on traditional comfort food, your quest ends here. This recipe is designed to bring joy to your taste buds and peace of mind to your dietary needs, proving that gluten-free can be utterly delicious and deeply satisfying.
For many, mac and cheese holds a special place in their heart, a true emblem of home and comfort. The golden, gooey pasta dish evokes cherished memories, often tied to family gatherings and simple, joyful meals. However, for those navigating gluten sensitivities or celiac disease, enjoying this classic can be a challenge. Store-bought gluten-free options often fall short, lacking the authentic richness and texture that defines a truly great macaroni and cheese. This recipe steps in to fill that void, offering a homemade version that rivals, and perhaps even surpasses, its traditional counterpart. It’s a dish crafted with care, ensuring every spoonful delivers that nostalgic warmth and irresistible cheesy goodness, now accessible to everyone.
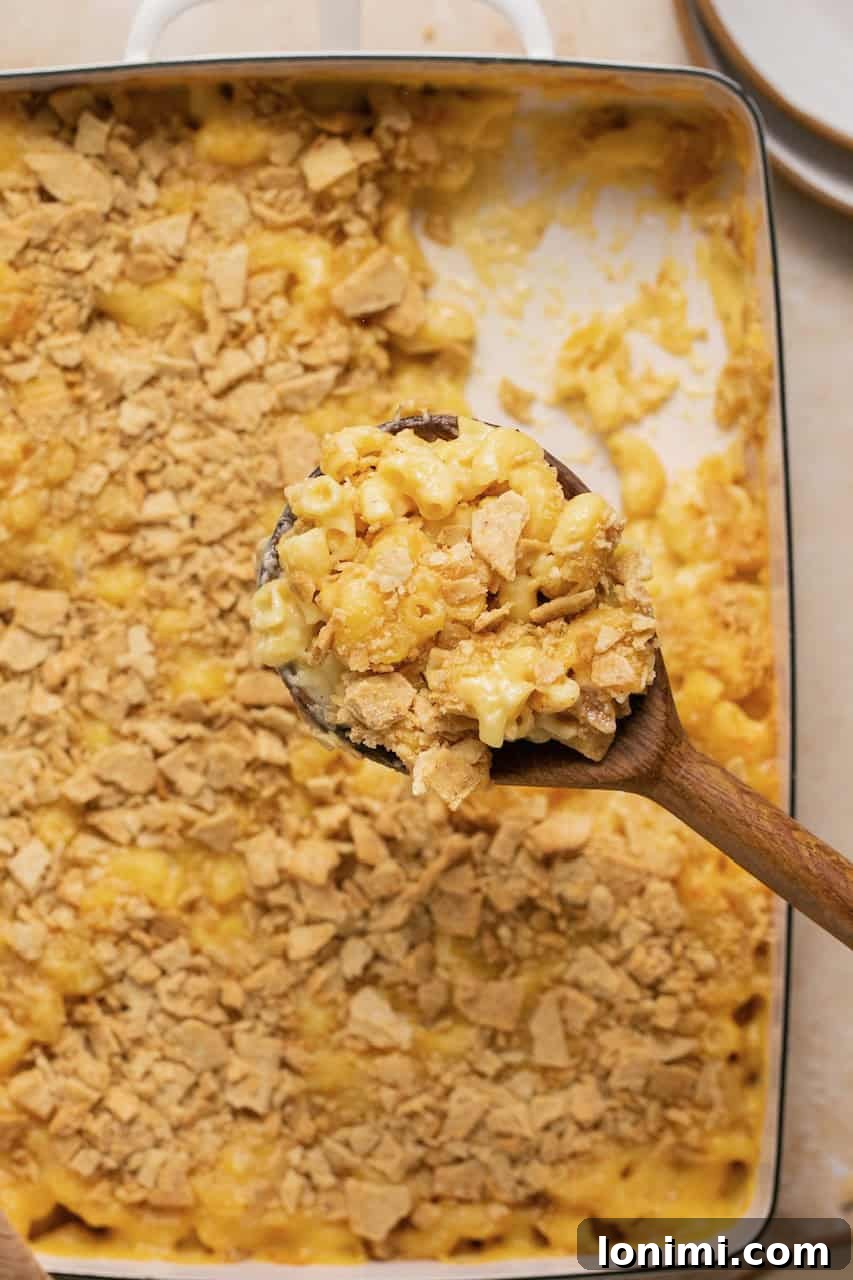
Why This Gluten-Free Mac and Cheese Recipe Shines
Growing up, my mother’s homemade macaroni and cheese was the epitome of comfort food. It was remarkably simple yet profoundly delicious, characterized by a deep, sharp cheddar flavor and that signature crunchy topping made from crumbled Ritz crackers. This cherished memory inspired me to embark on a mission: to re-create a version that was not only gluten-free but also a touch healthier, without sacrificing any of the comforting taste or satisfying texture. After much experimentation, I am thrilled to share that this recipe truly delivered on that promise, becoming a staple in my own kitchen.
This Gluten Free Macaroni and Cheese is a testament to the power of thoughtful ingredient selection. Crafted with high-quality, simple components such as Jovial brown rice pasta, a harmonious blend of rich cheddar and creamy Monterey Jack cheeses, and crowned with crushed Simple Mills sea salt crackers, it perfectly mimics the nostalgic flavors and textures of my mom’s original. The best part? I can enjoy this ultimate comfort food without any discomfort, making it a truly superior version. It’s a dish that brings back all those warm, fuzzy feelings, now made accessible and enjoyable for everyone, especially those with gluten sensitivities.
Beyond being naturally gluten-free, this homestyle delight offers versatile options for those avoiding dairy, ensuring no one misses out on the creamy goodness. Simply opt for your favorite dairy-free alternatives for butter, milk, and cheese, and you’ll achieve a similarly luscious result. This commitment to inclusivity means that everyone at your table can indulge in a hearty, better-for-you mac and cheese that feels like a warm hug. It’s not just a recipe; it’s an invitation to enjoy a classic without compromise, tailored for modern dietary needs.
Essential Ingredient Notes for Perfection
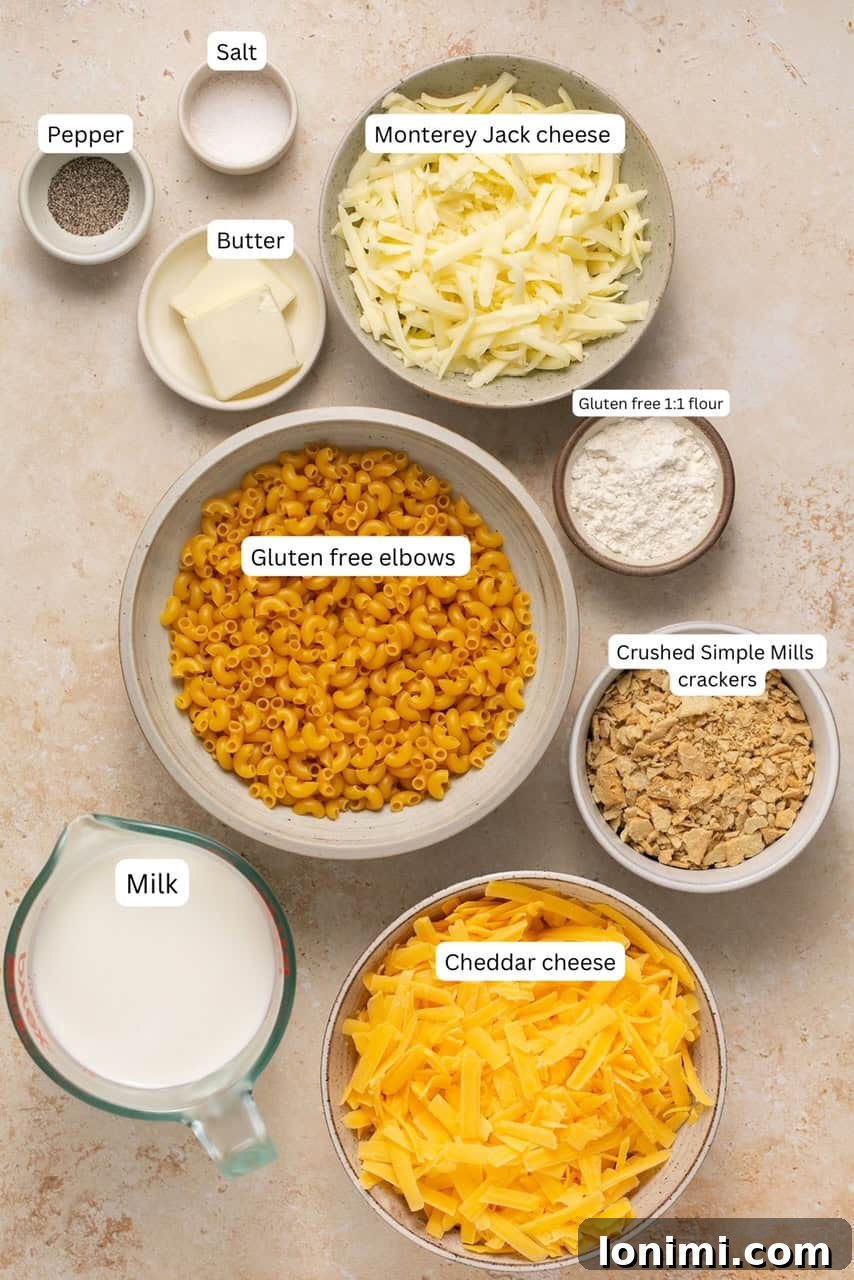
- Butter: Essential for building the roux, butter provides a rich foundation for our cheese sauce. Feel free to use high-quality regular butter or opt for your favorite vegan butter alternative to make this dish entirely dairy-free.
- Gluten-Free 1:1 Flour: This is crucial for thickening the cheese sauce into a smooth, luxurious consistency. A 1:1 blend ensures accurate measurement and reliable results. My personal preference is King Arthur Baking’s gluten-free 1:1 flour for its consistent performance.
- Organic Milk: The liquid base for our creamy sauce. Organic milk contributes to a richer flavor profile. For a dairy-free version, unsweetened almond milk or cashew milk works wonderfully, providing a similar creaminess without dairy.
- Salt: A fundamental seasoning that enhances all the flavors in the dish. Start with the recommended amount and adjust to taste, keeping in mind that cheese also contributes salinity.
- Black Pepper: Adds a subtle warmth and depth to the cheese sauce. Freshly ground black pepper will always offer the best flavor.
- Monterey Jack & Cheddar Cheese: This dynamic duo creates the ultimate cheesy experience. Cheddar provides that classic, robust mac and cheese flavor, while Monterey Jack melts beautifully and adds an extra layer of creaminess. Always shred your own cheese from blocks for the best melt and flavor; pre-shredded varieties often contain anti-caking agents that can hinder smooth melting. For a dairy-free alternative, brands like Daiya or Trader Joe’s offer excellent vegan cheese shreds that melt surprisingly well.
- Gluten-Free Elbow Pasta: The star of any mac and cheese, the elbow shape is perfect for cradling that luscious sauce. I highly recommend Jovial Foods Elbow noodles for their excellent texture and flavor, which holds up beautifully during baking. However, don’t hesitate to use your favorite gluten-free pasta brand and shape; penne, farfalle, or fusilli would also be fantastic choices, offering different textural experiences.
- Simple Mills Sea Salt Crackers: This is the “secret weapon” ingredient that elevates this Gluten Free Mac and Cheese from great to extraordinary! Instead of traditional gluten-free breadcrumbs, these crackers provide the iconic, buttery, and salty crunch reminiscent of classic Ritz crackers, but without the gluten. Crushing them adds a delightful textural contrast to the creamy pasta. Trust me, do not skip this game-changing topping – it’s what makes this dish truly special.
Step-by-Step Instructions for Your Best Gluten-Free Mac and Cheese
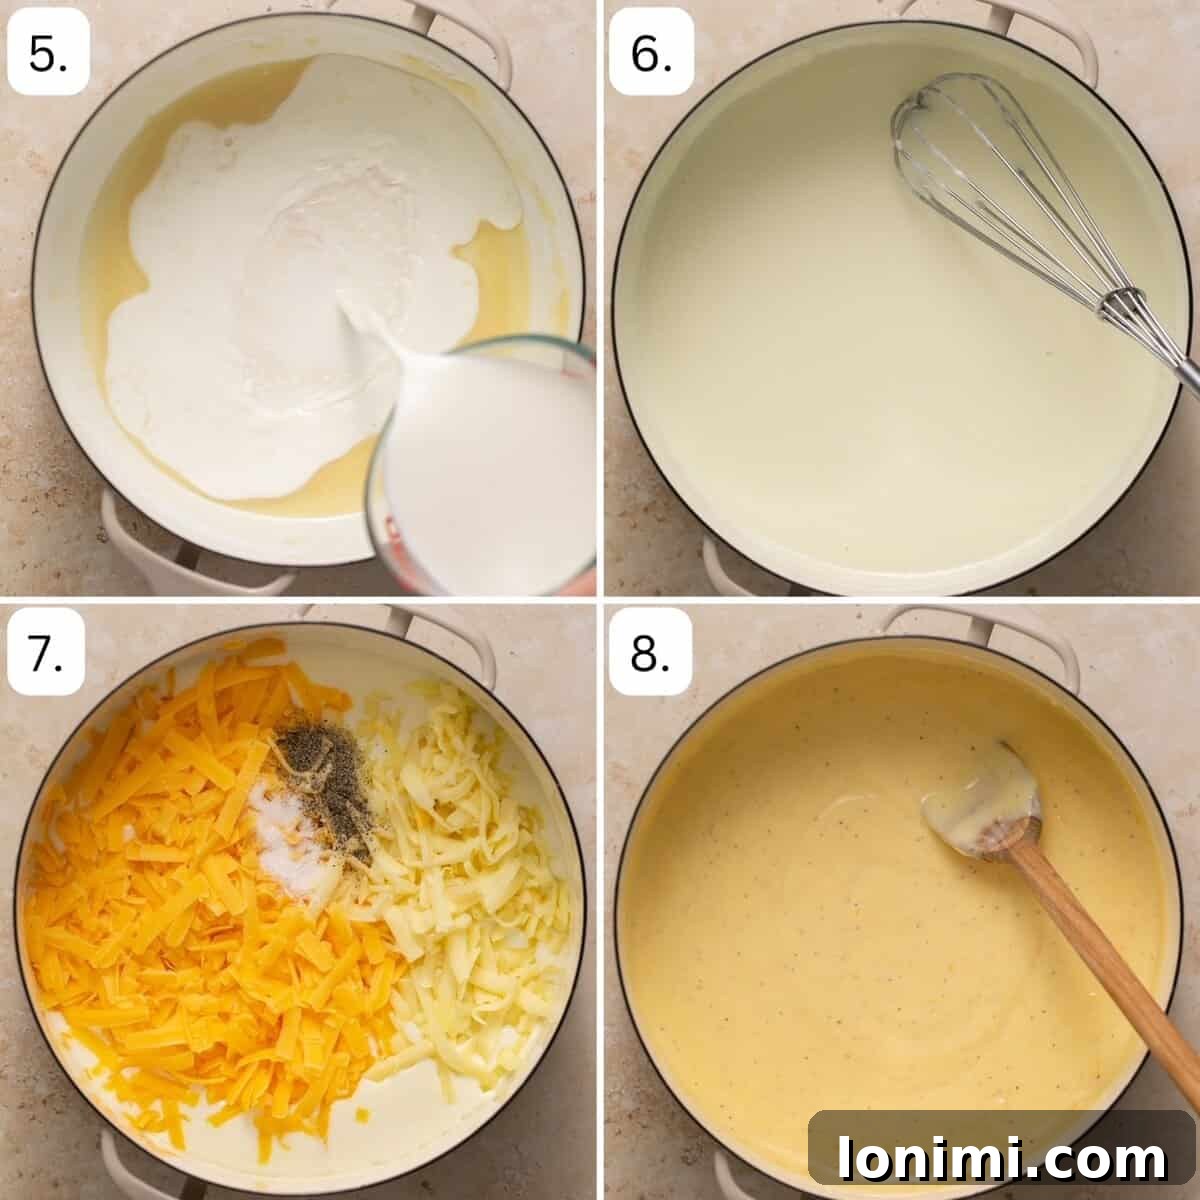
- Prepare for Baking: Begin by preheating your oven to 350°F (175°C). While the oven heats, lightly grease a 9×13-inch baking dish. This crucial step prevents the mac and cheese from sticking and ensures easy serving.
- Cook the Pasta: Bring a large pot of salted water to a rolling boil. Add your gluten-free elbow pasta and cook according to the package directions until al dente. Cooking al dente is important as the pasta will continue to cook slightly in the oven. Once cooked, drain the pasta thoroughly and rinse it with cold water. Rinsing helps to stop the cooking process and removes excess starch, preventing the pasta from clumping together.
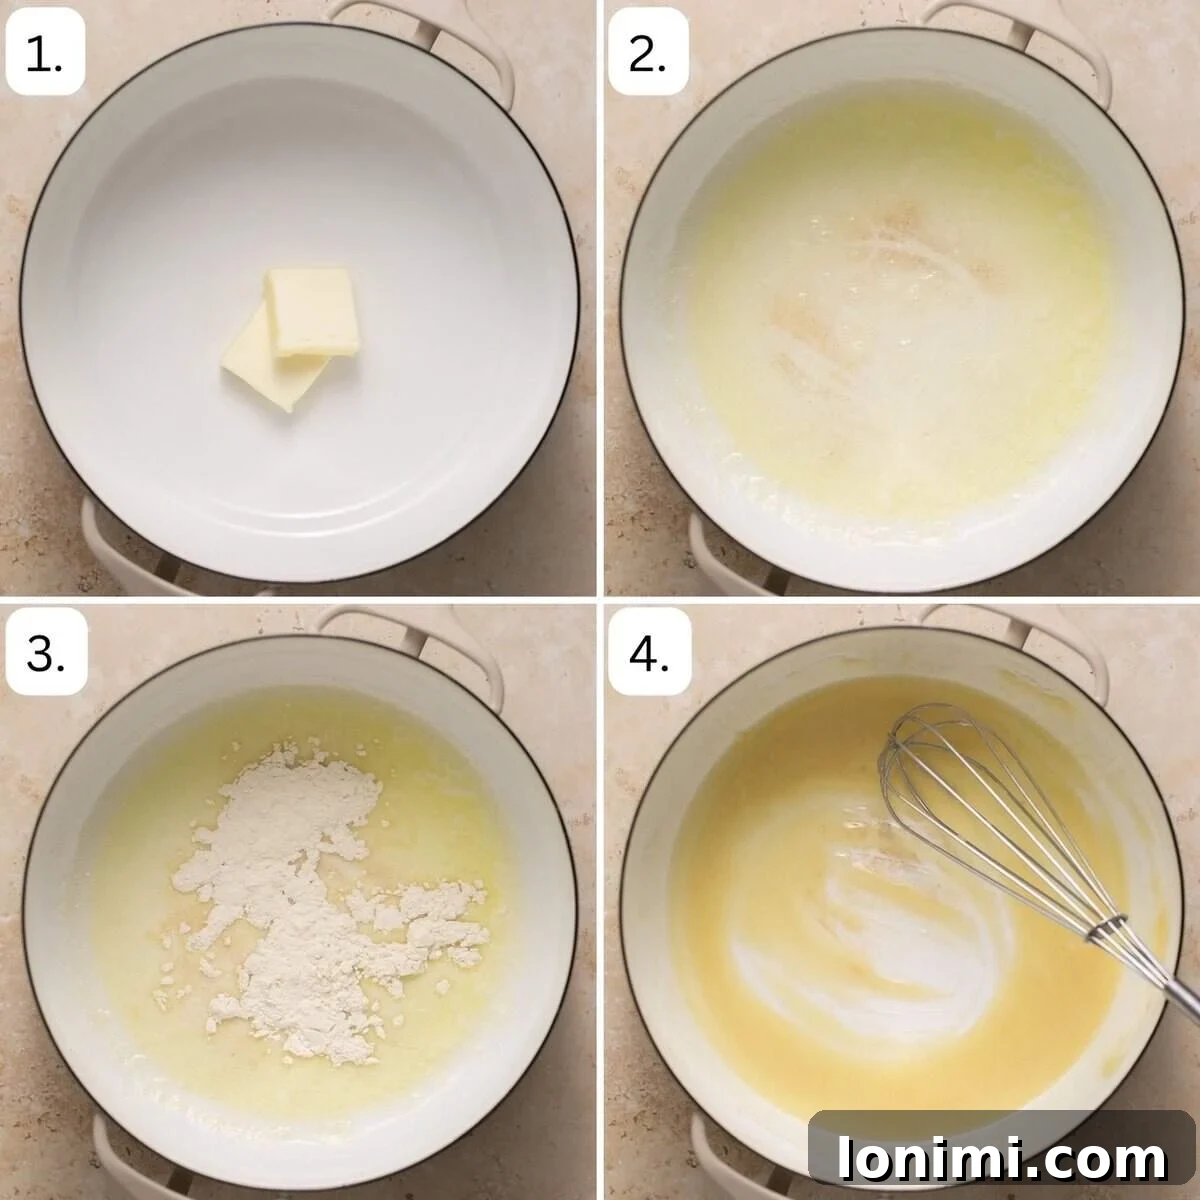
- Start the Roux: While your pasta is cooking, melt the butter in a medium saucepan over medium heat. Keep an eye on it to prevent burning.
- Create the Roux Paste: Once the butter is fully melted and shimmering, add the gluten-free 1:1 flour. Whisk continuously for 1-2 minutes until a smooth roux paste forms. This paste is the thickening agent for your cheese sauce and ensures a lump-free texture.
- Gradually Add Milk: Slowly pour in the milk (or almond milk for a dairy-free option) into the roux, whisking constantly to incorporate it smoothly. This gradual addition prevents lumps and helps create a silky base for your cheese sauce.
- Thicken the Sauce: Continue stirring the mixture over medium heat. Allow it to simmer gently and thicken for about 5-7 minutes. The sauce should become rich enough to coat the back of a spoon. Don’t rush this step; patience here results in a perfectly creamy sauce.
- Season and Add Cheese: Remove the saucepan from the heat. Stir in the salt, black pepper, and your shredded cheddar and Monterey Jack cheeses.
- Melt into Creaminess: Continue stirring until all the cheese has melted completely and the sauce is wonderfully smooth and creamy. The residual heat from the sauce will be enough to melt the cheese without overheating it, which can sometimes lead to a grainy texture.
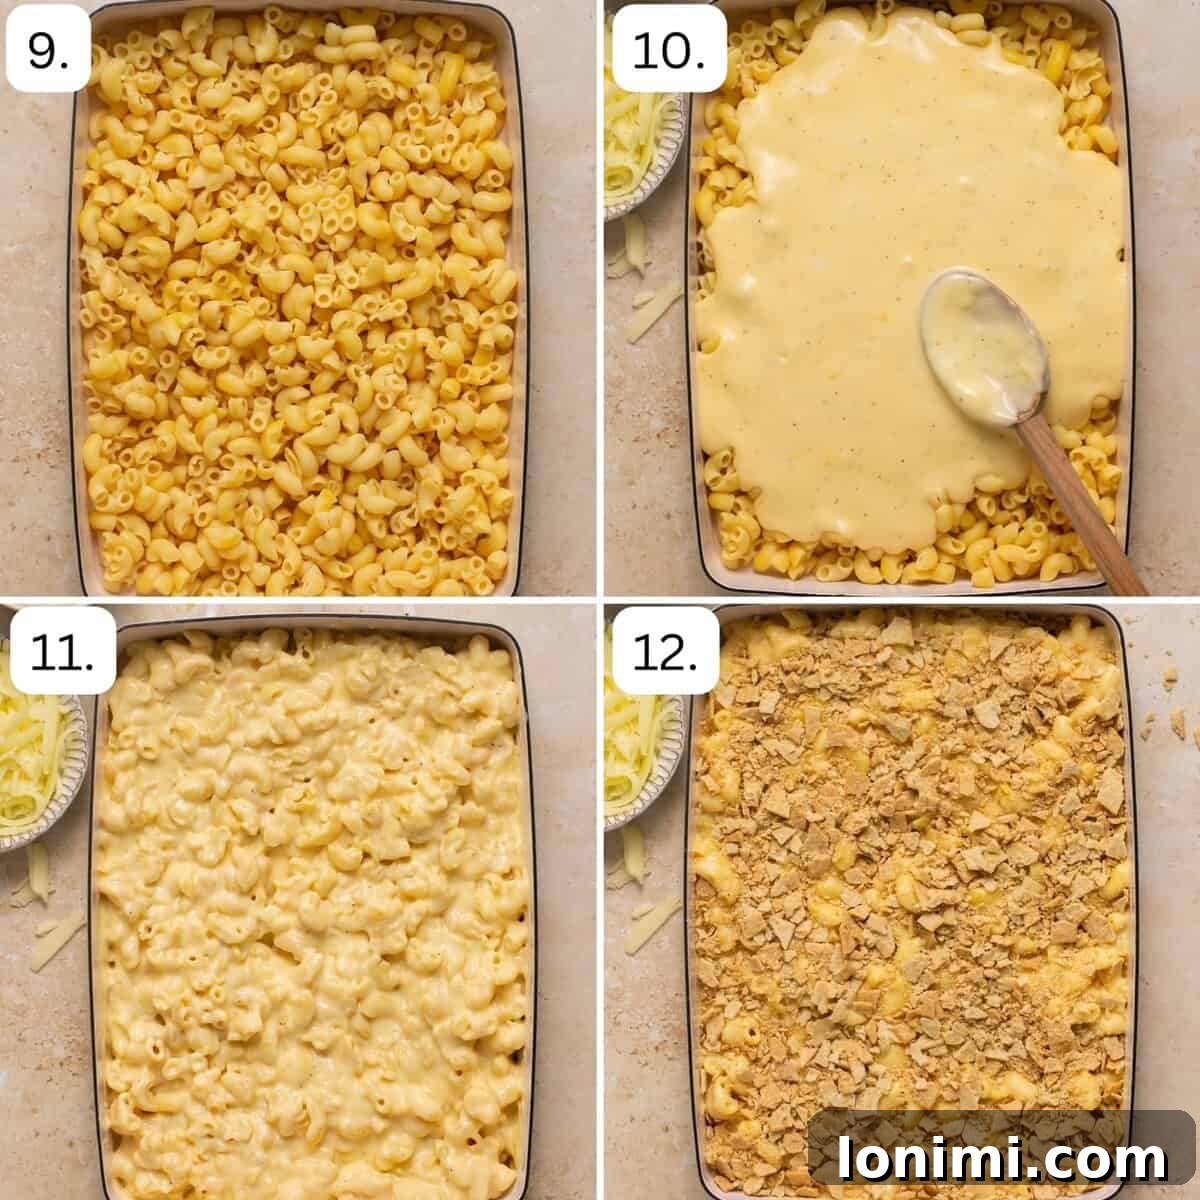
- Combine Pasta and Sauce: Add the cooked and rinsed gluten-free pasta to your prepared 9×13-inch greased casserole dish.
- Pour Over the Goodness: Generously pour your rich, creamy cheese sauce over the pasta.
- Gently Mix: Using a spatula or large spoon, gently mix the pasta and sauce until every elbow is thoroughly coated in that irresistible cheesy goodness.
- Add the Crunchy Topping: Evenly spread the crushed Simple Mills sea salt crackers over the top of the mac and cheese. This will bake into a golden, crispy crust. Bake the dish for 25-30 minutes, or until the cheese sauce is bubbly around the edges and the cracker topping is beautifully golden brown. Remove from the oven, let it cool for a few minutes, and then serve hot. Enjoy this comforting, Gluten Free Mac and Cheese masterpiece!
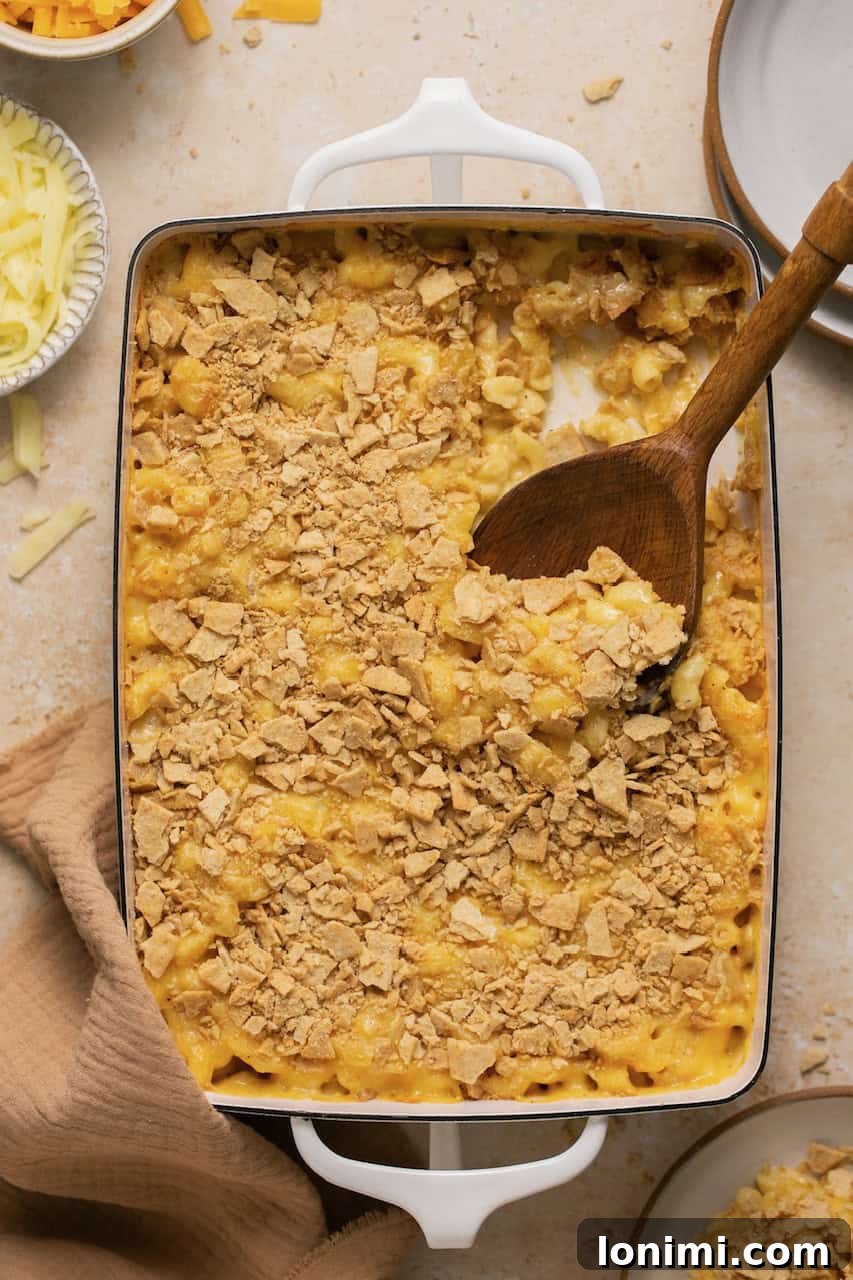
Expert Tips for the Best Baked Mac and Cheese
- Customizing Your Cheese Blend: While cheddar and Monterey Jack offer a perfect balance, don’t hesitate to experiment! For a sharper flavor, use sharp cheddar or even a blend of white cheddar. A touch of smoked gouda can add incredible depth. If you love Parmesan, feel free to add a handful of freshly shredded Parmesan cheese into the sauce for an extra layer of umami. The key is to use cheeses that melt well to ensure a smooth, creamy sauce.
- Perfect Pasta Selection: The choice of gluten-free pasta can significantly impact the final dish. While Jovial Foods Elbow noodles are a personal favorite for their excellent texture and ability to hold sauce, other brands like Barilla also offer reliable gluten-free options, often found in most grocery stores. Remember, gluten-free pasta can sometimes be a bit finicky; ensure you cook it according to package directions, typically to an al dente stage, as it will continue to cook in the oven. Always check the label to confirm it’s certified gluten-free.
- Enhancing the Flavor: Beyond salt and pepper, consider adding a pinch of garlic powder or onion powder to the cheese sauce for an extra savory kick. A dash of mustard powder or a tablespoon of Dijon mustard can also deepen the cheesy flavor without making the dish taste like mustard. For a hint of heat, a tiny pinch of cayenne pepper will add a subtle warmth without overwhelming the palate.
- Achieving the Ultimate Creaminess: To ensure your cheese sauce is incredibly smooth, make sure the roux is fully cooked (1-2 minutes) and that you add the milk slowly, whisking constantly to prevent lumps. When adding the cheese, remove the saucepan from direct heat and stir until melted; this prevents the cheese from separating and becoming oily.
- Make Ahead Option: You can prepare the mac and cheese up to the point of baking. Assemble the dish in your baking pan, cover tightly with foil, and refrigerate for up to 24 hours. When ready to bake, remove it from the fridge 30 minutes prior to baking, then bake as directed, adding an extra 5-10 minutes to ensure it’s heated through and bubbly.
Serving Tips and Pairing Suggestions
- This Gluten Free Mac and Cheese is incredibly versatile, making it the perfect side dish for a multitude of occasions. It’s robust enough to stand alone as a light meal, yet complements many main courses beautifully. Serve it at your next holiday feast, bring it as a crowd-pleasing potluck dish, or simply enjoy it as a comforting weeknight dinner. Its universal appeal makes it a guaranteed hit.
- To elevate this dish into a more complete and protein-rich meal, consider a few options. You can choose a gluten-free protein pasta, such as chickpea or lentil-based varieties, to boost the protein content directly within the dish. Alternatively, serve this creamy mac and cheese alongside your favorite lean protein. It pairs exceptionally well with grilled chicken, pan-seared steak, roasted pork tenderloin, or even baked fish. For a vegetarian option, a simple green salad or roasted vegetables would create a balanced and satisfying meal.
- Don’t forget the garnishes! A sprinkle of fresh parsley or chives can add a pop of color and a fresh, herbaceous note that cuts through the richness of the cheese. A dash of your favorite hot sauce on the side is perfect for those who enjoy a little extra kick.
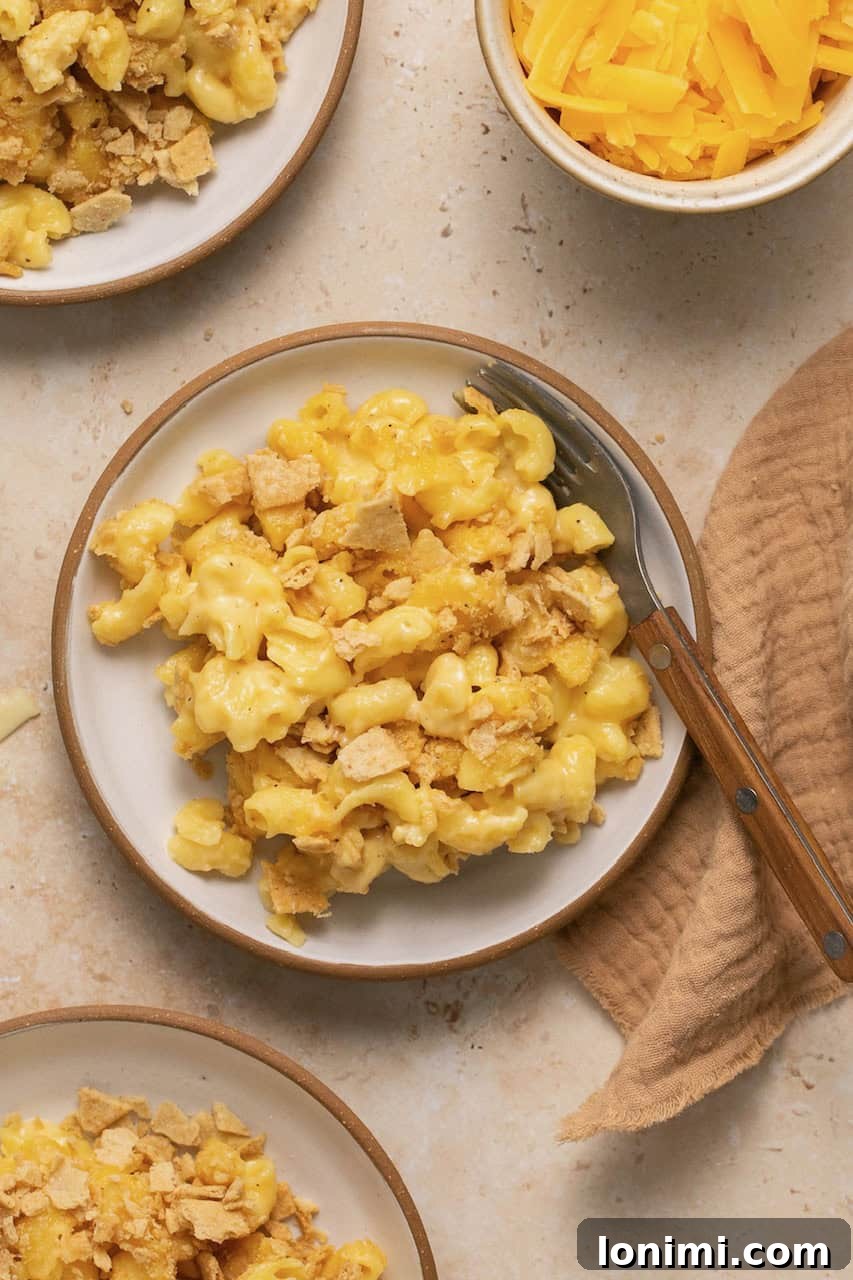
Storage and Reheating Best Practices
- Refrigeration: Any leftover Gluten Free Mac and Cheese should be stored promptly in an airtight container. Properly sealed, it will remain fresh in the refrigerator for up to 3-4 days. This ensures its quality and prevents it from drying out or absorbing other flavors in the fridge.
- Reheating in the Microwave: For a quick and easy reheat, portion out your desired amount into a microwave-safe dish. Add a splash of milk (dairy or non-dairy) to help restore creaminess, then cover loosely and microwave on medium power, stirring every minute or so, until thoroughly heated through. This helps prevent the pasta from becoming tough.
- Reheating in the Oven: For best results, especially with larger quantities, reheating in the oven is ideal as it helps retain the creamy texture and prevents the pasta from getting mushy. Place leftovers in an oven-safe dish, add a splash of milk, cover with foil, and warm in a preheated 300°F (150°C) oven for about 15-20 minutes, or until heated through. Remove the foil for the last few minutes if you want to crisp up the topping again.
- Freezing: While possible, freezing mac and cheese can sometimes alter the texture of the sauce and pasta upon thawing. If you choose to freeze, ensure it’s in an airtight, freezer-safe container for up to 2-3 months. Thaw overnight in the refrigerator before reheating gently in the oven with added milk for moisture.
Frequently Asked Questions About Gluten-Free Mac and Cheese
Unfortunately, no, traditional Kraft mac and cheese, along with most conventional boxed macaroni and cheese products, is not gluten-free as it contains wheat pasta. However, many popular brands, including Kraft, have recognized the demand for gluten-free options and now offer specific gluten-free versions of their boxed mac and cheese. While these can be convenient, nothing quite compares to the rich, wholesome flavor and texture of this homemade, homestyle gluten-free version, crafted with fresh ingredients.
Absolutely! Individuals with celiac disease can safely enjoy macaroni, provided the noodles are certified gluten-free and proper precautions are taken to prevent cross-contamination during preparation. This means using dedicated utensils, cutting boards, and cooking surfaces if there’s any risk of gluten exposure. I, personally, living with celiac disease, have found immense joy in gluten-free elbow macaroni pasta. The Jovial Foods brand is a particular favorite of mine, not only for its delicious taste but also for the wide variety of pasta shapes it offers, ensuring that delicious pasta dishes remain a part of a gluten-free diet.
Yes, this recipe is incredibly adaptable to be dairy-free! Simply substitute regular butter with your favorite vegan butter, and opt for unsweetened almond milk or cashew milk in place of organic milk. For the cheese, there are many excellent vegan shredded cheese alternatives available from brands like Daiya, Miyoko’s Kitchen, or even Trader Joe’s that melt wonderfully and provide a comparable cheesy flavor and texture. Just be sure to choose varieties specifically designed for melting to ensure a smooth, creamy sauce.
A standard 9×13-inch baking dish is ideal for this recipe. Glass or ceramic dishes are excellent choices as they distribute heat evenly, allowing the mac and cheese to bake beautifully and achieve that perfect bubbly, golden-brown topping. Ensure the dish is deep enough to accommodate all the pasta and sauce without overflowing during baking. Don’t forget to grease it well before adding the pasta!
More Gluten-Free Pasta Recipes to Explore
One Pot Mac & Cheese with Broccoli
Viral French Onion Pasta
Easy Tuna Pesto Pasta
Dairy-Free Lobster Butternut Squash Mac & Cheese
Gluten-Free Tik Tok Spaghetti Alfredo
Loved this recipe? Your feedback helps! Please consider leaving a 5-star 🌟🌟🌟🌟🌟 rating and a review in the comment section below. And for more wholesome, delicious gluten-free recipes, be sure to follow me on Facebook, Pinterest, or Instagram!
Print Recipe
Easy Oven-Baked Gluten Free Mac and Cheese Recipe
Mary Smith
5 mins
40 mins
45 mins
8 people
Equipment
-
9×13 inch baking dish
Ingredients
- 2 tbsp butter, or vegan butter
- 2 tbsp gluten free 1:1 flour (I like King Arthur Baking)
- 2 cups organic milk, or almond milk
- ½ tsp salt, more to taste
- ½ tsp black pepper
- 8 oz cheddar cheese, shredded – feel free to sub vegan shreds for dairy-free
- 4 oz Monterey Jack cheese, shredded – feel free to sub vegan shreds
- 12 oz gluten free elbow pasta (I like Jovial Foods Elbows)
- 1 cup Simple Mills sea salt crackers, crushed (Any gluten-free crackers or chips will work!)
Instructions
- Preheat oven to 350°F (175°C). Lightly grease a 9×13 inch baking dish.
- Boil gluten-free pasta according to package directions until al dente. Drain and rinse with cold water to prevent sticking.
- Meanwhile, prepare the cheese sauce. Melt the butter in a medium saucepan over medium heat. Once melted, add the gluten-free flour and whisk constantly to form a smooth roux paste.
- Slowly pour in the milk while continuing to whisk. Continue stirring over medium heat for 5-7 minutes until the mixture simmers and thickens. Remove from heat, then stir in salt, pepper, and both shredded cheeses until smooth and creamy.
- Add the cooked pasta to the greased casserole dish, then pour the cheese sauce over the top. Mix gently to combine, ensuring all pasta is coated. Evenly sprinkle the crushed crackers over the pasta. Bake for 25-30 minutes until the cheese is bubbling and the cracker topping is golden brown. Enjoy hot!
Notes
Expert Tips
- Variations: Feel free to make simple swaps and substitutions to make this dish your own. Use white cheddar or sharp cheddar cheese instead of mild or medium yellow cheddar for a different flavor profile. Add shredded parmesan cheese if desired. Spice it up with garlic powder or a pinch of cayenne pepper, or adjust salt and black pepper to your preference.
- Pasta: I like the Jovial brand for its consistent quality, but use your favorite box of gluten-free noodles. Barilla gluten-free pasta is also a widely available and reliable option at most grocery stores. Always check the label to ensure it’s certified gluten-free!
Serving Tips
- This gluten-free mac and cheese is the perfect side dish for so many occasions! Serve at your next holiday gathering, potluck, or as a comforting weeknight dinner.
- For extra protein, consider using a gluten-free protein pasta (like Chickpea pasta) or serve this dish alongside grilled chicken, steak, or your favorite main protein. A simple side salad also pairs wonderfully.
Storage Tips
- Store any leftovers in an airtight container in the fridge for up to 3-4 days. To reheat, warm in the microwave or oven, adding a splash of milk to restore creaminess if needed.
Nutrition Information (Estimated per Serving)
Carbohydrates: 59g |
Protein: 16g |
Fat: 24g |
Saturated Fat: 13g |
Polyunsaturated Fat: 1g |
Monounsaturated Fat: 5g |
Trans Fat: 0.1g |
Cholesterol: 56mg |
Sodium: 761mg |
Potassium: 127mg |
Fiber: 2g |
Sugar: 3g |
Vitamin A: 580IU |
Calcium: 384mg |
Iron: 1mg
All nutrition facts are an estimate and automatically calculated. While efforts are made to ensure accuracy, please note that they may not always be 100% precise and can vary based on specific ingredients and brands used. For the most accurate grams per serving size, weighing your total dish and dividing by the number of servings is recommended.
Did you make this?Rate & comment below, and tag me on Instagram @maryswholelife
This post was originally published on November 4, 2017, and updated with new photos and expanded content on August 22, 2023, to provide the most comprehensive and delightful experience for our readers.